Touch the [size input] key, Enter the scan size (original size), Touch the [ok] key – Sharp MX-7001 User Manual
Page 419
59
3
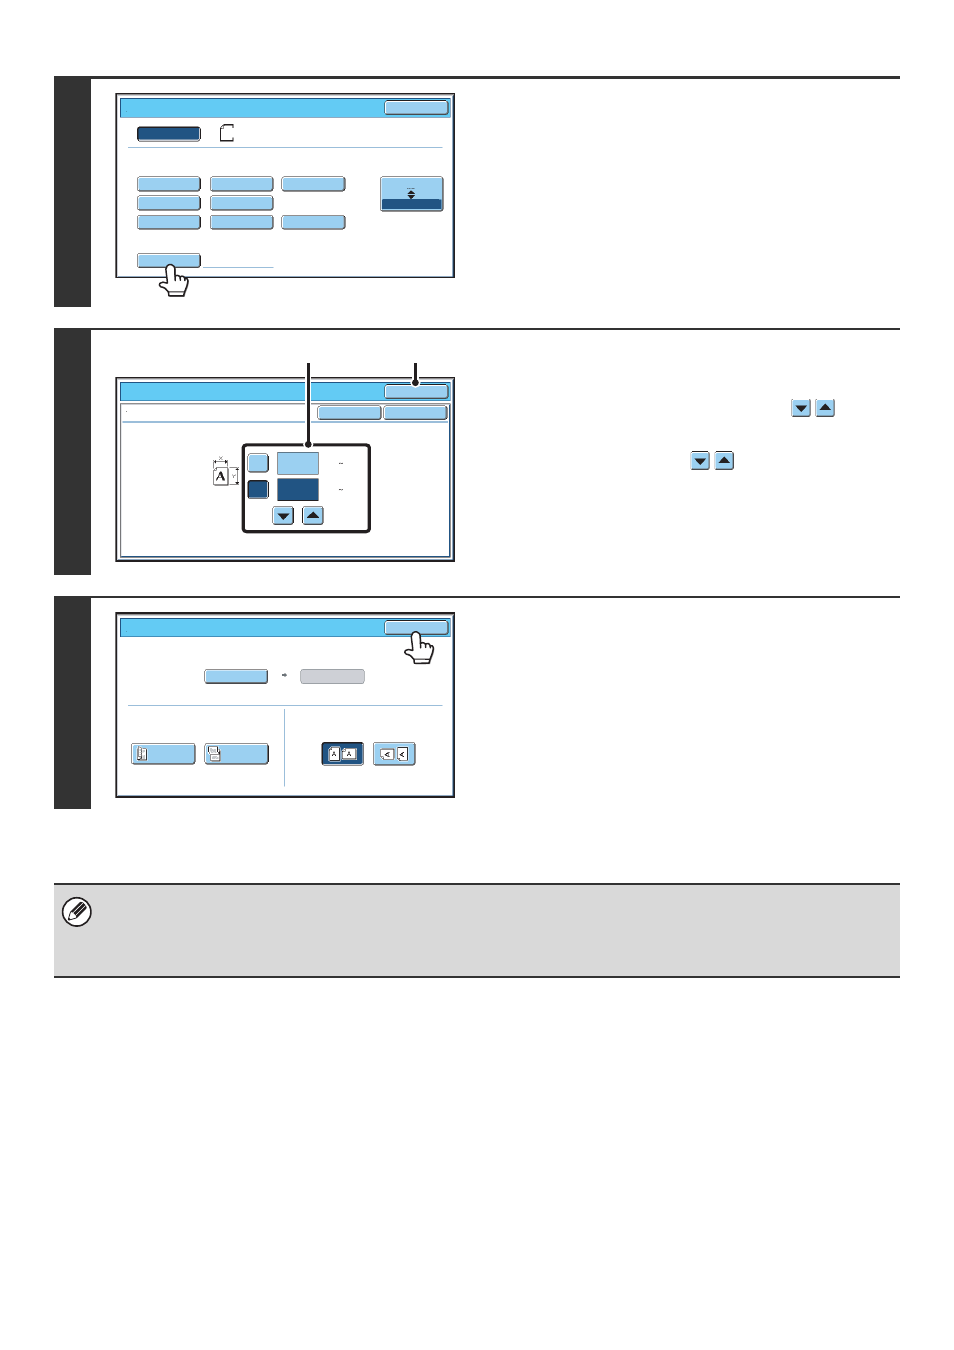
Touch the [Size Input] key.
4
Enter the scan size (original size).
(1) Touch the [X] key and enter the X
(horizontal) dimension with the
keys.
(2) Touch the [Y] key and enter the Y (vertical)
dimension with the
keys.
(3) Touch the [OK] key.
Touch the [OK] key next to the [Cancel] key to complete
the setting and return to the screen of step 3.
5
Touch the [OK] key.
The specified size appears in the [Scan Size] key.
• When the scan size is specified by numerical values, the send size cannot be specified.
• When the automatic document feeder is used, an original longer than 17" (432 mm) can be scanned (maximum width
31-1/2" (800 mm)). In this case, touch the [Long Size] key in the screen of step 3.
☞
Specifying the original scan size (by paper size)
(page 57)
Scan/Original
OK
Auto
5½x8½
5½x8½R
8½x11
8½x11R
8½x13(216x330)
11x17
8½x14
Size Input
Long Size
Inch
AB
Manual
8½x11
Size Input
Scan/Original
OK
OK
Cancel
11
17
(2 1/2 17)
inch
(2 1/2 11 5/8)
inch
X
Y
(3)
(1), (2)
Scan/Original
OK
Auto
X17 Y11
Scan Size
2-Sided
Tablet
2-Sided
Booklet
Send Size
Image Orientation