Scan send sequence, Place the original, Change the mode – Sharp MX-7001 User Manual
Page 377: Select settings
17
SCAN SEND SEQUENCE
This section explains the basic procedure for scanning and transmission. Select settings in the order shown below to
ensure smooth transmission.
For the detailed procedures for selecting the settings, see the explanation of each setting in this manual.
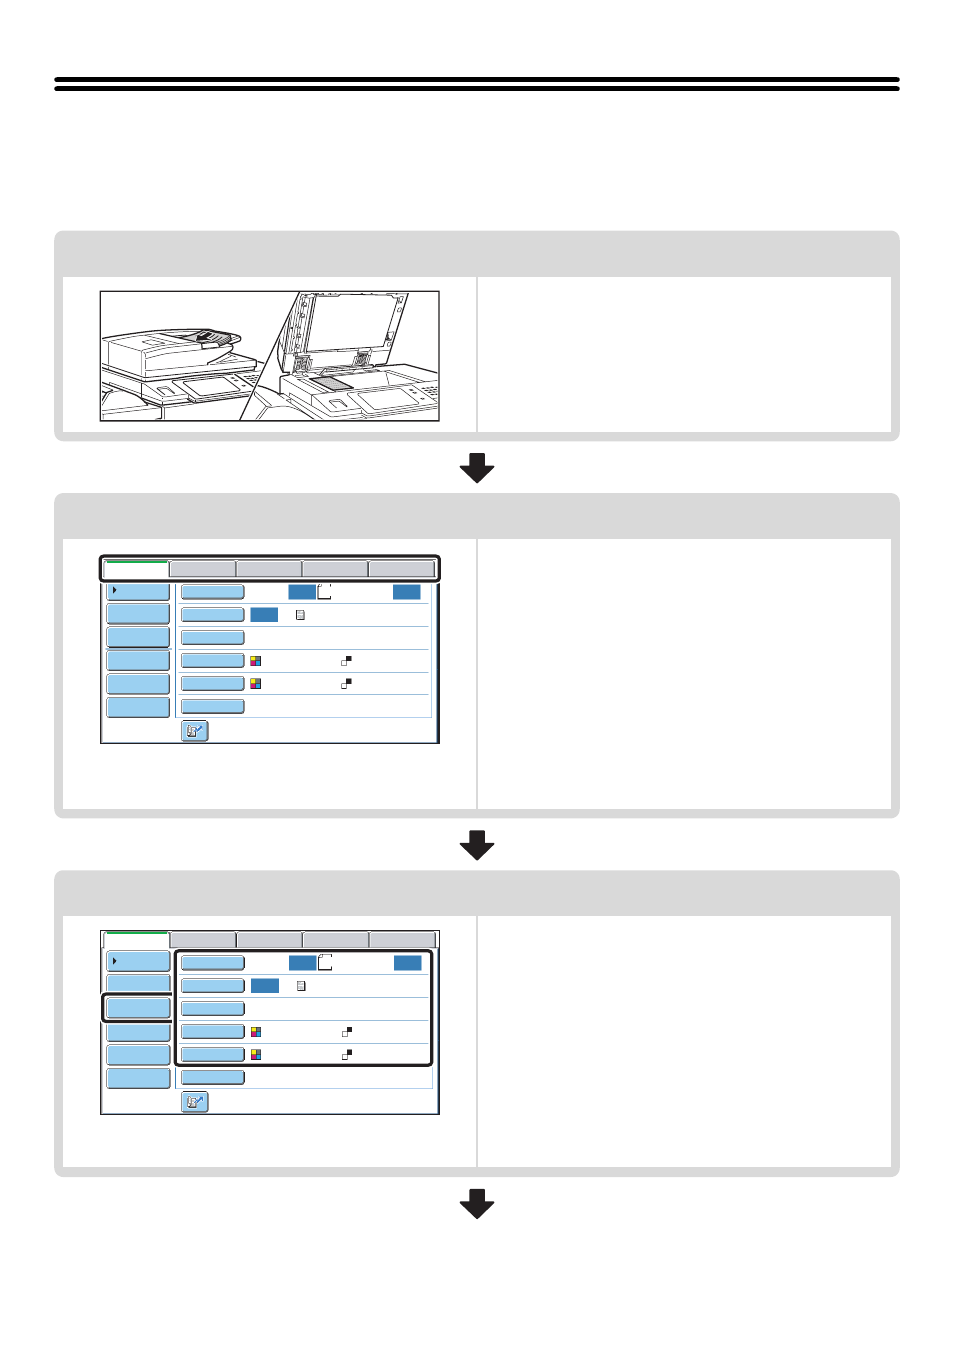
Place the original.
Place the original in the document feeder tray of the automatic
document feeder, or on the document glass.
☞
SENDING AN IMAGE IN USB MEMORY MODE
(page 37)
SENDING A FAX IN INTERNET FAX MODE
(page 42)
Change the mode.
Select the mode that you wish to use for scanning and
transmission.
☞
• Scan mode:
☞
(page 28)
• USB memory mode:
☞
SENDING AN IMAGE IN USB MEMORY MODE
(page 37)
• Internet fax mode:
☞
SENDING A FAX IN INTERNET FAX MODE
(page 42)
• PC scan mode:
☞
7. SCANNING FROM A COMPUTER (PC Scan Mode)
(page 112)
• Data entry mode:
☞
(page 119)
Select settings
Settings can be selected for scanning the original.
• Original (2-sided original, scan size, send size)
• Exposure • Resolution • File Format • Color Mode
☞
• Send Settings (File Name)
Scan mode, Data entry mode:
☞
CHANGING THE SUBJECT, FILE NAME, REPLY-TO,
AND BODY TEXT
(page 33)
USB memory mode:
☞
(page 41)
Internet fax mode:
☞
CHANGING THE SUBJECT, FILE NAME, AND BODY
TEXT
(page 45)
8½x11
Auto
Auto
Auto
File
Quick File
Address Review
Send Settings
Address Entry
Address Book
USB Mem. Scan
Fax
Internet Fax
PC Scan
Special Modes
Color Mode
File Format
Resolution
Exposure
Original
Scan:
Scan
Send:
Text
200X200dpi
Auto/Grayscale
Mono2
8½x11
Auto
Auto
Auto
File
Quick File
Address Review
Send Settings
Address Entry
Address Book
USB Mem. Scan
Fax
Internet Fax
PC Scan
Special Modes
Color Mode
File Format
Resolution
Exposure
Original
Scan:
Scan
Send:
Text
200X200dpi
Auto/Grayscale
Mono2