Specify the original size, Enter the destination fax number, 1) enter the original size – Sharp MX-7001 User Manual
Page 306: 2) touch the [ok] key
77
3
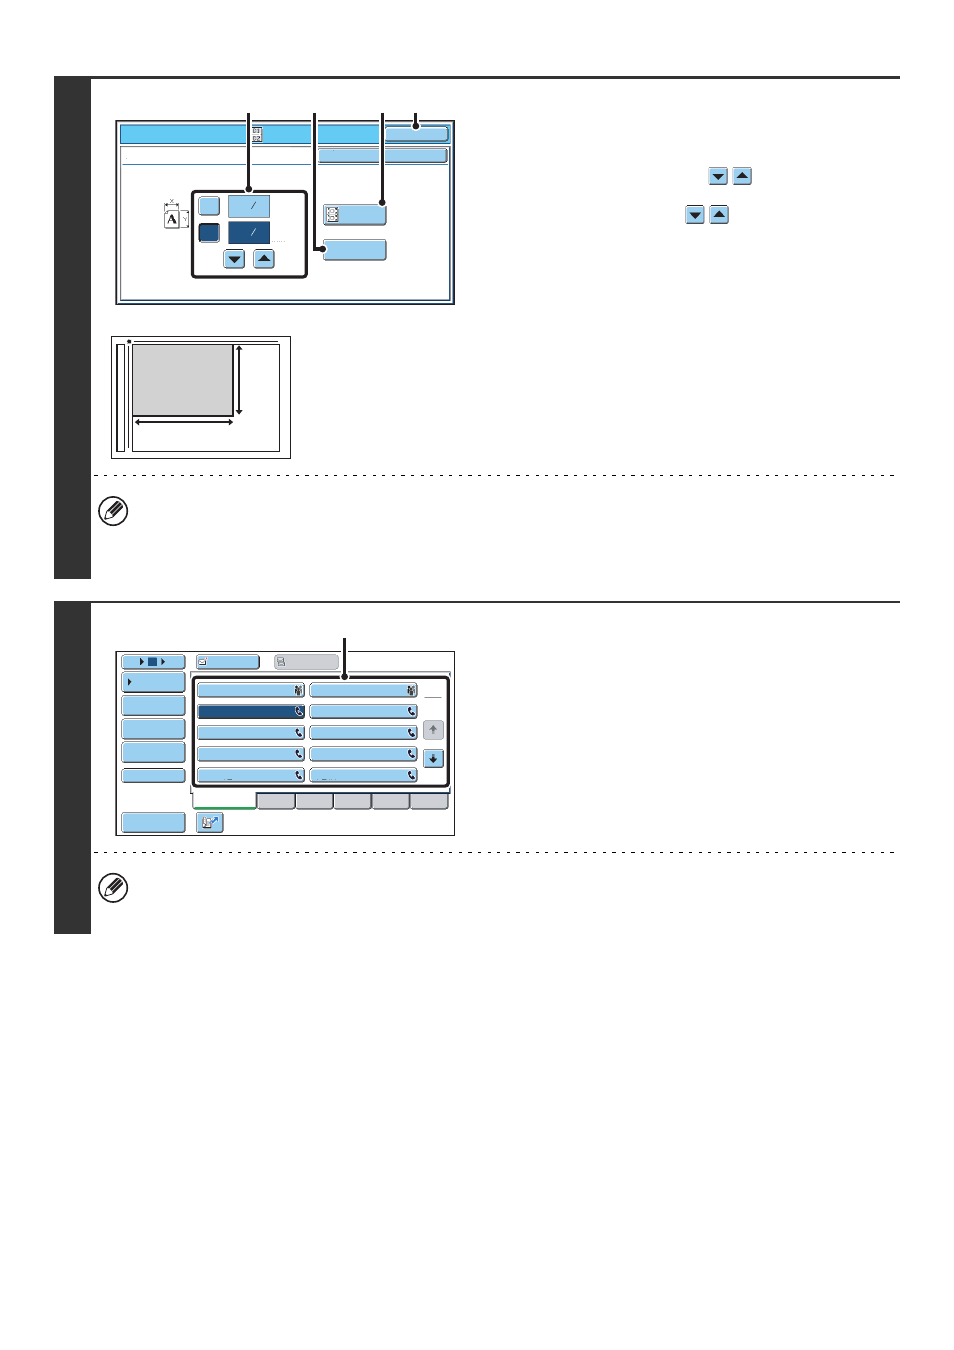
Specify the original size.
(1) Enter the original size.
• Touch the [X] key and enter the horizontal dimension
(X) of the original with the
keys.
• Touch the [Y] key and enter the vertical dimension (Y)
of the original with the
keys.
(A) To return the original size to the default size, touch
the [Size Reset] key.
(B) To automatically enlarge or reduce the image size to
the send size, touch the [Fit to Send Size] key. Do not
touch this key if you wish to scan the original at the
original size that you entered.
(2) Touch the [OK] key.
• The send size is automatically selected based on the original size you entered.
• After selecting Card Shot, you can touch the [Original] key in the base screen to change the original scan size or the
send size. In this case, the screen of step 3 appears when you touch the scan size key. For the procedure for
setting the send size, see "
Specifying the send size of the original
4
Enter the destination fax number
(1) Touch the [Address Book] key in the base
screen.
(2) Touch the one-touch key of the desired
destination.
In addition to specification by one-touch key, a destination can also be specified using a search number. You can also
directly enter a fax number with the numeric keys or look up a destination in a global address book. For more
information, see "
Fax/Special Modes
OK
X
Y
Card Shot
(1~8 1/2)
inch
(1~8 1/2)
inch
OK
Cancel
Fit to
Send Size
Size Reset
3
8
3
2
8
1
(2)
(B)
(1)
(A)
X
Y
Frequent Use
ABCD
EFGHI
JKLMN
OPQRST
UVWXYZ
1
2
10
5
15
To
Cc
III III
GGG GGG
EEE EEE
CCC CCC
AAA AAA
JJJ JJJ
HHH HHH
FFF FFF
DDD DDD
BBB BBB
Global
Address Search
Address Entry
Sort Address
Sub Address
Address Review
Condition
Settings
(2)