Installing the backplane – Intel SERVER SYSTEM SR2500AL User Manual
Page 98
76
Intel® Server System SR2500AL User’s Guide
Installing the Backplane
1. Observe the safety and ESD precautions at the beginning of this book. See
2. Power down the server and unplug all peripheral devices and the AC power
cable(s).
3. Remove the server system cover. For instructions, see
4. Remove the mid-plane board. For instructions, see
5. Remove all hot-swap drive carriers, regardless of whether a drive is installed in the
carrier. For instructions, see
“Removing a SAS or SATA Hot-swap Hard Disk
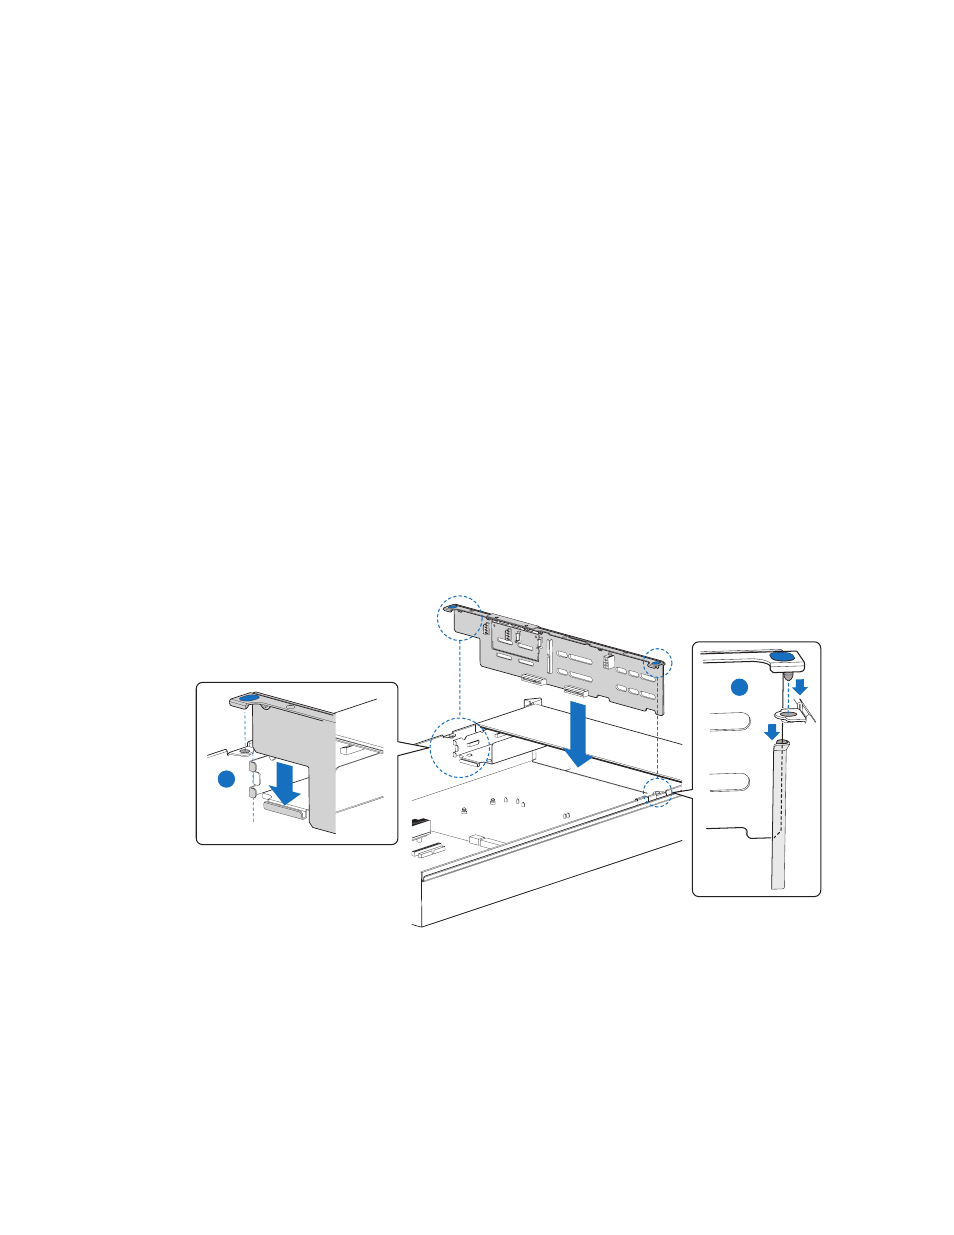
6. Hold the backplane only by the edges. Do not push or pull on any components on
the backplane. set the backplane in place at the front of the server system, with the
sides of the board resting in the guides at the left and right sides of the server
system.
7. Slide the backplane into the server system guides at the left and right sides of the
server system until the pins at the left and right sides of the backplane bracket are
fully inserted into the matching holes in the server system (see letters “A” and “B”).
Figure 66. Installing the Backplane into the Server System
8. Install hot-swap drive carriers. For instructions, see
.
9. Install the mid-plane board. For instructions, see
“Installing the Mid-plane Board”
AF000017
A
B