Installing a console switch horizontally in a rack – IBM PC Server/Enterprise Racks 42S User Manual
Page 145
IBM NetBAY console switch
137
15. Refer to the Apex User Guide CD for configuration and operation information
about your console switch.
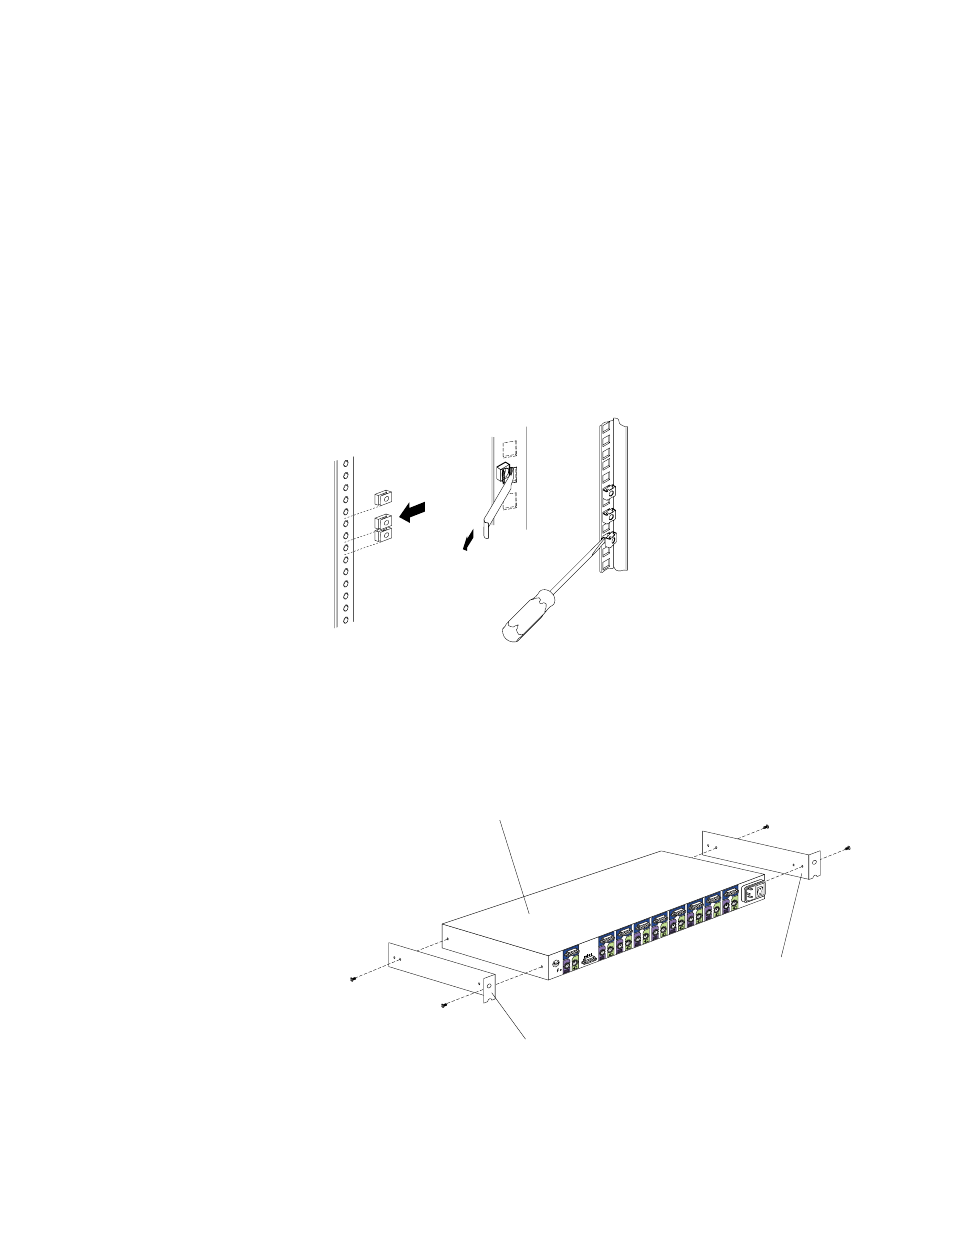
Installing a console switch horizontally in a rack
Use the following procedure to install the console switch horizontally in 1U of EIA
rack mounting space in your rack cabinet:
1.
Refer to the documentation that comes with your rack cabinet for additional
information.
Notes:
a.
Removing the rack doors and side panels might make your console switch
installation easier.
b.
Use cage nuts for rack cabinets with square holes, or clip nuts for rack
cabinets with round holes.
2.
Attach one horizontal mounting bracket to each side of the console switch using
two 8-32 screws per bracket. Make sure that the notched hole on the bracket is
toward the bottom of the console switch.
Note:
There are two sets of mounting holes on the brackets. You can install the
console switch even with the EIA mounting flanges of the rack cabinet or
recessed, depending on how you install the brackets.
3.
Determine the appropriate U level within the EIA mounting space; then, install
the console switch in the rear of your rack cabinet using four M6 screws and
either cage nuts or clip nuts.
Cage
nuts
Cage
nuts
Clip
nuts
8
1
A
2
3
4
5
6
7
Console switch
Horizontal mounting bracket
Horizontal mounting bracket
- PC Server/Enterprise Racks 9QS PC Server/Enterprise Racks 200 PC Server/Enterprise Racks 42P PC Server/Enterprise Racks 4QS PC Server/Enterprise Racks 4SB PC Server/Enterprise Racks 42E PC Server/Enterprise Racks 4QX PC Server/Enterprise Racks 900 PC Server/Enterprise Racks 42X PC Server/Enterprise Racks 9TX PC Server/Enterprise Racks 4SA PC Server/Enterprise Racks 9TS PC Server/Enterprise Racks 9QX