IBM PC Server/Enterprise Racks 42S User Manual
Page 101
NetBAY 42 Enterprise Rack (Type 9308 Models 42P, 42X, 4SA, 4SB, 42S, 42E)
93
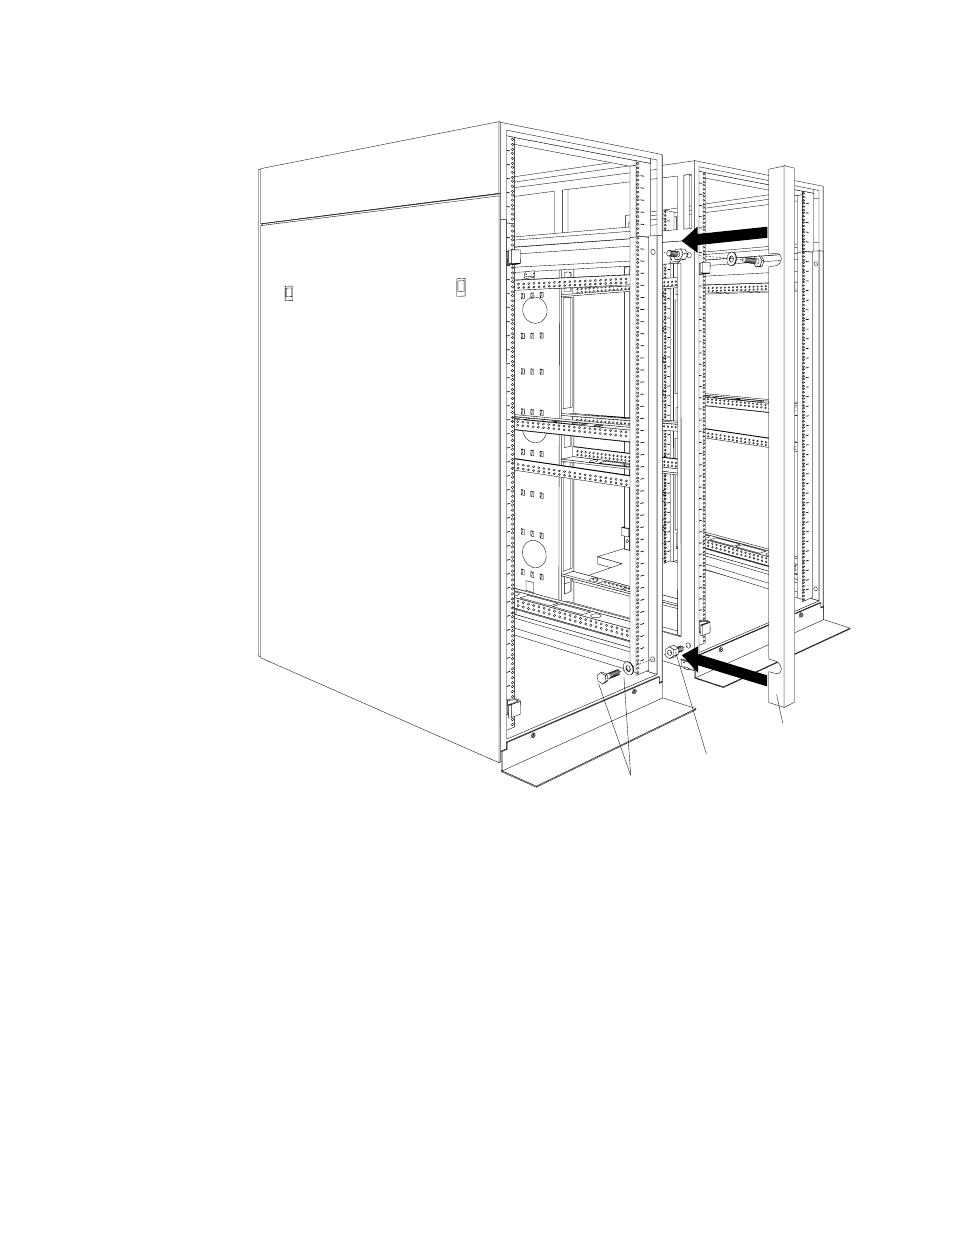
Figure 42. Attaching two adjacent rack cabinets to each other to form a suite
1.
Remove both side panels (see “Removing and installing the side panels” on page
85) from the side of a primary rack cabinet that is adjacent to an expansion rack in
a suite.
2.
Remove the front and rear doors (see “Doors” on page 87) from all rack cabinets.
3.
On the outside of two adjacent rack cabinets, install the four threaded standoffs
that come with the expansion rack cabinet:
a.
Install two threaded standoffs on the rack cabinet to the left, one on the top-
front and one on the bottom-rear.
b.
Install the other two threaded standoffs on the rack cabinet to the right, one
on the bottom-front and one on the top-rear.
4.
Attach the rack cabinets together, using four bolts and washers that come with the
expansion rack cabinet.
Note:
You must install the top-front and bottom-rear bolts from right-to-left;
then, install the bottom-front and top-rear bolts from left-to-right.
Bolt and washer
Threaded standoff
Trim piece
- PC Server/Enterprise Racks 9QS PC Server/Enterprise Racks 200 PC Server/Enterprise Racks 42P PC Server/Enterprise Racks 4QS PC Server/Enterprise Racks 4SB PC Server/Enterprise Racks 42E PC Server/Enterprise Racks 4QX PC Server/Enterprise Racks 900 PC Server/Enterprise Racks 42X PC Server/Enterprise Racks 9TX PC Server/Enterprise Racks 4SA PC Server/Enterprise Racks 9TS PC Server/Enterprise Racks 9QX