Crosscutting full size panels, Crosscutting smaller panels, Crosscutting using rip fence as a cut-off gauge – Grizzly G0623X3 User Manual
Page 48
-46-
Model G0623X/G0623X3 (Mfg. Since 5/12)
crosscutting full size panels
1. install the crosscut fence in the forward
mounting location shown in
figure 82 and
lock it in place.
2. Check to make sure the fence is at 90˚ and
adjust it as described in
squaring crosscut
fence to blade on page 70 if necessary.
3. set either flip stop to the desired width-of-
cut.
note: Extend the crosscut fence slide if the
workpiece is more than 74".
4. load the workpiece onto the table saw. the
set up should look similar to
figure 79.
5. once all the necessary safety precautions
have been taken, perform the cutting opera-
tion.
crosscutting smaller panels
1. install the crosscut fence in the rear mount-
ing points shown in
figure 82 and lock it in
place.
2. Check to make sure the fence is at 90˚ and
adjust it as described in
squaring crosscut
fence to blade on page 70 if necessary.
3. set either flip stop to the desired width-of-
cut.
note: Extend the crosscut fence slide if the
workpiece is more than 74".
4. load the workpiece onto the table saw. the
set up should look similar to
figure 80.
5. once all the necessary safety precautions
have been taken, perform the cutting opera-
tion.
crosscutting using rip fence as a
cut-off gauge
1. install the crosscut fence in the rear mount-
ing points shown in
figure 82 and lock it in
place.
2. Check to make sure the fence is at 90˚ and
adjust it as described in
squaring crosscut
fence to blade on page 70 if necessary.
3. position the rip fence for the desired width.
4. load the workpiece onto the table saw. the
setup should look similar to
figure 81.
5. slide the leading end of the rip fence behind
the front edge of the blade as shown in
figure 83. (this step is critical to reduce
the risk of blade binding and kickback.)
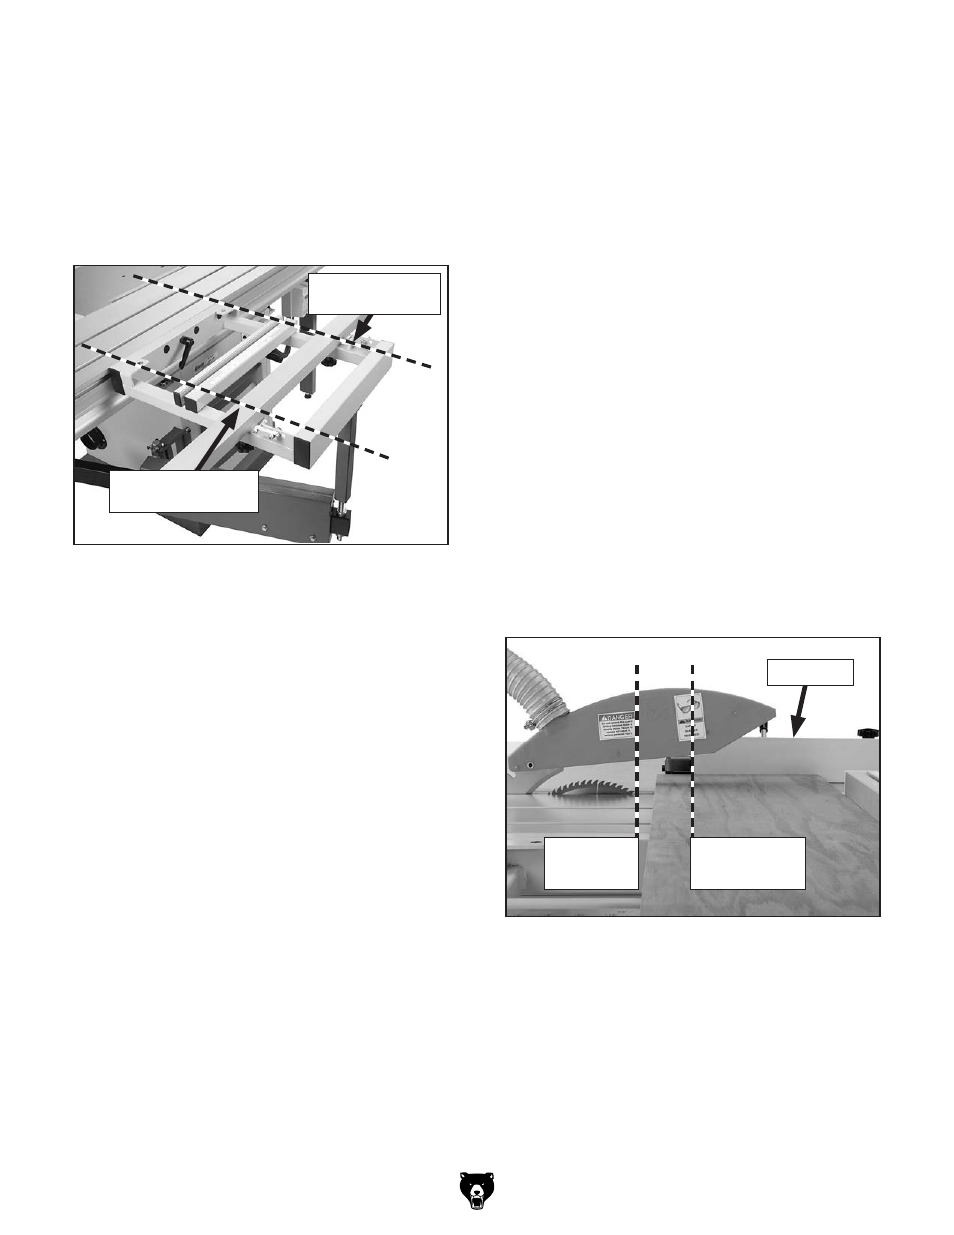
figure 82. Crosscut fence mounting points.
forward mounting
location
rear mounting
location
figure 83. Correct rip fence position when using
it as a cut-off gauge.
6. take all the necessary safety precautions,
then perform the cutting operation.
rip fence
front edge
of blade
leading edge
of rip fence