Rip cutting with rip fence – Grizzly G0623X3 User Manual
Page 46
-44-
Model G0623X/G0623X3 (Mfg. Since 5/12)
rip cutting with rip fence
1. slide the crosscut table out of the way.
2. lock the sliding table into a stationary posi-
tion (see
figure 75).
note: The table will only lock in place when it
is centered with the saw cabinet.
3. place the fence in the vertical position for
larger workpieces, or in the horizontal posi-
tion for angled cuts and for small workpieces
(see
figure 76).
table lock
figure 75. sliding table lock.
4. slide the leading end of the rip fence so it is
even with the center of the main saw blade as
shown in
figure 77.
note: This technique allows the finished cut-
off piece to “fall” away from the blade when
the cutting operation is complete; reducing
the possibility of kickback.
figure 77. rip fence even with center of blade
(blade guard removed for clarity).
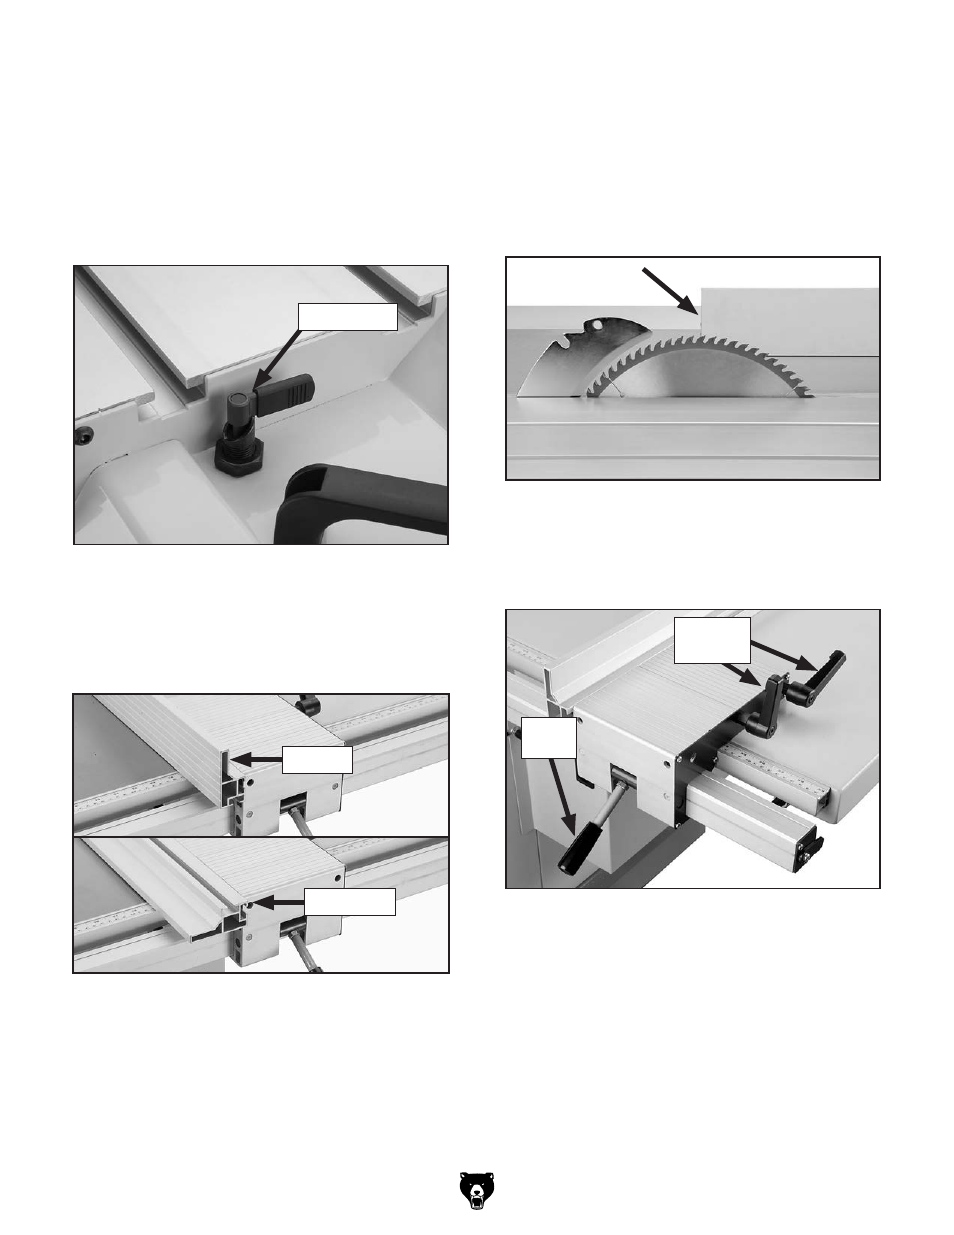
5. tighten the lock handles (figure 78) to
secure the rip fence against the base.
6. pull up the lock lever to loosen the fence
base on the rail, position the fence at the cor-
rect distance away from the blade (as needed
for the cut), then push down the lock lever to
lock the fence base in position.
7. take all the necessary safety precautions,
then make the cut as you would with a tradi-
tional table saw.
lock
lever
figure 78. rip fence micro-adjusting controls.
lock
handles
figure 76. rip fence positions.
horizontal
vertical