Assembly & setup – Grizzly G0623X3 User Manual
Page 25
Model G0623X/G0623X3 (Mfg. Since 5/12)
-23-
assembly & setup
before shipping, the sliding table was installed on
the machine and calibrated to the main table and
blade. When the sliding table was removed for
shipping, the lock nuts on the sliding table mount-
ing brackets were carefully left in position to make
re-installation easier. as such, be careful not to
move any pre-installed nuts when installing the
sliding table.
the sliding table and extension tables are heavy
so you must get help lifting and holding them dur-
ing the installation process. We recommend using
a forklift or four strong helpers to lift the sliding
table during installation.
to assemble the sliding table saw:
1. place the sliding table on the cabinet.
2. on each side of the sliding table, slide a
t-stud down the center bottom t-slot until it
is next to the mounting bracket.
3. lift one side of the sliding table, position the
t-stud over the hole in the mounting bracket,
then lower the sliding table so the t-stud fits
through the hole, as shown in
figure 17.
repeat on the other side.
figure 17. t-stud inserted in mounting bracket.
figure 18. small extension table installed.
4. put a 12mm flat washer, lock washer and
hex nut onto the bottom of each t-stud and
tighten the hex nut to secure the sliding table
in place.
5. install the small extension table with the two
m10-1.5 x 25 cap screws, flat washers and
lock washers (see
figure 18).
6. thread one m8-1.25 hex nut halfway onto
each of the m8-1.25 x 25 set screws, then
thread two of the set screws where shown in
figure 18, to act as leveling set screws in a
later step.
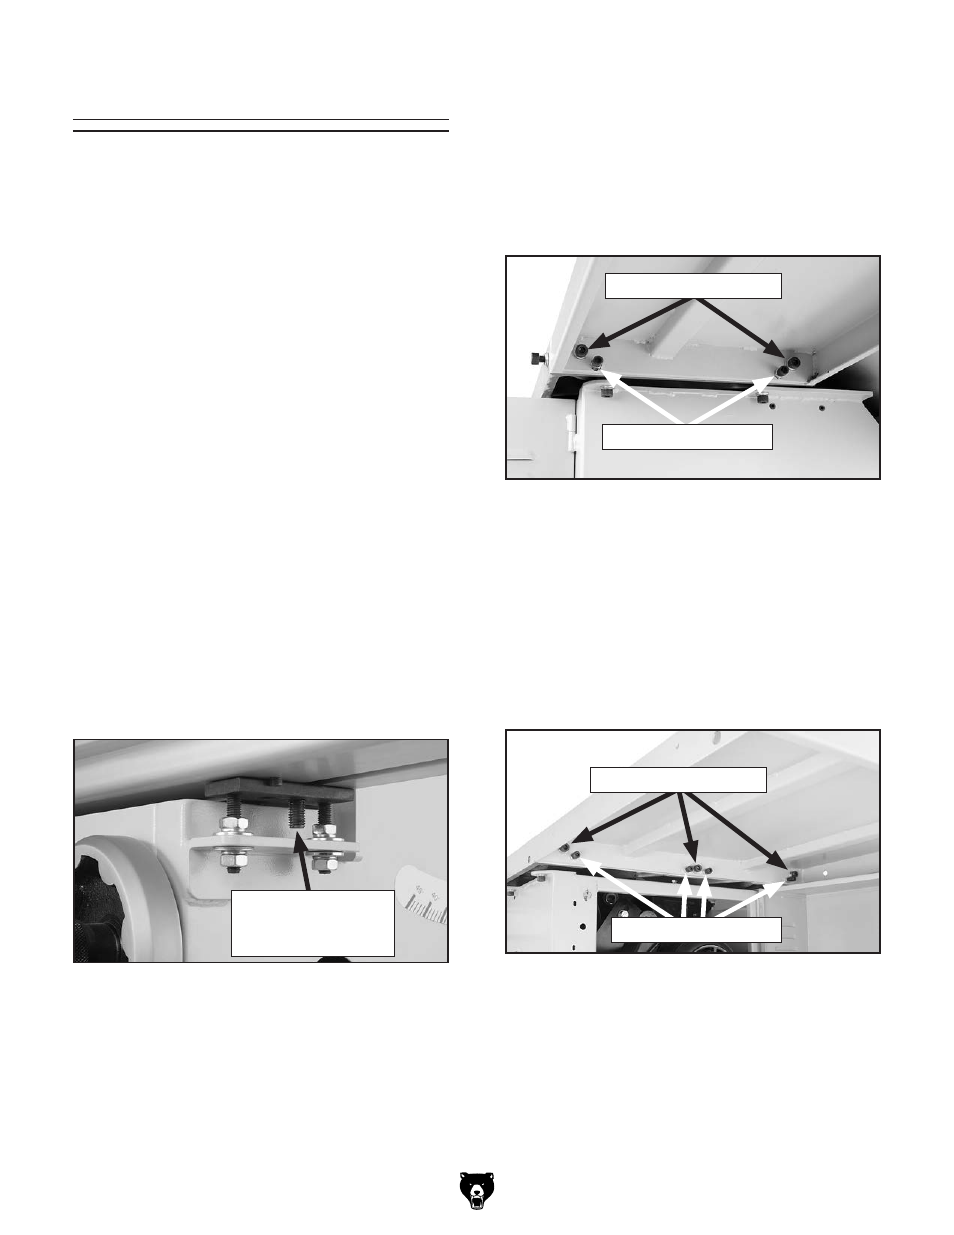
7. install the large extension table with the three
m10-1.5 x 25 cap screws, flat washers, and
lock washers (see
figure 19).
8. thread four m8-1.25 x 25 set screws with
hex nuts where shown in
figure 19, to act as
leveling set screws in a later step.
t-stud inserted
through mounting
bracket
mounting Cap screws
leveling set screws
figure 19. large extension table installed.
mounting Cap screws
leveling Cap screws