Grizzly G0623X3 User Manual
Page 28
-26-
Model G0623X/G0623X3 (Mfg. Since 5/12)
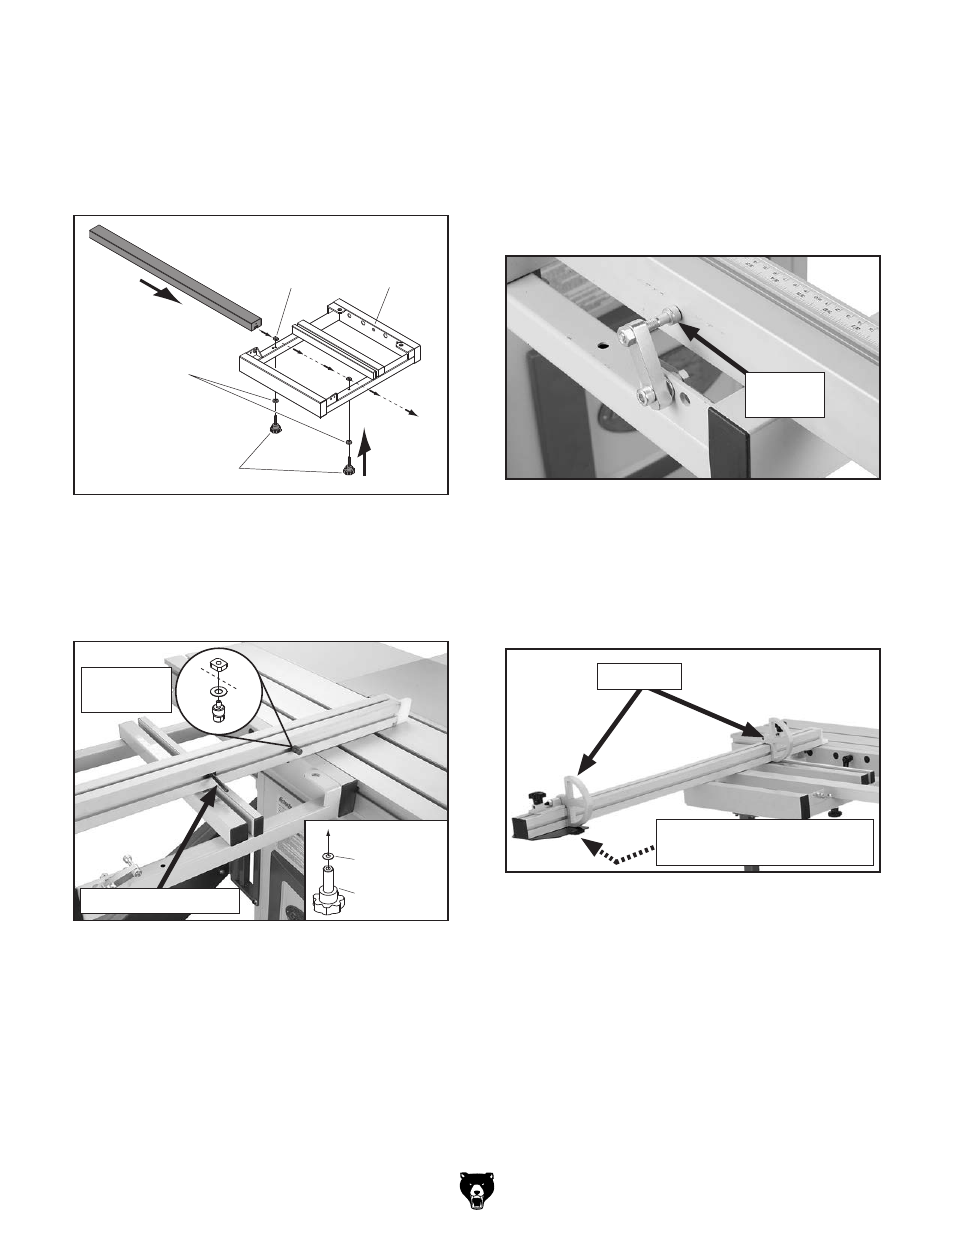
18. insert the two crosscut brace knobs with
8mm flat washers through the crosscut table,
then thread the square nuts onto the ends of
the knob threads (
figure 28, A). slide the
t-slot in the support bar over both t-nuts,
and tighten the knobs (
figure 28, B).
Support
Bar
Knob
M8-1.25 x 50
Square Nut
M8-1.25
Crosscut
Table
Flat Washer
8mm
B
A
figure 28. installing support bar on crosscut
table.
19. slide the pivot stud assembly and the m8-1.25
x 60 t-bolt into the crosscut fence t-slot, as
shown in
figure 29.
22. hold the crosscut fence against the positive
stop bolt, shown in
figure 30, then tighten
the knob underneath the crosscut table to
lock the crosscut fence in position.
note: This positive stop bolt can be fine-
tuned later to ensure that the crosscut fence
is square to the blade.
figure 30. positive stop bolt against the crosscut
fence.
positive
stop bolt
23. install the flip stops in the t-slot on the cross-
cut fence, as shown in
figure 31, and use
the crosscut fence lock knob to secure the
extendable end of the fence in position.
figure 29. pivot stud and t-bolt installed in
crosscut fence.
t-bolt m8-1.25 x 60
pivot stud
assembly
...to T-bolt
Knob
M8-1.25 x 55
Flat Washer
8mm
20. align the t-bolt and pivot stud with the cross-
cut table insertion points (
figure 29), and
install the fence on the table.
21. thread the m8-1.25 knob with an 8mm flat
washer onto the bottom of the t-bolt from the
underside of the table.
figure 31. flip stops installed on crosscut fence.
flip stops
Crosscut fence lock Knob
m8-1.25 x 25