Replacing dimms, Replac i ng dimms – HP TC2120 User Manual
Page 96
90
Chapter 7
Replacing Parts
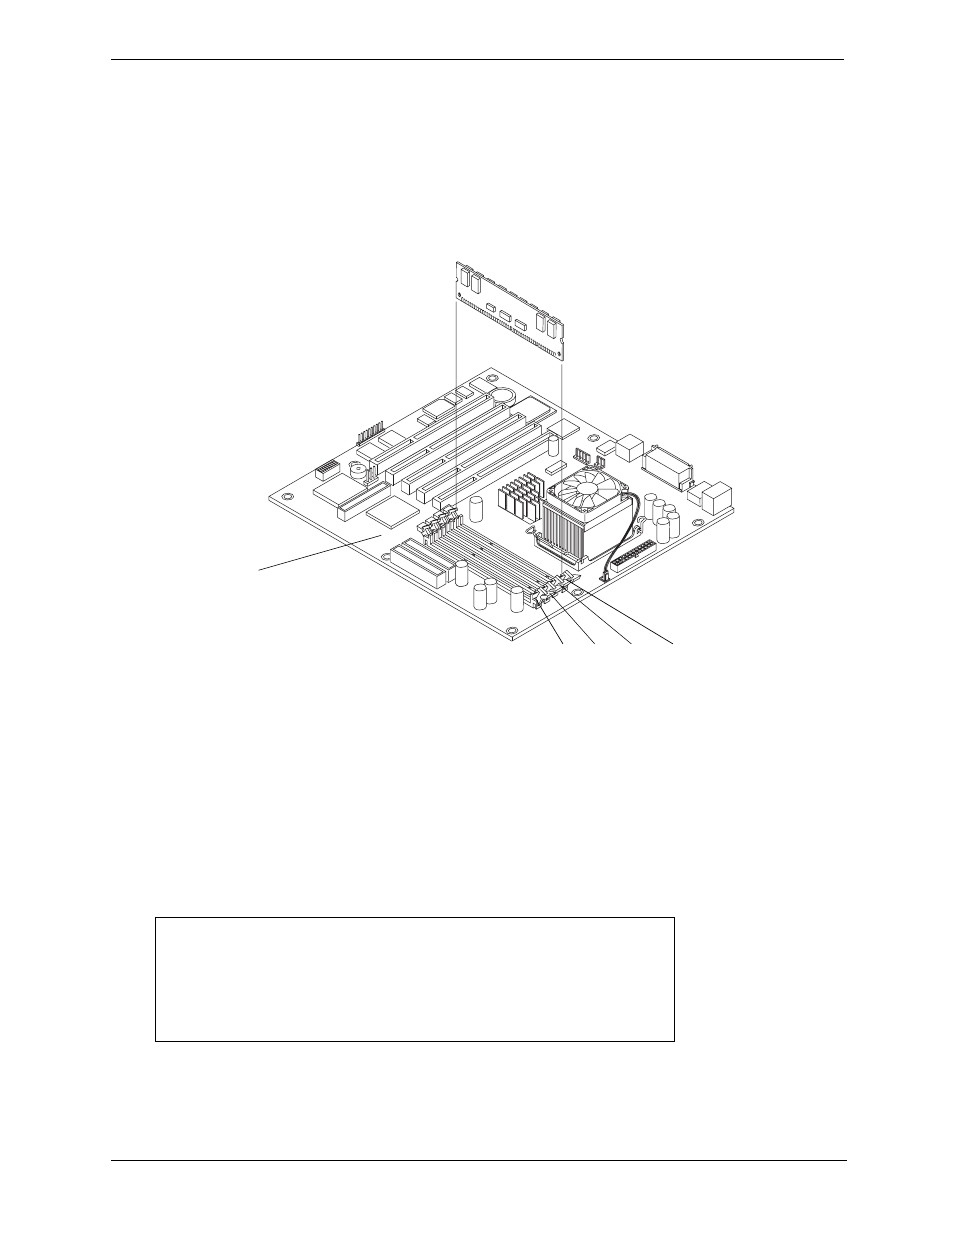
4. Lay the server on its side (components showing).
5. Select the desired DIMM and open the retaining latches completely.
This forces the DIMM up in the slot and makes it easier to remove.
6. Lift the DIMM completely away from the slot.
7. Place the DIMM in its anti-static container.
8. Repeat Steps 5-7 for as many DIMMs as you need to remove.
Replacing DIMMs
1. Choose a DIMM slot for the desired DIMM.
DIMM sizes may be mixed on the system board and may be loaded in any order (1 through 3). However,
HP recommends starting at slot 1 and filling the slots in order: 1, 2, and 3. Empty slots between DIMMs are
permitted.
2. Spread the two retaining latches on the slot outward.
3. Remove a DIMM from its protective container, handling the module by its edges.
If necessary, lay it on an anti-static surface until you are ready to install it.
Figure 7-8. Removing DIMMs from System Board
CAUTION
Use only HP DIMMs, which are 184-pin, 3.3V, PC2100 (266
MHz), buffered ECC DDR DIMMs. The EDO DIMMs and
PC 100 SDRAM DIMMs from earlier hp server models will
fit into the DIMM slots in the hp server tc2120, but the EDO
DIMMs and PC 100 SDRAM will not function properly. HP’s
warranty does not apply to non-HP parts.
System Board
DIMM Slots
1
2
3
4