Replacing a hard disk drive (drive cage mounted) – HP TC2120 User Manual
Page 94
88
Chapter 7
Replacing Parts
6. Slide the drive out of the drive cage.
7. Remove the four screws to remove the rails from the drive.
8. Place the removed drive in an anti-static bag for protection.
Replacing a Hard Disk Drive (Drive Cage Mounted)
1. Set the jumper on the back of the drive to “CS” (Cable Select). Refer to the hard disk drive documentation
for detailed instructions.
2. Align and screw the rails to the new drive.
Use the shoulder screws located above the drive cage.
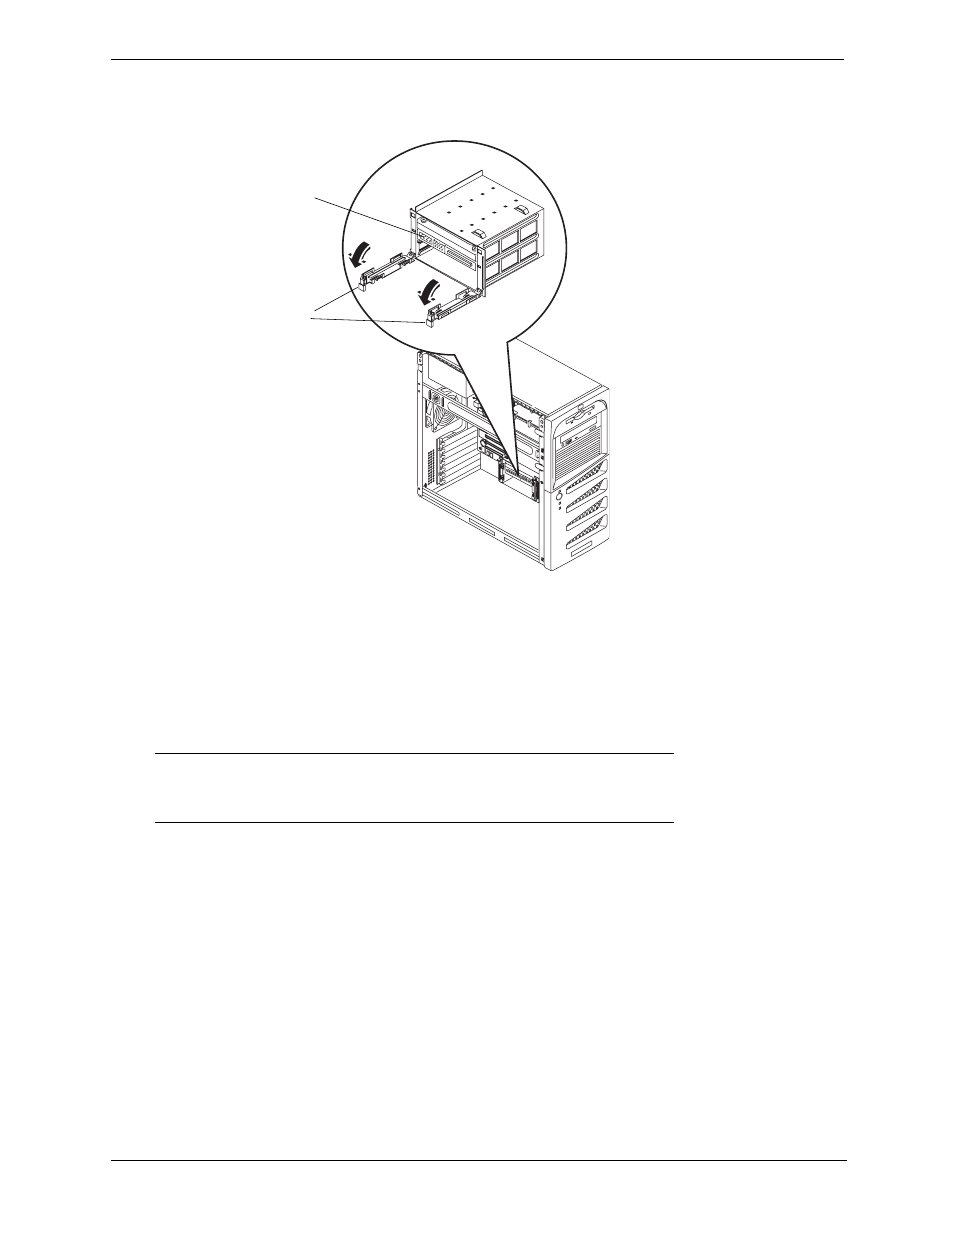
Figure 7-6. Releasing the Retaining Clips
NOTE
If the hard disk drive (HDD) you are planning to install
already has a mounting tray attached, you must remove it
before you can install the drive into the drive cage.
Drive Slide Rails
Retaining Clips
(Do not remove
drive cage from
chassis.)
- UX B6941-90001 (548 pages)
- A3661B (95 pages)
- C100/110 (252 pages)
- L1702 (45 pages)
- 576X-B (1 page)
- rx5670 (13 pages)
- ProLiant PC2-6400 (38 pages)
- PC (120 pages)
- S3240 (2 pages)
- LC 2000R (194 pages)
- GS80 (41 pages)
- COMPAQ DX2710 MT (107 pages)
- TOUCHSMART 9100 (62 pages)
- BC1500 (13 pages)
- Proliant DL580 (48 pages)
- Proliant DL580 (53 pages)
- DX2200 (31 pages)
- ProLiant Server Blade BL460c (31 pages)
- P6000 (105 pages)
- d530 Series (2 pages)
- dc5700 (216 pages)
- RX7620-16 (43 pages)
- ProLiant ML370 G5 (46 pages)
- PROLIANT ML350 G6 (54 pages)
- BL35P (22 pages)
- COMPAQ DC5750 (214 pages)
- Agent-Desktop-Laptop Computer (23 pages)
- DL380 G7 (126 pages)
- xw8600 (73 pages)
- Pavilion A6140 (2 pages)
- Z800 (55 pages)
- 8080 ELITE BUSINESS (284 pages)
- VECTRA VL800 (72 pages)
- Vectra XE320 (82 pages)
- Vectra XE320 (32 pages)
- AA-RTDRB-TE (146 pages)
- BL465C (66 pages)
- DM4 (113 pages)
- PROLIANT 580554-001 (87 pages)
- ProLiant ML330 (34 pages)
- ProLiant ML330 (44 pages)
- PROLIANT BL465C G7 (30 pages)
- LH 3r (23 pages)
- Compaq dc7900 (3 pages)
- T5000 (41 pages)