Replacing the cd-rom – HP TC2120 User Manual
Page 89
83
Chapter 7
Replacing Parts
3. Remove the left side cover.
“Opening and Closing the hp server”
.
4. Remove the upper bezel.
“Opening and Closing the hp server”
.
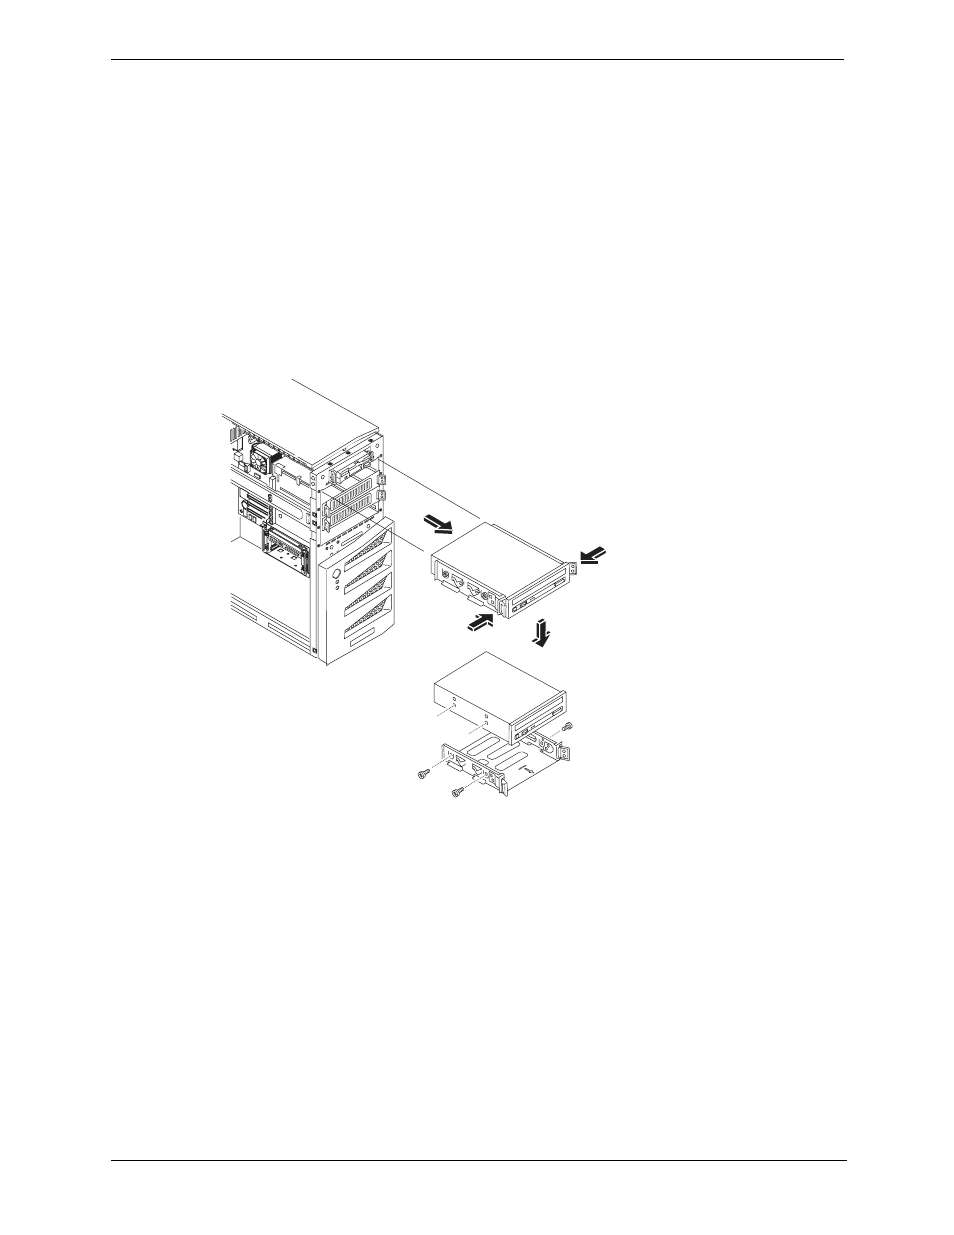
5. At the rear of the CD-ROM, carefully disconnect the power and data cables.
6. Remove the CD-ROM:
Press in on both release tabs to release the CD-ROM tray assembly.
Pull the CD-ROM assembly out of the chassis.
Remove the four screws (two on each side) from the CD-ROM tray.
7. Place the CD-ROM in an anti-static bag.
Replacing the CD-ROM
1. Remove the CD-ROM from the shipping container.
2. Set the jumper on the back of the CD-ROM to “CS” (Cable Select). Refer to the CD-ROM documentation
for detailed instructions.
3. If not already mounted, place the CD-ROM into the CD-ROM tray and secure it using the four screws.
4. Guide the CD-ROM tray into the chassis opening, with the cable connectors of the CD-ROM toward the
rear of the chassis.
The first CD-ROM must be mounted in the second shelf.
5. Push the CD-ROM tray all the way into the chassis until the CD-ROM tray snaps into place.
The two release tabs should click when in place.
Figure 7-3. Removing the CD-ROM