Replacing the cd-rom drive, Removing the cd-rom drive – HP TC4100 User Manual
Page 104
102
Chapter 7
Replacing Parts
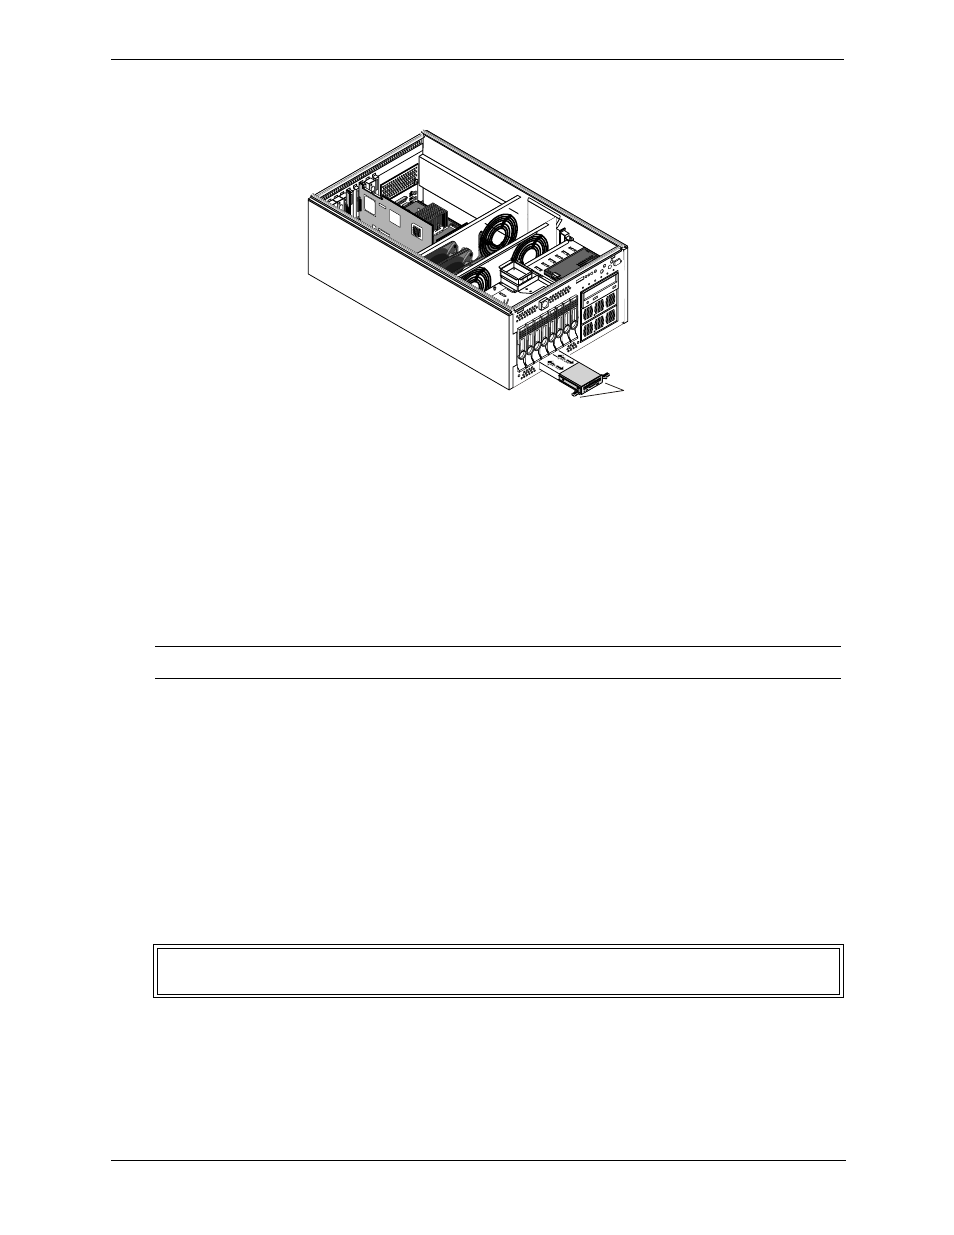
8. From the front of the server, press the two tabs on the sides of the flexible disk drive and slide the drive
forward and out of the chassis..
Figure 7-1. Flexible Disk Drive Removal
9. The blue plastic rails need to be removed from the original flexible disk drive and insert them on the new
drive. Pull out the rail and it will detach from the drive. Line up the two prongs and insert in the holes on
the new drive.
Installing the Flexible Disk Drive
1. Install the new flexible disk drive into the chassis. The blue tabs on the rails will click when they lock into
place in the chassis.
2. Reconnect both cables to the rear of the drive.
3. Replace the front bezel.
4. Replace the access panel. When installing the access panel, line up the tabs on the cover with the slots in
the chassis. As the latch is returned to the closed position, the panel will be pulled forward by the latch.
Replacing the CD-ROM Drive
Replace the CD-ROM Drive only after you verify the failure with Diagtools.
Removing the CD-ROM Drive
1. Power down the HP Server and disconnect the power cord(s) from the back of the server.
2. Disconnect any other cables from the back of the server.
3. If applicable, remove the server from the rack.
4. Remove the left access panel (pedistal model) or the top access panel (rack-mount model) by pressing in on
the release button with your thumb as you pull the latch out with your fingers.
NOTE
The flexible disk drive connectors are keyed. Ensure that the cables are fully seated.
WARNING
The power supplies continue to provide standby voltage to the HP Server until the power
cord(s) is/are disconnected.
Tabs
2