5 set ting the d a ta int e rf aces – HEIDENHAIN iTNC 530 (340 49x-02) ISO programming User Manual
Page 550

550
13 MOD Functions
13.5 Set
ting the D
a
ta Int
e
rf
aces
Data transfer between the TNC and TNCremoNT
Check whether the TNC is connected to the correct serial port on your
PC or to the network, respectively.
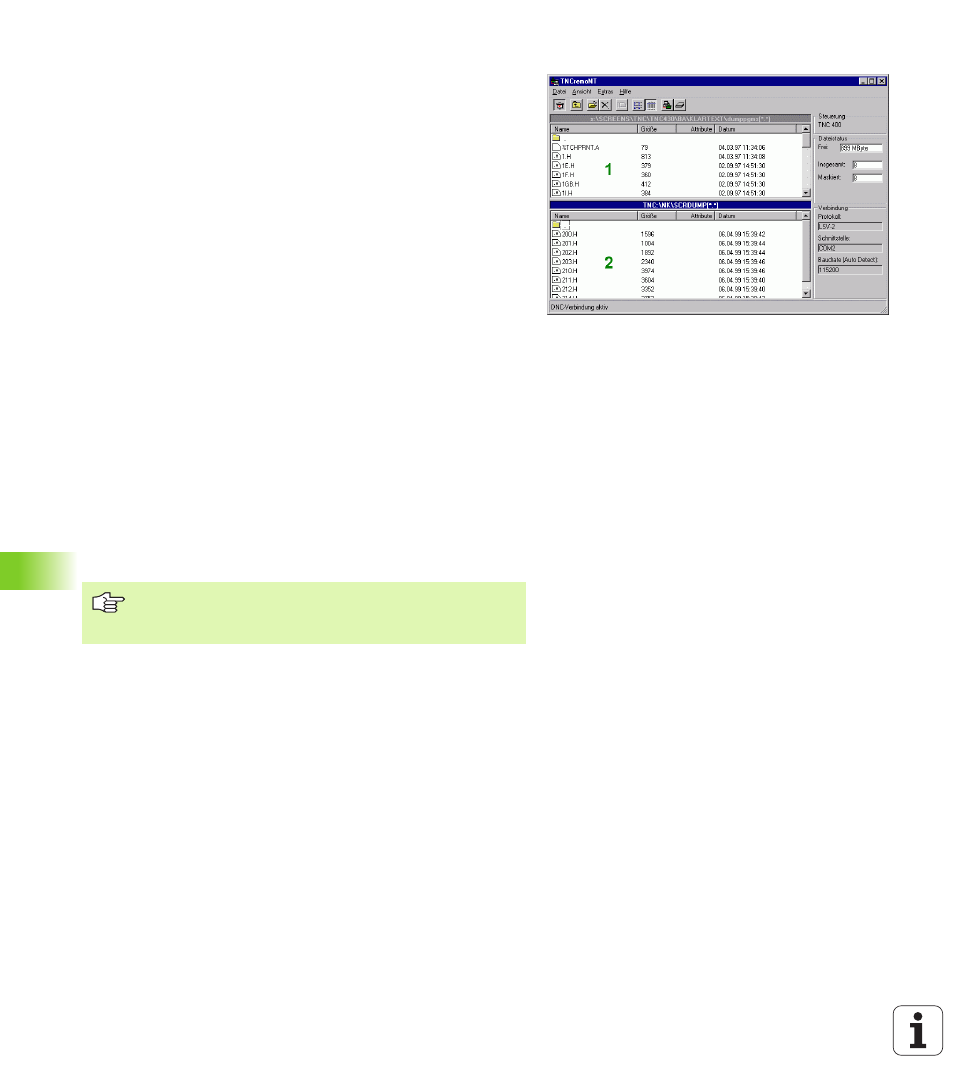
Once you have started TNCremoNT, you will see a list of all files that
are stored in the active directory in the upper section of the main
window
1
. Using the menu items
can change the active directory or select another directory on your PC.
If you want to control data transfer from the PC, establish the
connection with your PC in the following manner:
8
Select
file and directory structure from the TNC and displays this at the
bottom left of the main window
2
.
8
To transfer a file from the TNC to the PC, select the file in the TNC
window with a mouse click and drag and drop the highlighted file
into the PC window
1
.
8
To transfer a file from the PC to the TNC, select the file in the PC
window with a mouse click and drag and drop the highlighted file
into the TNC window
2
.
If you want to control data transfer from the TNC, establish the
connection with your PC in the following way:
8
Select
It can receive data from the TNC and send data to the TNC.
8
You can now call the file management functions on the TNC by
pressing the key PGM MGT (see “Data transfer to or from an
external data medium” on page 113) and transfer the desired files.
End TNCremoNT
Select the menu items
Refer also to the TNCremoNT context-sensitive help texts
where all of the functions are explained in more detail. The
help texts must be called with the F1 key.
