Using the missing nozzle adjustment – QuickLabel Kiaro! User Manual
Page 100
Kiaro! Maintenance Utility
84
Kiaro! User Guide
5
Adjust the horizontal and vertical registration of each color.
Magenta (M) is the reference color. Black (K), cyan (C), and yellow (Y) adjustments
are made relative to magenta.
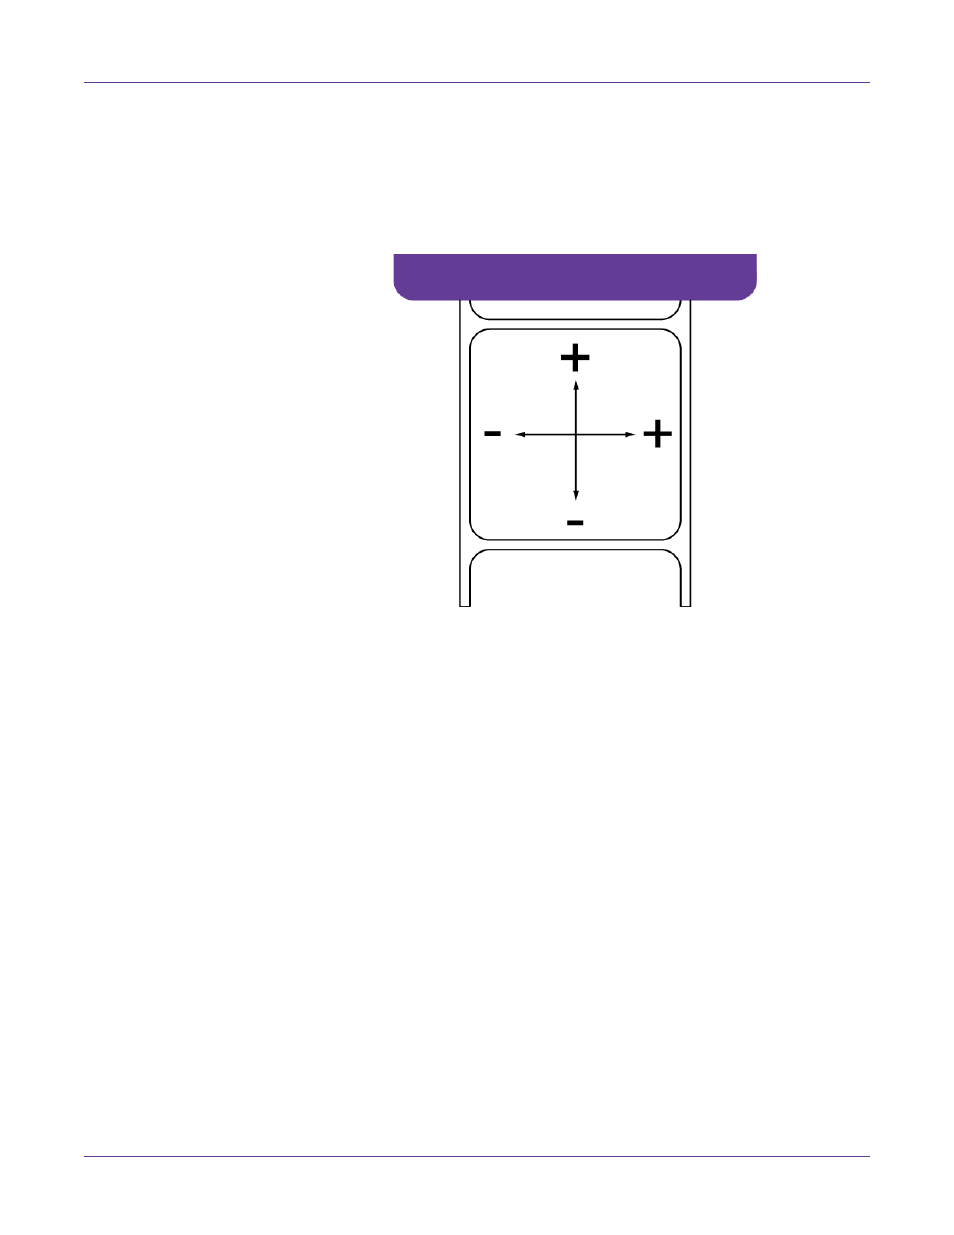
In the following illustration, a label is exiting the printer. Note the positive and
negative adjustment directions.
6
Choose
Send
. The manual color registration settings will be saved.
Using the Missing Nozzle Adjustment
If a printhead nozzle is not functioning properly, you may notice small vertical lines of
missing color on printed labels. If a nozzle is clogged, you can often resolve the issue
using the cleaning functions.
If multiple cleanings do not resolve the issue, a nozzle may no longer be functioning.
In this case, you can use the missing nozzle adjustment procedure to identify
non-functioning nozzles. The printer will apply more ink from nozzles adjacent to
non-functioning nozzles in an attempt to compensate for the missing nozzle.
Note: This adjustment works best when correcting an issue with a single nozzle. The
adjustment is not recommended in situations with multiple consecutive non-functioning
nozzles, or in situations with clogged nozzles.
1
Ensure that 4x5 media is loaded.
2
Launch the Kiaro! Maintenance Utility.
From the Windows Start Menu, choose
Start > All Programs > QuickLabel
Kiaro! > Kiaro! Maintenance Utility
. A language and printer prompt will open.
Select a display language and the Kiaro! printer you want to connect to. Choose
OK
.
3
Choose the
Adjustments
tab.