Collect data – Measurement Computing WavePort rev.3.0 User Manual
Page 58
6-6 WaveView
09-29-00
WavePort User’s Manual
Collect Data
The following text describes how to collect data for a sample acquisition.
To read data from the WaveBook (or Simulated Device), select the Scope option from the View menu or the
tool bar. The WaveView Scope window will display. Complete the acquisition setup as follows:
• Number of Charts. First, the Scope window should be configured to display 4 charts since 4 channels
were previously selected for the acquisition. Select the Number of Charts option from the Charts menu
item. When the flyout appears showing a selection of up to 8 channels for display, click on 4.
• Arm and Trigger. The system is now set to start collecting data. At this point, you may acquire one
acquisition or continuous acquisitions. For this sample acquisition, click the Arm button, then click the
Trigger button.
• Data Acquisition. The system has now collected 1000 pre-trigger scans and 5000 post-trigger scans.
If desired, you may modify the current Scope window display as follows:
• View additional channels (up to 8) simultaneously by changing the entry in the Number of Charts
menu.
• Change the channels viewed. Use the channel select list box at the right of the waveforms to display
waveforms of other active channels.
• To scale the waveforms, click on the Scale All Charts button. All 4 waveforms should then be visible.
• Examine the waveforms at any point along the timeline by using the horizontal scroll-bar.
• Vary the number of scans displayed by using the Zoom In or Zoom Out buttons.
..
6
7
8
9
10
11
12
5
4
3
2
1
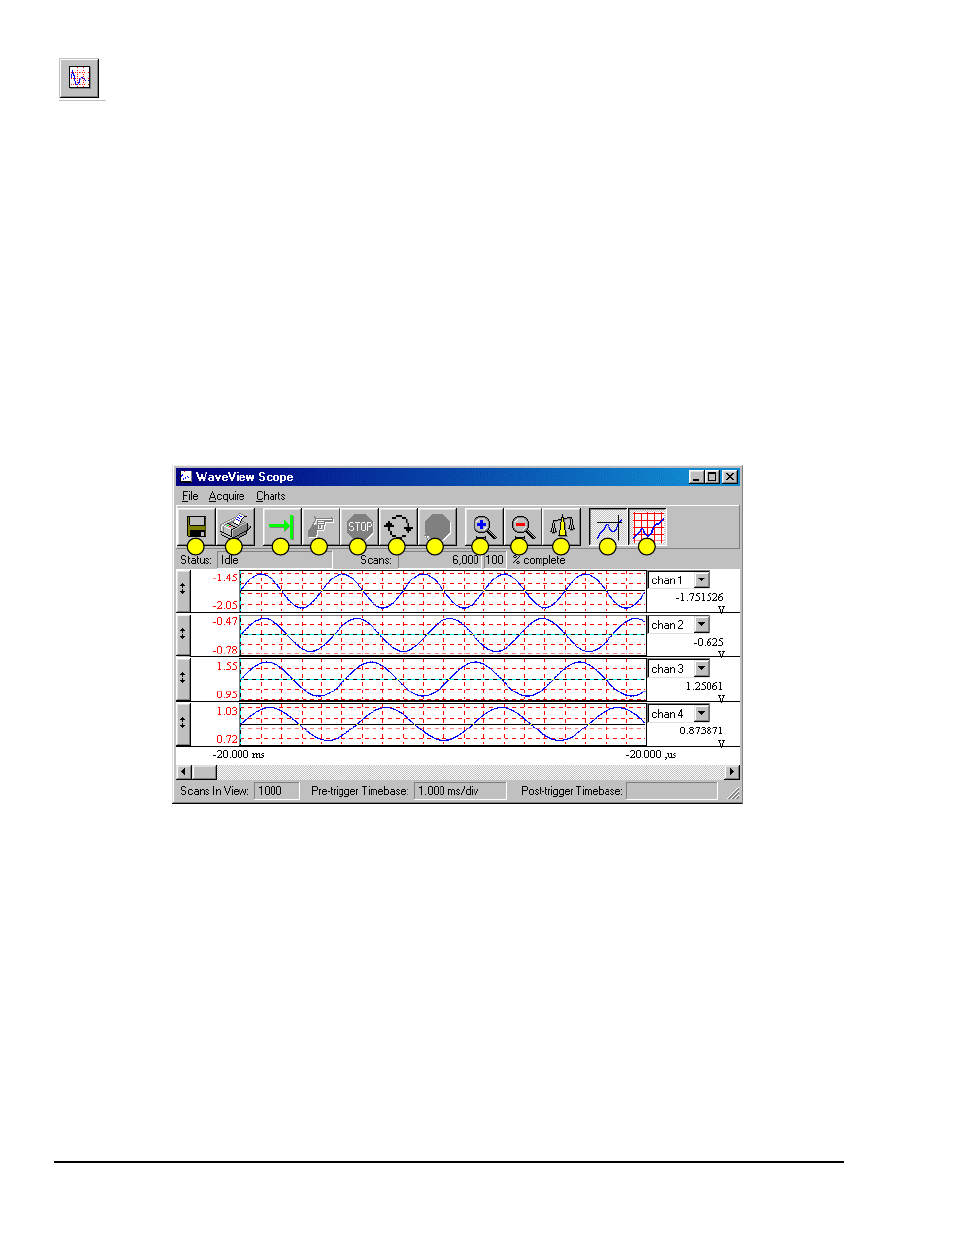
WaveView Scope Window
Item
Description
Item
Description
1
Save
7
Stop Rearming
2
Print Window
8
Zoom In
3
Arm
9
Zoom Out
4
Trigger
10
Scale All Charts
5
Stop Acquiring
11
Toggle Cross Hairs
6
Auto-Rearm
12
Toggle Grids