Charging, Fuse replacement – Measurement Computing WavePort rev.3.0 User Manual
Page 47
WavePort User’s Manual
09-29-00
Hardware and Operation Reference 4-19
Charging
In general, lead-acid batteries [and comparable gel-pack batteries] require charging at 120% of drain energy
(e.g., the 4 A-hr power module requires a charge equal to, or greater than 5 A-hr). Charging times vary; but
times of 4 to 5 hours are typical for a battery that is fully discharged at the time a charge commences.
If WavePort’s modules are powered-on, then the charge rate is reduce and a charge time of approximately
15 hours will be required to return the power module’s batteries to a full-charge state.
Follows these simple steps to ensure the best charge possible.
1. Turn the WavePort’s Module Power Switch to OFF.
2. Ensure WavePort is connected to a suitable AC-line power source. Note that the unit will accept AC
power in the voltage range of 90 to 260 VAC, and within the frequency range of 50-400 Hz.
3. Allow the charge to run until the BATTERY indicator LED goes out. The BATTERY indicator
will be lit solid while the batteries are being fast-charged at the 0.2 amp/cell rate.
To ensure the best charge possible:
always use the AC line power to charge WavePort’s batteries.
CAUTION
CAUTION
CAUTION
CAUTION
DC Voltage applied to WavePort must not exceed 30 VDC.
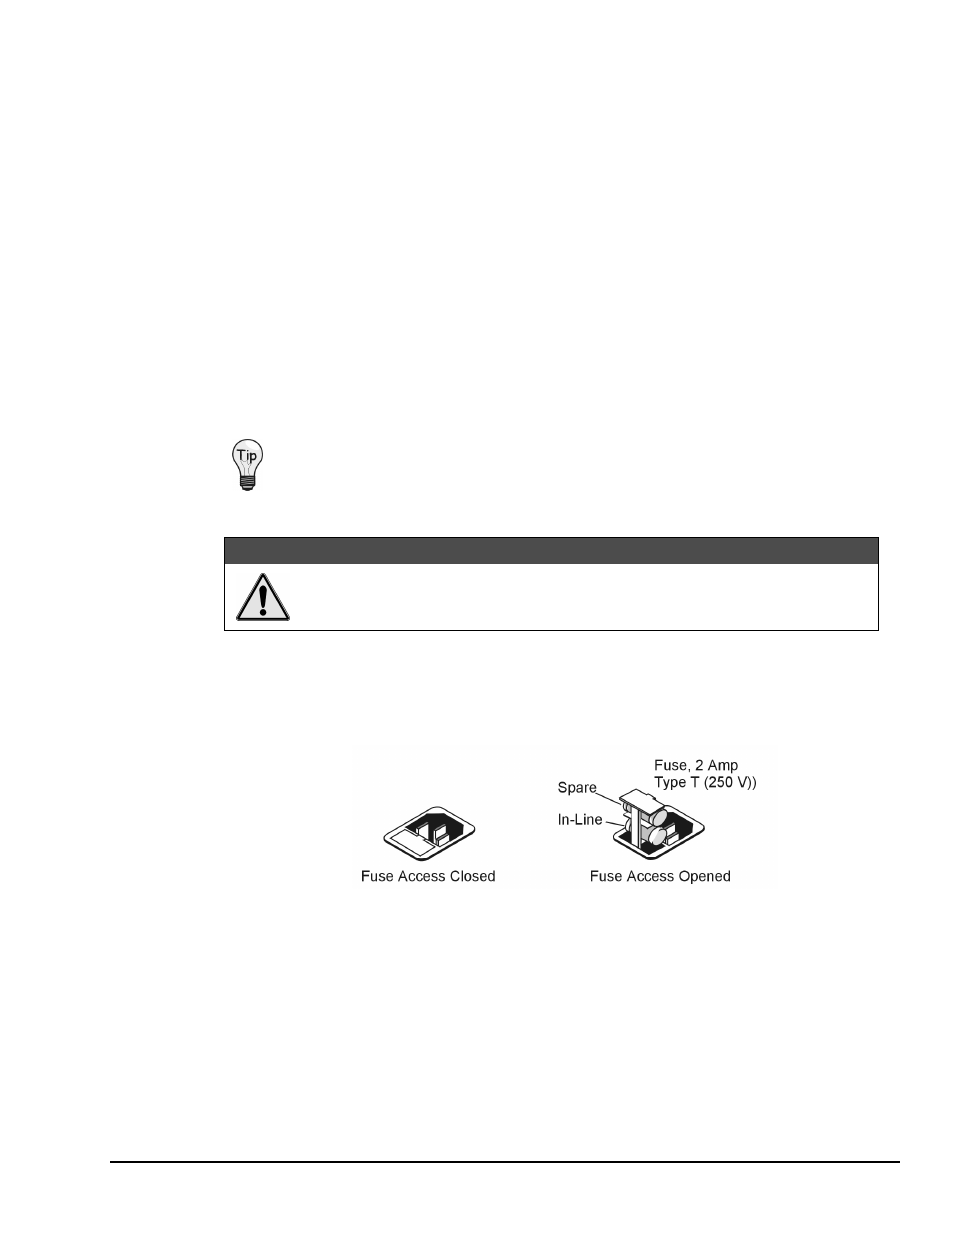
Fuse Replacement
If there is no power available at WavePort’s Notebook Power receptacle, and WavePort is plugged in to a
“live” 100 to 240 VAC Power Source, it is likely that the AC in-line fuse has blown. You can replace the
fuse as follows:
Two Views of WavePort’s AC Line Power Receptacle
Note: If you do not need WavePort’s modules powered, position the Module Power Switch to “Off” to
conserve battery power while the unit is disconnected from the AC power supply.
1. Remove WavePort’s power cord from the AC Power Supply and from the AC Line Receptacle on
WavePort’s cover plate.
2. Open the Fuse Access on the AC Line Receptacle (see figure).
3. Remove the lower “In-Line” Fuse.
4. Verify that the fuse is blown.
If the fuse is not blown, and your AC Power Supply is known to be reliable,
promptly notify your service representative.