Appendix b – wbk20a pcmcia option, setup notes – Measurement Computing WavePort rev.3.0 User Manual
Page 135
Appendix B, WBK20A Option, Setup Notes
04-13-00
Appendix B – WBK20A PCMCIA Option, Setup Notes
B
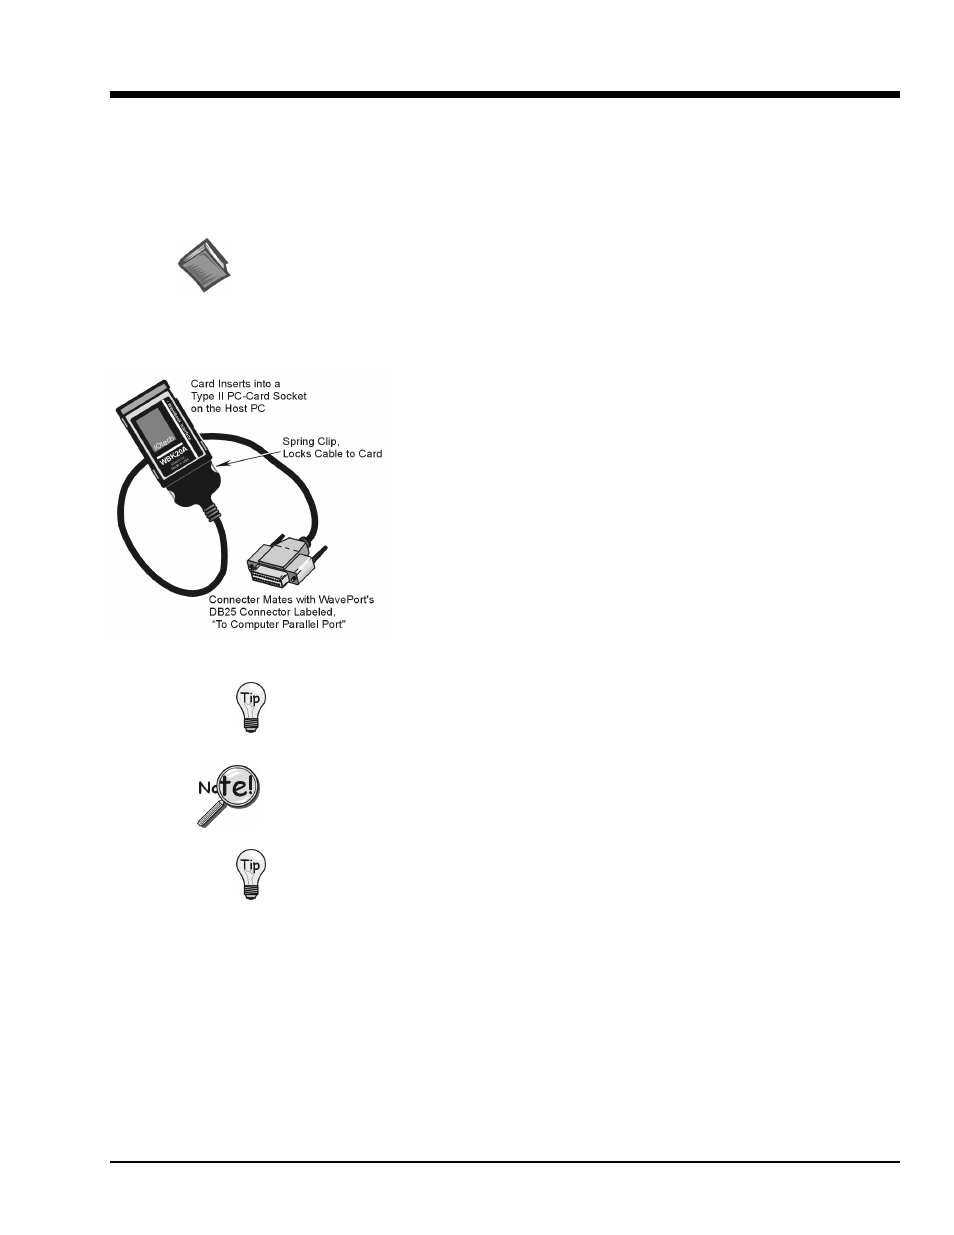
Instead of using the supplied CA-35-2 enhanced parallel port (EPP) cable to connect WavePort to the
Notebook PC, you can connect your WavePort to the Notebook with a WBK20A, PCMCIA Interface Card.
Reference Note:
WBK20A is shipped with a PC-Card-to-Parallel-Port Adapters User’s Manual.
Refer to that document for installation details.
To link a WavePort to a Notebook using a WBK20A:
1. Insert the WBK20A card into a Type II PCMCIA socket on the Notebook.
2. Connect cable (CA-191-1) to the PCMCIA card.
3. Connect the cable’s DB-25 socket-connector to WavePort's DB25 plug
connector labeled “TO COMPUTER PARALLEL PORT.”
4. Load the required software drivers by following the instructions provided
with the WBK20A.
Note that no hardware configuration is required. Software configuration is
performed from within the provided software.
Record the WBK20A IRQ interrupt setting for future reference.
To ensure proper operation of WBK20A card, you will need to boot up the notebook
computer with the WBK20A inserted in the PC’s card slot. Failure to do so may prevent the
application software from recognizing the card as a parallel port device.
You can use the earlier version WBK20 card/cable to connect your WavePort to a Notebook
PC. WBK20 is identical to WBK20A in performance, but requires a different cable
(CA-157-1). WBK20A uses cable CA-191-1, which locks to the card.
It is important to note that these two cables are not interchangeable.