Important information – Gasboy FiPay Payment Network User Manual
Page 18
Installing FiPay (NBS)
Page 18
MDE-4999A FiPay™ Payment Network Installation and Setup Instructions · October 2012
30
After the configuration has been saved, the HASP key driver installation will begin. Press any
key to continue the installation process.
31
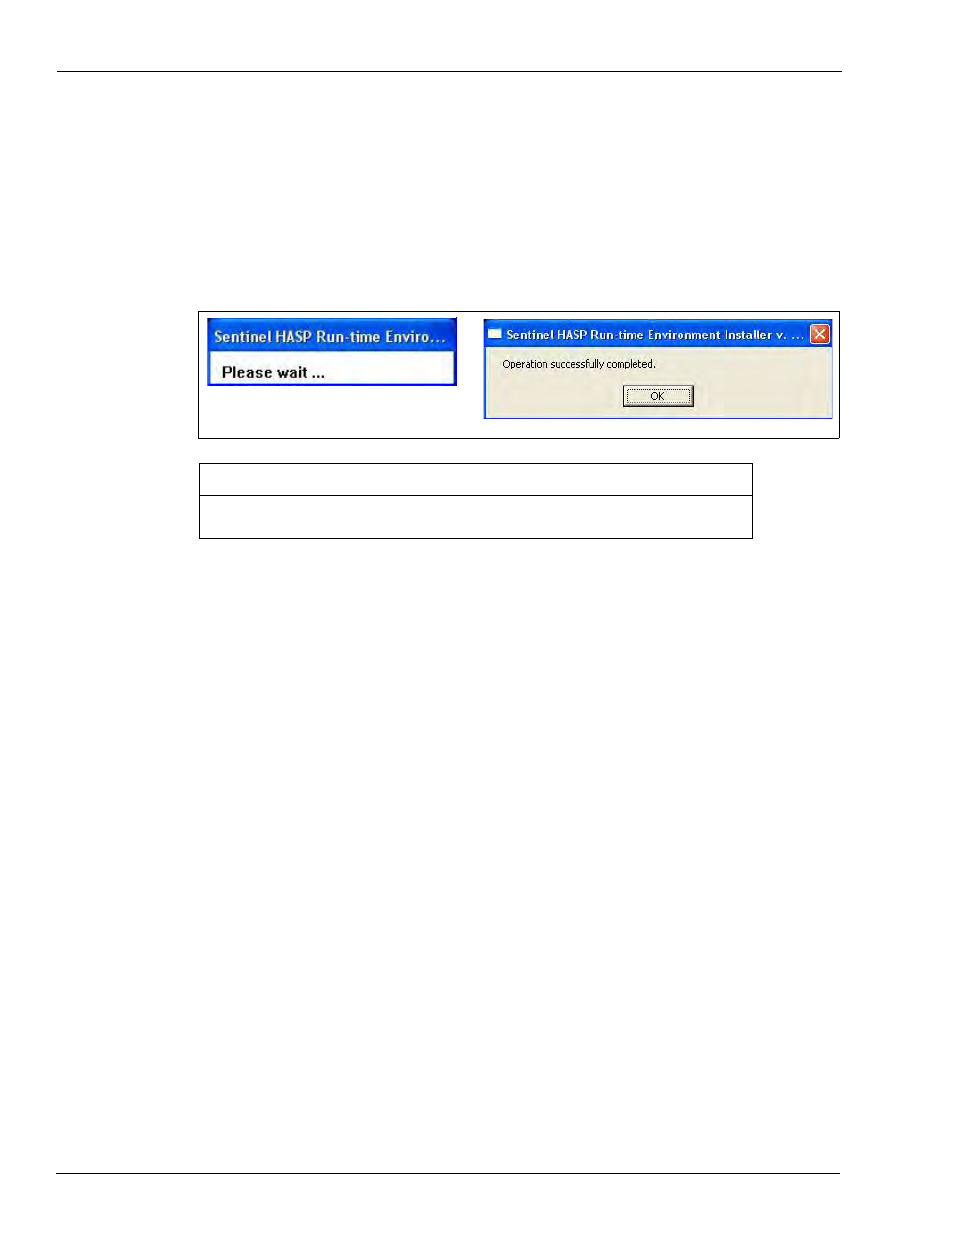
The script will then copy the driver files for the HASP to your computer and make the required
configuration changes to your computer for it to operate. At this point, you will see the
following two messages (see
). The first message indicates that the driver is being
loaded and second message indicates that the operation has been successfully completed.
Figure 16: Operation Successful Message
(i)
(ii)
The HASP key does not have to be inserted for the drivers to be successfully installed.
However, it must be inserted before FiPay service will start and function.
IMPORTANT INFORMATION
32
Press any key to complete the software installation.
33
To complete the installation and start the FiPay service, refer to
on
Option 3: Abierto Router with Dialup Modem (See
on
and
)
34
Enter the Terminal ID. This is the terminal ID for this location. Contact NBS for this number.
Cenex customers obtain Terminal ID from CHS.
35
Enter the COM Port for Abierto Router. This is the COM port of the computer hosting the
FiPay application.
36
Enter the COM Port for Dialup Modem. This is the COM port of the computer connected to
the modem.
37
Enter the NBS Phone Number. This is the number used by FiPay to Dial Out for
authorization.
38
Enter the Modem Init String. This allows you to edit the Init string for the Dial Out modem
you are using for authorization.
Note: You MUST include amp; after each ampersand symbol used in the init string. For more
details, refer to
“Appendix D: Modem Initialization String Info”
39
Enter the NBS Backup Phone Number. This is the number used by FiPay to Dial Out for
authorization.
40
Enter the Min Dial Attempts. This is the number of redial attempts.