Display studio preliminary setup, Create a new workspace – Daktronics Show Control System User Manual
Page 59
52
Daktronics Show Control System
Display Studio Setup
Display Studio preliminary setup
Now that you’ve created your presentations, you are probably interested in learning how to get those
presentations to play on your sign. That is where Display Studio comes in. In the upcoming sections, we
will introduce you to many of the exciting and powerful tools and features that Display Studio has to offer
and provide recommendations for using them to put on an excellent show. Before you begin putting
together containers and buttons, though, there are a few preparation steps to take to help get your
Display Studio workspace ready.
Tip: Keep in mind that much of the upcoming sections consist of simply our
recommendations for how to set up your workspaces. Once you understand the
mechanics of how Display Studio works, you are encouraged to experiment and adapt
your workspaces as you see fit to make them work for you.
Section Contents
Adding content to digital media player
Updating your Show Control Server
Create a new workspace
The first part of getting started in Display Studio is creating your workspace. As we discussed in
Navigating the Show Control software
, your Display Studio workspace is what organizes all of your
containers and buttons for your digital display show. You can create as many workspaces as you need, for
whatever purposes you need them for, such as different workspaces for different types of events; different
workspaces for different operators; different workspaces for different facilities; workspaces based on
combinations of these scenarios; or workspaces for any other possible type of scenario.
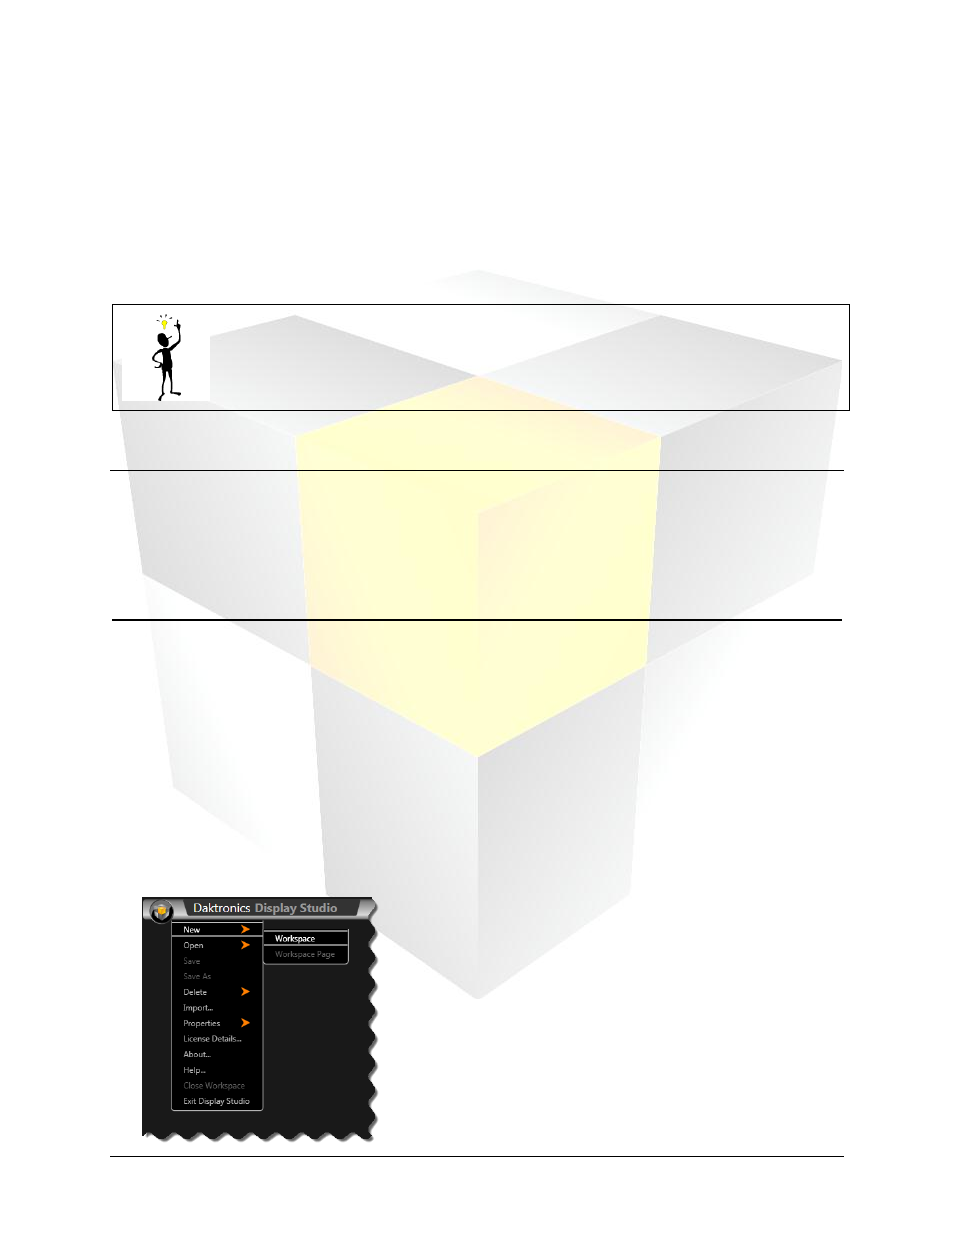
1. From within Display Studio, click the Display Studio Hub to open the Display Studio Main Menu.
2. On the menu, select New and click Workspace. The Workspace Name dialog box appears.