Encode (export) content, Encode content from the bin, Redray player operation guide – RED REDRAY PLAYER User Manual
Page 57
REDRAY PLAYER OPERATION GUIDE
COPYRIGHT © 2014 RED.COM, INC
955-0017, REV-D | 57
ENCODE (EXPORT) CONTENT
This section describes how to encode your video and audio files from the Bin and Timeline panels.
NOTE: Encode content with uncompressed audio to ensure content plays properly when the Loopback setting
is enabled
ENCODE CONTENT FROM THE BIN
This section explains how to encode (export) a single clip from the Bin panel.
1. Click on the Export panel at the bottom of the REDCINE-X PRO application.
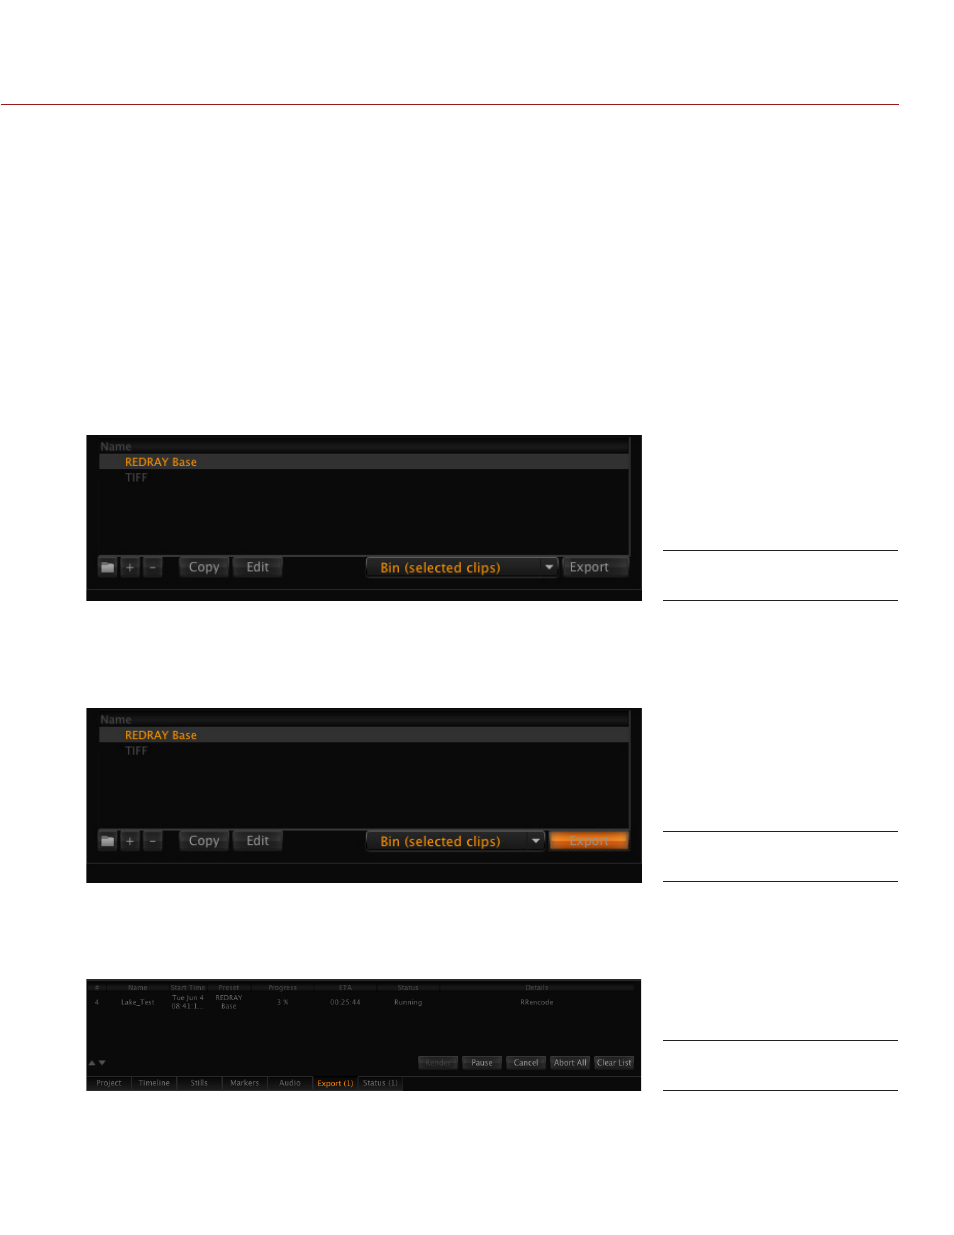
2. Select your RRencode preset as the export type.
NOTE: The default RRencode preset is REDRAY BASE. If REDRAY BASE is not an available selection, make
sure that RRencode is installed on your system. If RRencode is installed but REDRAY BASE is still not an
available selection, create a new preset. For more information about how to edit presets, go to
3. Select one of the following from the drop-down menu next to the Export button:
‒ Bin (Selected Clips): Encodes the clips that are currently selected in the Bin.
‒ Bin (All Clips): Encodes all of the clips currently in the Bin.
4. Click Export to start the encoding process.
REDCINE-X PRO exports the clip to the folder designated by the preset.
The progress of the encoding process displays in the Export panel. The estimated time to completion is
listed in the ETA column. The value in the ETA column varies across a wide range of values at first, but
provides an accurate estimate after the first few minutes of the encoding process.
NOTE: Once you have started the encoding process, RED recommends that you allow REDCINE-X PRO to
perform the encoding process without interruptions. You may perform other tasks with caution in RED-
CINE-X PRO during the encoding process, but the encoding process will finish sooner if REDCINE-X PRO
is not disturbed.
Export Panel
Start Exporting (Encoding)
Monitor Status