Add clips to the timeline panel, Redray player operation guide – RED REDRAY PLAYER User Manual
Page 53
REDRAY PLAYER OPERATION GUIDE
COPYRIGHT © 2014 RED.COM, INC
955-0017, REV-D | 53
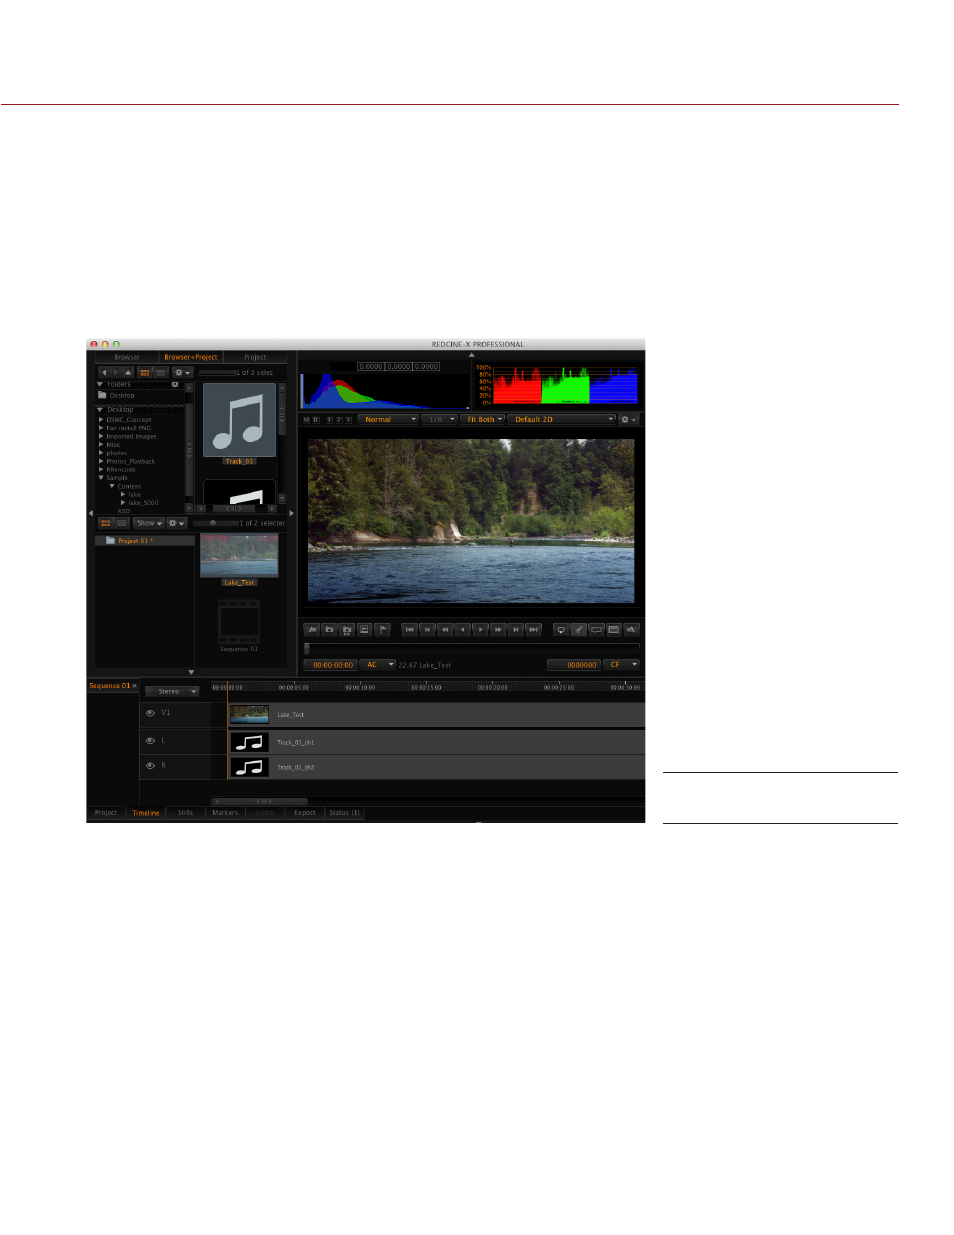
ADD CLIPS TO THE TIMELINE PANEL
This section provides information on how to add video clips and their corresponding audio tracks (if applicable)
to the Timeline in REDCINE-X PRO.
NOTE: The Timeline panel should only be used to create a single encoded clip from multiple video clips.
1. Click the Timeline panel at the bottom of the REDCINE-X PRO application.
2. Click the first clip of your sequence in the Bin panel and drag the clip to the row labeled V1. Ensure that
the clip snaps to the 00:00:00:00 position.
NOTE: Leaving a gap between the 00:00:00:00 position and the start of the first clip will result in a black
screen in the encoded video for the length of that gap.
When you add a clip that has an external audio file to the Timeline, each audio track in the audio file dis-
plays as a separate row in the Timeline panel.
3. In the Timeline panel, click the the channel configuration (from the drop-down menu next to the sequence
name) that matches the number of channels that your audio files have:
‒ Stereo
‒ 5.1 Channel
‒ 7.1 Channel
NOTE: The RRencode Plugin encodes up to eight (8) channels of audio for each video clip. If you are not
encoding content for the REDRAY (if you are not using the RRencode Plugin), REDCINE-X PRO can encode
up to 12 channels of audio.
Add Clip to TIMELINE