Redray player operation guide – RED REDRAY PLAYER User Manual
Page 55
REDRAY PLAYER OPERATION GUIDE
COPYRIGHT © 2014 RED.COM, INC
955-0017, REV-D | 55
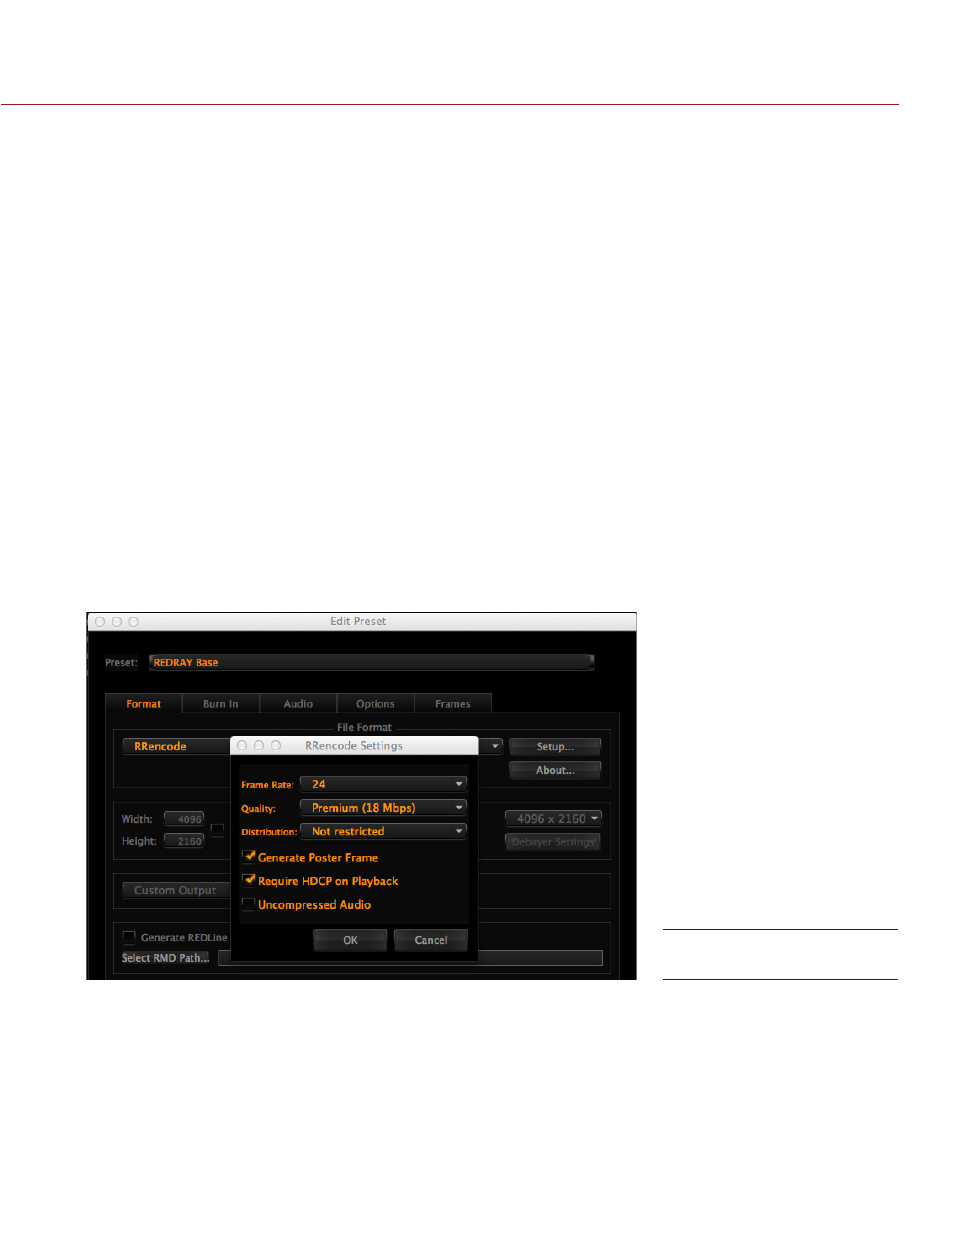
7. Select a Quality level from the drop-down menu:
‒ Standard: 9 Mbps
‒ Premium: 18 Mbps
‒ Cinema: 36 Mbps
8. Select Not Restricted from the Distribution drop-down menu.
NOTE: “Not Restricted” is the only Distribution setting available at this time.
9. Select the following check boxes, as needed:
‒ Generate Poster Frame: Creates a poster frame.
‒ Require HDCP On Playback: When this check box is selected, the RRencode Plugin embeds a flag in the
encoded .RED file to enforce HDCP (High-bandwidth Digital Copy Protection) on the REDRAY HDMI
outputs. It is recommended that you always use HDCP when encoding content for movie distribution
or pay-for-view applications. Deselect this check box if you are creating content for applications where
you will be using monitors or projectors equipped with DVI or HD-SDI inputs, or other inputs which do
not support HDCP. By default, this check box is selected.
‒ Uncompressed Audio: Audio will not be compressed during the encoding process. By default, this check
box is NOT selected. Leaving the audio uncompressed increases the file size of the final encoded con-
tent.
NOTE: If you are encoding content that will be used for digital signage applications and that has audio,
RED recommends that you select the Uncompressed Audio check box.
NOTE: If you are encoding content that will be used with the Loopback setting enabled, RED recom-
mends that you select the Uncompressed Audio check box.
10. Click OK to return to the Create Preset window.
11. In the Output Location section, verify that Custom Output is selected and click Setup.
12. Select the default folder location for the encoder output in the Base Output Folder field.
RRencode Settings