2a 2 – Keri Systems BioPointe Users Manual User Manual
Page 45
Administering the BioPointe
44
4.5.5 Erasing the Logs
The log records that are stored in the device can be erased totally through this authentication mode. This
process will involve an additional master fingerprint authentication to prevent accidental erasure.
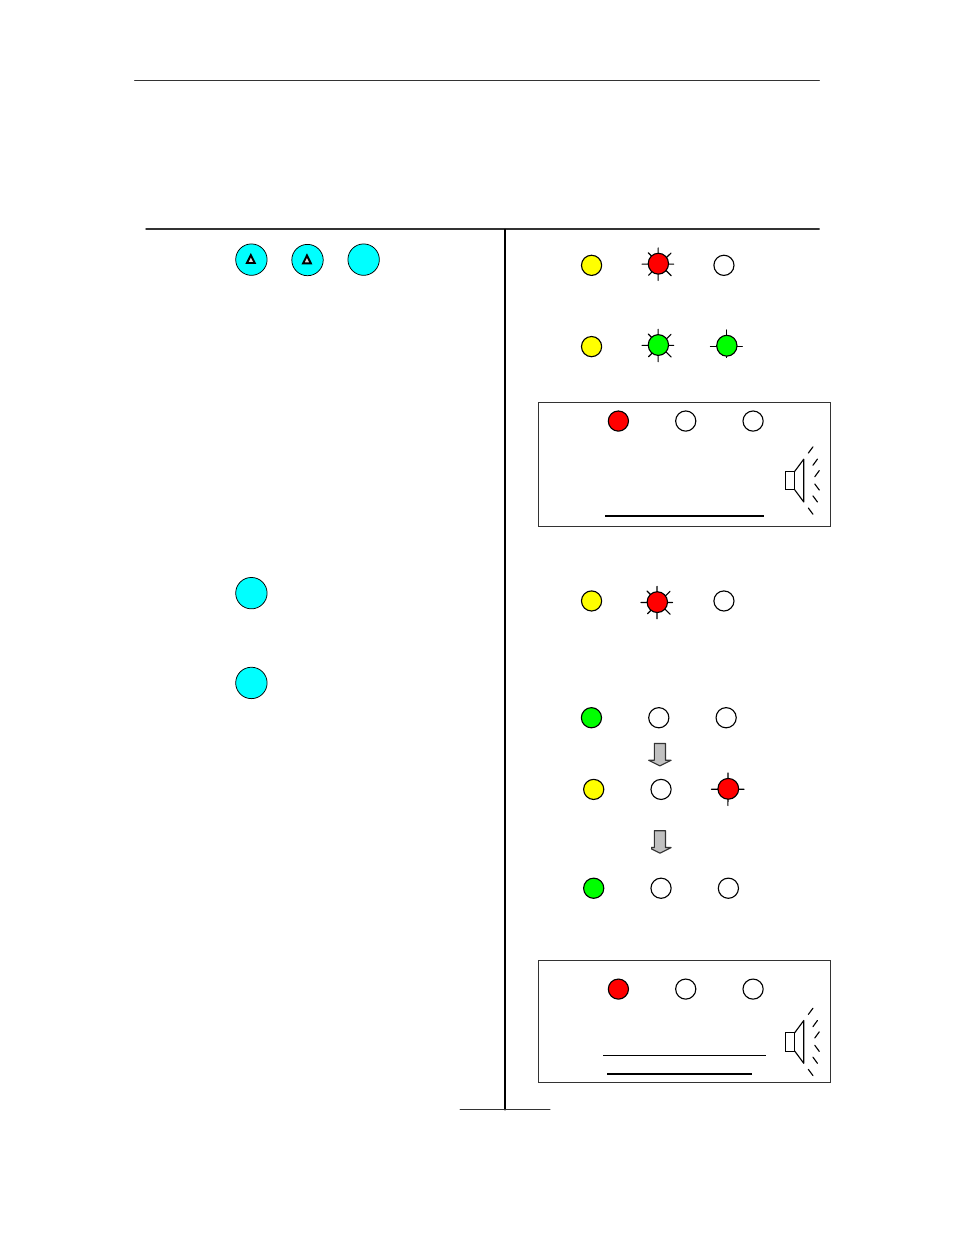
Steps
LED and Buzzer Status
Press , , .
The LEDs will light up as shown in 1. The sensor
will also light up, waiting for a master fingerprint
to be verified.
Place the master finger on the sensor to verify.
a) If the finger is successfully verified as a
master, the 1
st
LED will blink green briefly as
shown in 2(a). The 2
nd
LED will blink fast in
green while the 3
rd
LED will blink slowly in
green next. Proceed to step 3.
b) If the finger is not successfully verified as a
master, the 1
st
LED will blink red briefly as
shown in 2(b). Operation will cease and return to
normal mode.
Press 3 times to proceed with the
operation.
Or,
Press once to abort.
When the # key is pressed 3 times, The 2
nd
LED
will blink fast in red as shown in 3. The sensor
will also light up to ask for the master fingerprint
verification again. Proceed to step 4.
If the * key is pressed, operation will cease and
return to normal mode.
Place the master finger on the sensor to verify.
a) If the finger is successfully verified as a
master, the 1
st
LED will blink green briefly as
shown in 4(a). The 3
rd
LED will blink slowly in
red next, indicating that the operation is in
progress. At the end of the operation, the 1
st
LED
will blink green briefly to indicate that the delete
all operation has been completed successfully.
b) If the finger is not successfully verified as a
master, the 1
st
LED will blink red briefly as
shown in 4(b). Operation ceases and will return
to normal mode.
1
1
5
AMBER
RED
2b
RED
→AMBER
Master verification fails
2a
2
AMBER
GREEN
GREEN
AMBER
RED
4
3
#
*
3
RED
4b
RED
→AMBER
Master verification fails,
erasure not continued
GREEN
→AMBER
GREEN
→AMBER
4a