4a 4b, 4 using the administration modes (enrollment) – Keri Systems BioPointe Users Manual User Manual
Page 29
Administering the BioPointe
28
4.4 Using the Administration Modes (Enrollment)
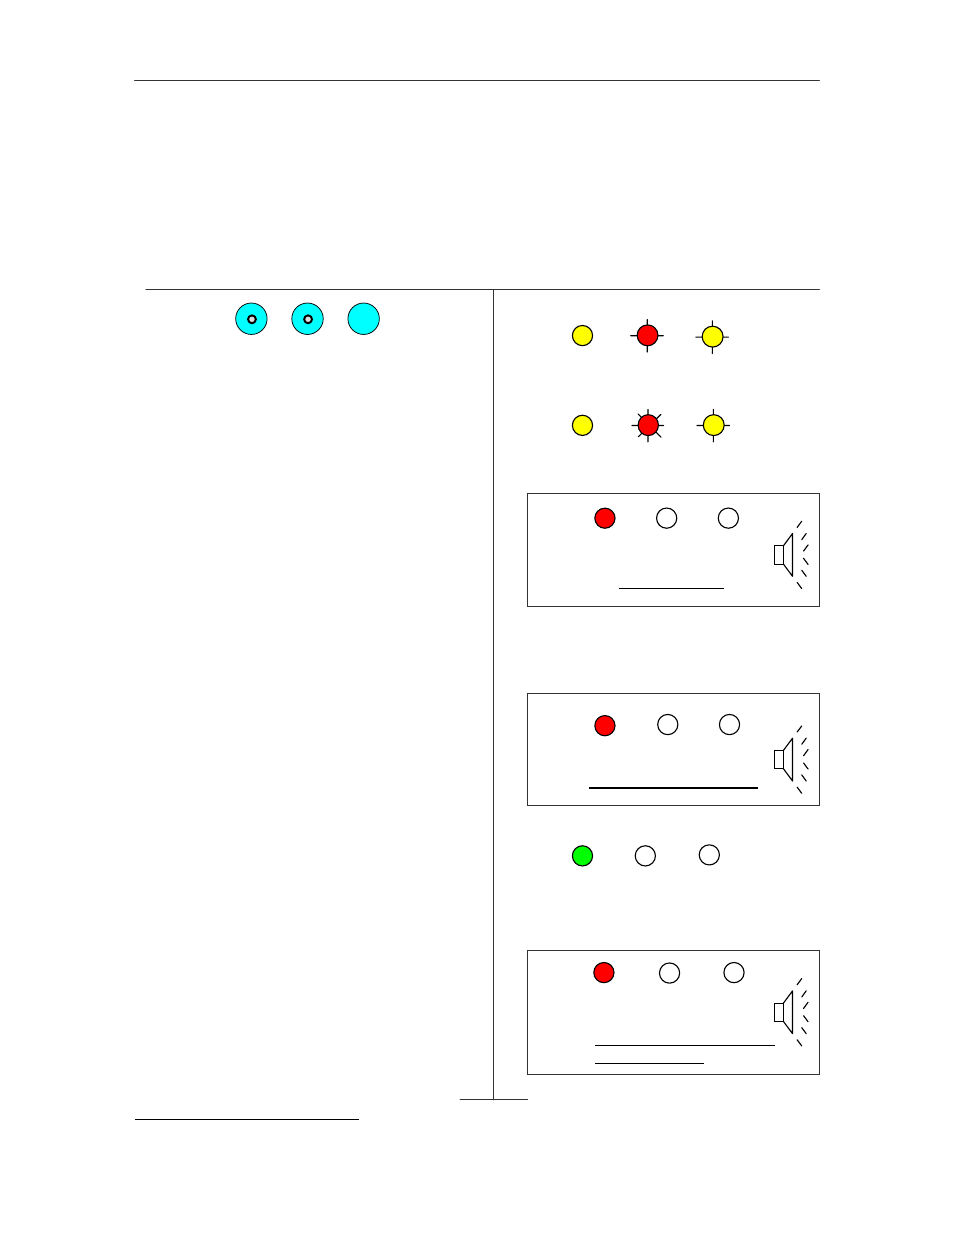
4.4.1 Enrolling the First Master of the Device
When you first receive the device, there are neither any master nor any other fingerprints within it. The steps
below show you how to enroll the first Master.
Steps
LED and Buzzer Status
Press , , .
The LEDs will light up as shown in 1.
When the 2
nd
LED starts to blink slowly
in red,
Enter a 4-digit
2
ID.
a) If the 4-digit ID is accepted, the 2
nd
LED will
blink fast in red as shown in 2(a), and the sensor
will light up. Proceed to step 3.
b) If the ID is not accepted, the 1
st
LED will blink
red briefly as shown in 2(b). Operation will cease
and return to normal mode.
Place your finger on the sensor for the
enrollment when the sensor lights up.
Each successful enrollment requires 2 image
captures.
a) The sensor will go off after the first image has
been successfully captured, and a series of beep
sound will be heard. Proceed to step 4.
b) If the first capture is not successful, the 1
st
LED will blink red briefly as shown in 3.
Operation will cease and return to normal mode.
Lift up your finger when you hear the
series of beep sound and place it back on
the sensor when it lights up again.
This is for the second capture.
a) If the 2
nd
capture is successful, the 1
st
LED will
blink green briefly as shown in 4(a). The
enrollment is successful. Operation will return to
normal mode.
b) If the 2
nd
capture is not successful, the 1
st
LED
will blink red briefly as shown in 4(b). Operation
will cease and return to normal mode.
2
The number of digits, by default is 4. But it can be changed by BioPointe Central. The range can be from 3 to 10 digits.
1
1
AMBER
RED
AMBER
2
2a
AMBER
RED
AMBER
2b
RED
→AMBER
ID not accepted
3
GREEN
→AMBER
4a
4b
RED
→AMBER
2nd capture not successful.
enrollment fails.
4
3
RED
→AMBER
1st capture not successful
1