Keri Systems BioPointe Users Manual User Manual
Page 35
Administering the BioPointe
34
4.4.5 Enrolling a User with Card with PIN
The following steps describe how to enroll a user with Card with PIN.
Note: The presence of the Card is not necessary when the "PIN-Only" feature is turned on. If Card presence
is not necessary, the ID input can be through the keypad. For more details on this feature, refer to the section
on "PIN-Only" in Chapter 3 – Features.
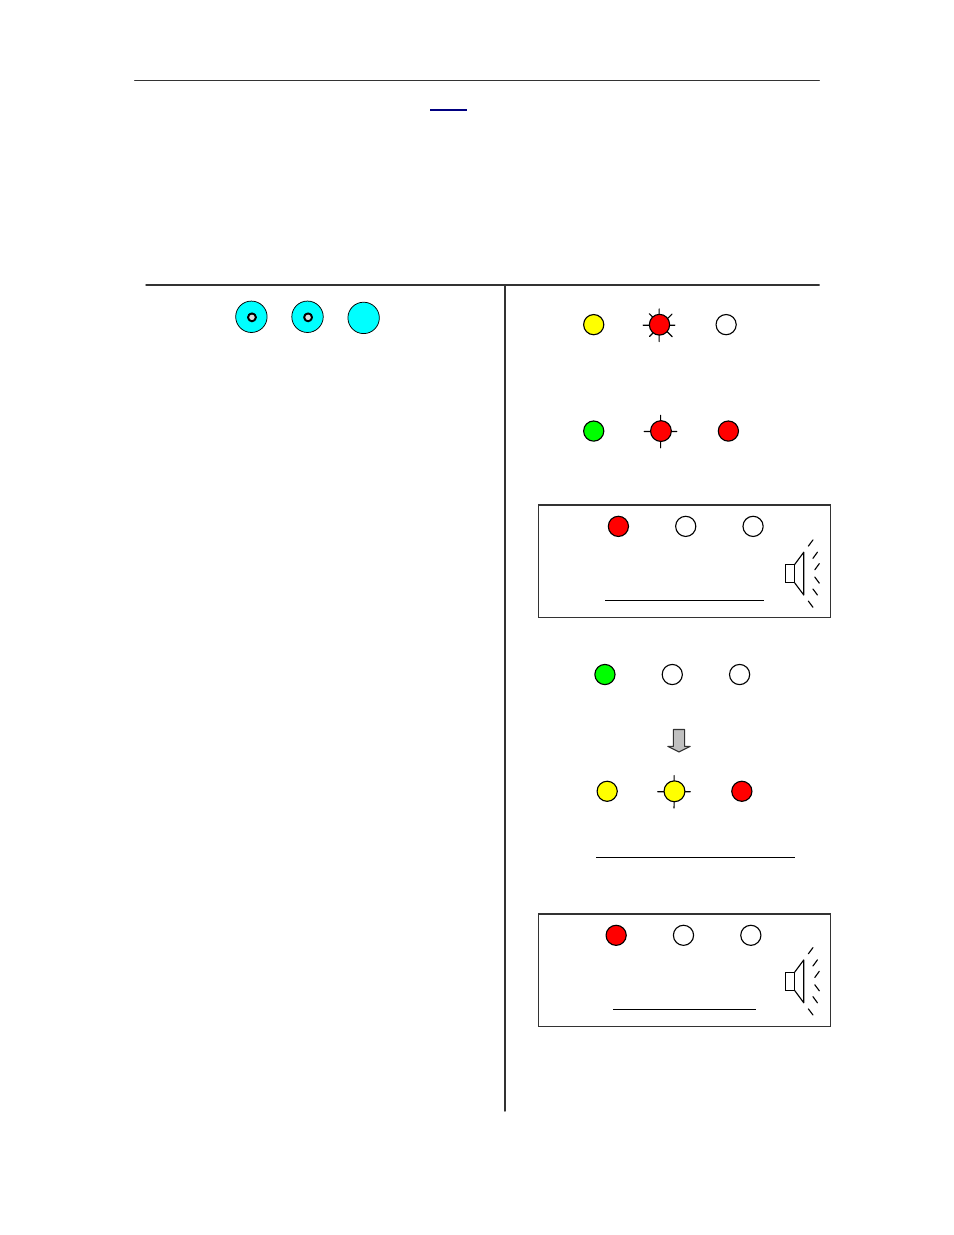
Steps
LED and Buzzer Status
Press , , .
The LEDs will light up as shown in 1. The sensor
will also light up, waiting for a master fingerprint
verified.
Place the master finger on the sensor to
verify.
a) If the finger is successfully verified as a
master, the 1
st
LED will blink green briefly as
shown in 2(a). Proceed to step 3.
b) If the finger is not successfully verified as a
master, the 1
st
LED will blink red briefly.
Operation will cease and return to normal mode.
When the 2
nd
LED starts to blink slowly
in red,
Flash your card above the fingerprint
sensor.
a) If the card ID is accepted, the 1
st
LED will
blink green briefly as shown in 3(a). The 2
nd
LED
will blink slowly in amber next. Proceed to step
4.
b) If the card ID is not accepted, the 1st LED will
blink green briefly as shown in 3(b). Operation
will cease and return to normal mode.
1
1
AMBER
RED
2
2a
GREEN
→AMBER
RED
RED
2b
RED
→AMBER
3
Master verification fails
GREEN
→AMBER
3a
AMBER
AMBER
Waiting for PIN to be entered
RED
RED
→AMBER
3b
Card ID not accepted
4