Storix Software SBAdmin TSM Edition Users Guide User Manual
Page 79
made. If you select a different option, the checkmark will be removed from the previous selection. After
making your selection, click the
Continue
button at the bottom of the screen.
7. You will be returned to the previous window, where you must select each of the following:
Client on which to create - This field will show the original client from which the backup was made.
The backup information may be used to create the logical volumes and filesystems on a different client
by selecting the arrow button to the right of this field and selecting a different client from the list.
Logical Volume(s) to create - To list and select the logical volume(s) (and filesystems) that are
defined on the backup and select one or more to create from the list, select the arrow next to this field.
You must select at least one logical volume to continue.
8. When all selections have been made, press the
Continue
button at the bottom of the screen. A new
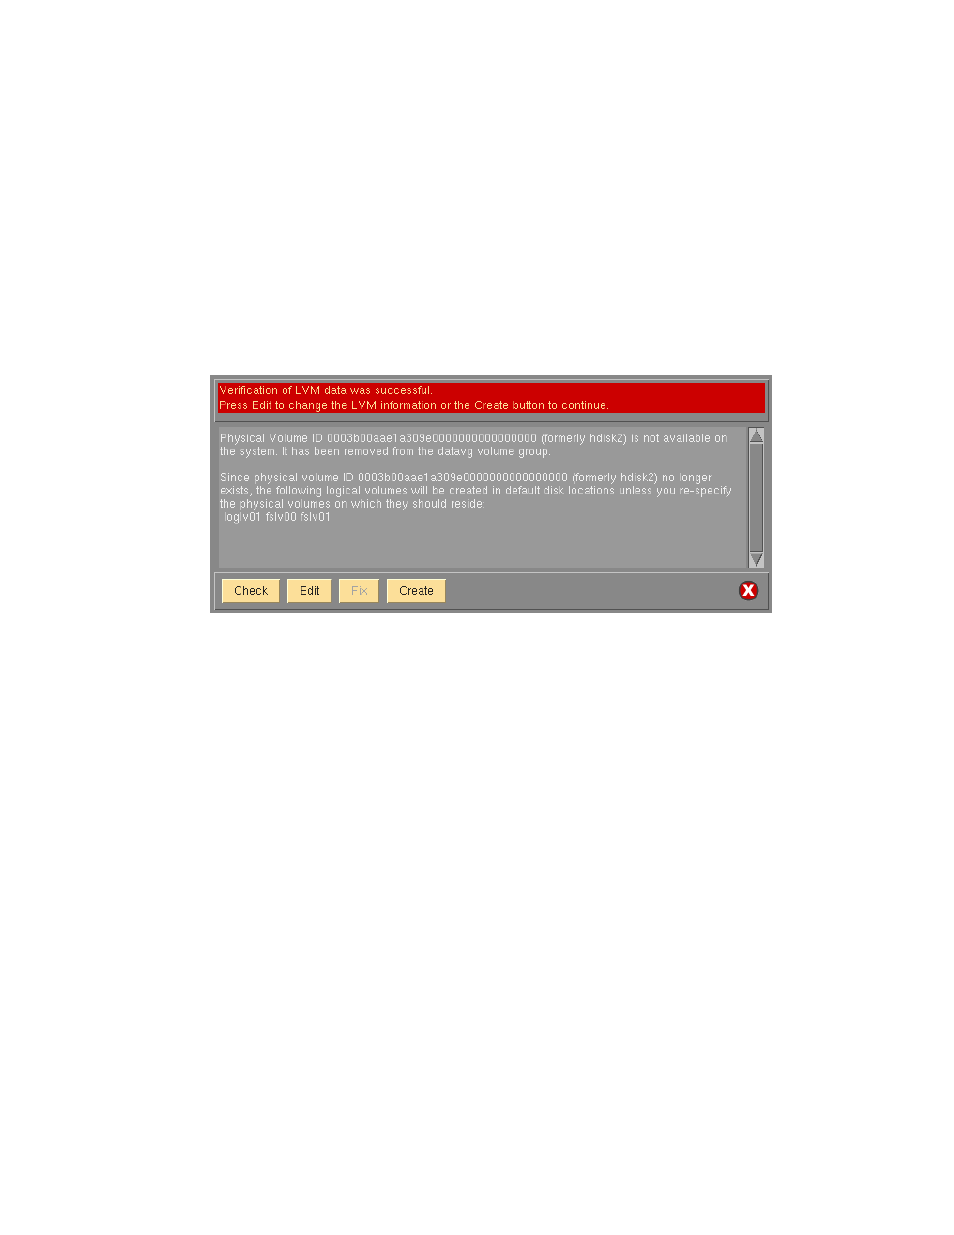
screen similar to the following will appear and the LVM data on the media will be retrieved and checked
for consistency with the current system configuration:
If there are changes required to make the selected volume group fit onto the current system, the
Edit
and
Fix
buttons will become available. If there are no problems found, the
Create
button will be
available.
a. The
Check
button may be used to check the LVM information again. This is automatically
performed when you initially display this screen and any time you change the volume group, logical
volume or filesystem information.
b. The
Edit
button may be used to change any of the volume group, logical volume or filesystem
information defined on the backup in order to make the volume group conform to the current
system configuration. This may include changing the volume group or logical volume names,
selecting different disks on which to build the volume group, etc. This editing process is identical to
that which is available during a system installation, and is described in detail in the section
Change the Volume Group, Logical Volume and Filesystem Information in the
SBAdmin AIX
System Recovery Guide
. After following the instructions in that section, press the
ESC (escape)
key on that screen to exit and save changes.
c. The
Fix
button may be used if there were non-fatal errors that can be automatically repaired. For
instance, if there is only one physical volume available, and a logical volume is striped, the striping
would need to be turned off to create the logical volume as this required at least two physical
volumes. The errors described in the messages section of the window indicate if and what changes
would automatically be made if the
Fix
button is selected.
d. The
Create
button will become available only after all errors, both fatal and non-fatal, have been
fixed (either using the Fix button or by editing the volume group, logical volume or filesystem
information using the Edit button). When you select this button, the volume group and all of its
logical volumes and filesystems will be created as defined and the messages will be updated to
reflect the progress and completion of the process as follows:
Storix System Backup Administrator
79
Version 8.2 TSM Edition User Guide