Groups, Adding a group, Removing a client – Storix Software SBAdmin TSM Edition Users Guide User Manual
Page 23
5. Groups
To configure Groups you must be logged into SBAdmin as a
with “System Admin” privilege.
When SBAdmin was first installed the group “main” was created. “main” will function as the default group and no
further group configuration is necessary. You may choose to configure groups to assist with organization or
security in your backup environment.
Groups are used to allow a single SBAdmin to organize and manage Storix
and
; and may be
configured to allow or restrict certain
access. Groups are also necessary when configuring servers that will
share or limit client access based on group ID. For further examples of groups please see the
section of this guide.
Adding a Group
To add a group, select
Configure->Groups
from the menu bar. A similar looking screen will appear:
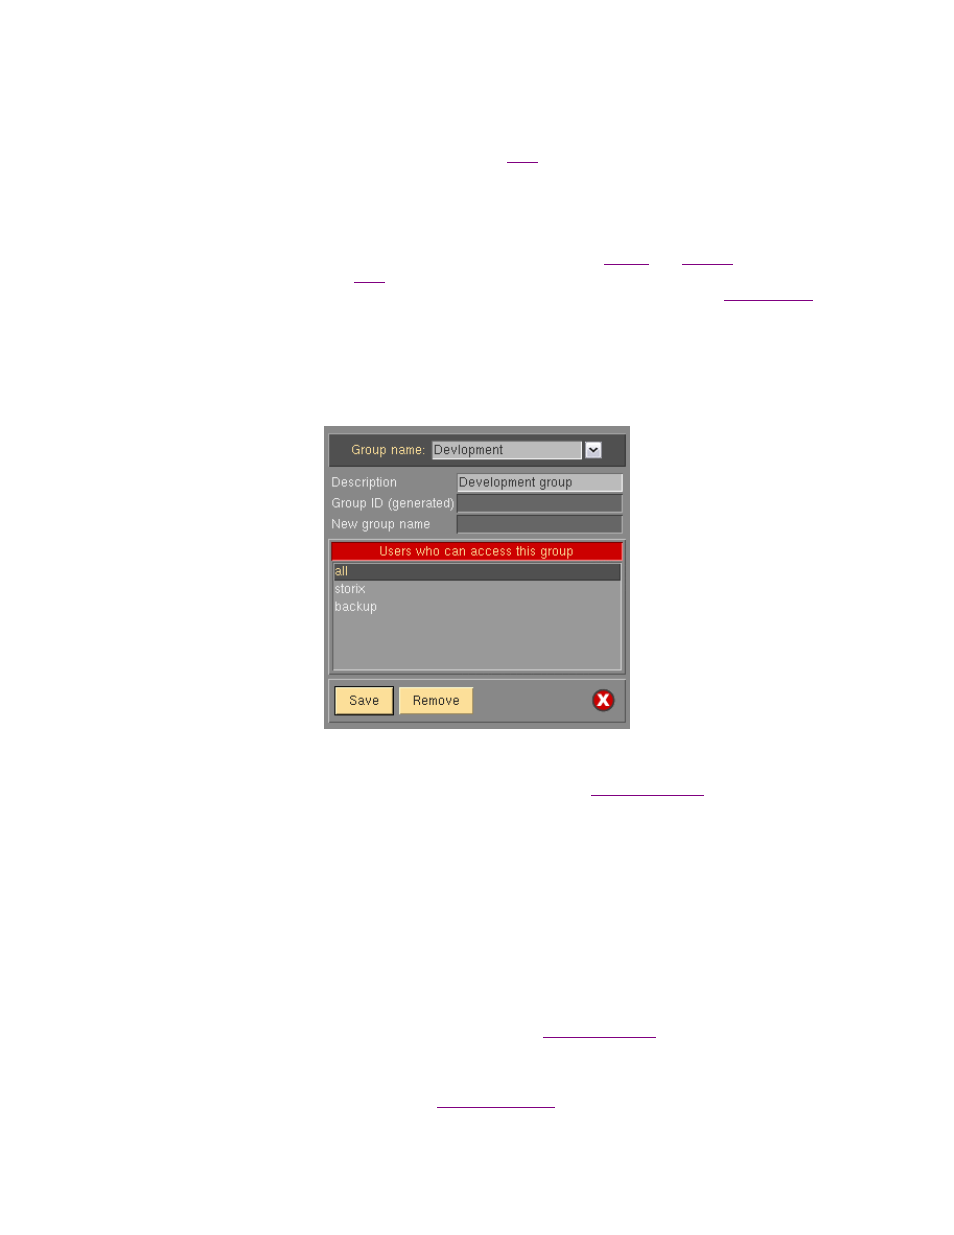
From this screen, simply type the name of the group to add in the
Group name: entry field and optionally a
Description of the group. The Group ID field will be automatically populated with a unique value to be
associated with the group. The
New group name field is only used when
. Select any users
who should have access to this group from the
Users who can access this group box. Then press the
Save
button.
When finished, press the
Cancel
button at the bottom.
•
Group name: - This field defines the name of the group to be added.
•
Description – This is an optional field, it is used to elaborate on and clarify what this group
may be used for.
•
Group ID – This field will be automatically populated when adding a group. It is a unique
identifier and will not change if the group name is later changed.
•
New group name – This field is only used when
.
•
Users who can access this group – This field allows you to specify one or more users that
have permission to launch the SBAdmin interface under this group. For more information on
users and user roles please see
Storix System Backup Administrator
23
Version 8.2 TSM Edition User Guide