3 installing a hardware raid controller – Kontron CG1200 Carrier Grade Server User Manual
Page 46
40
Kontron CG1200 Carrier Grade Server Installation and Maintenance Guide 40
7. Re-Installing the Front Bezel”.
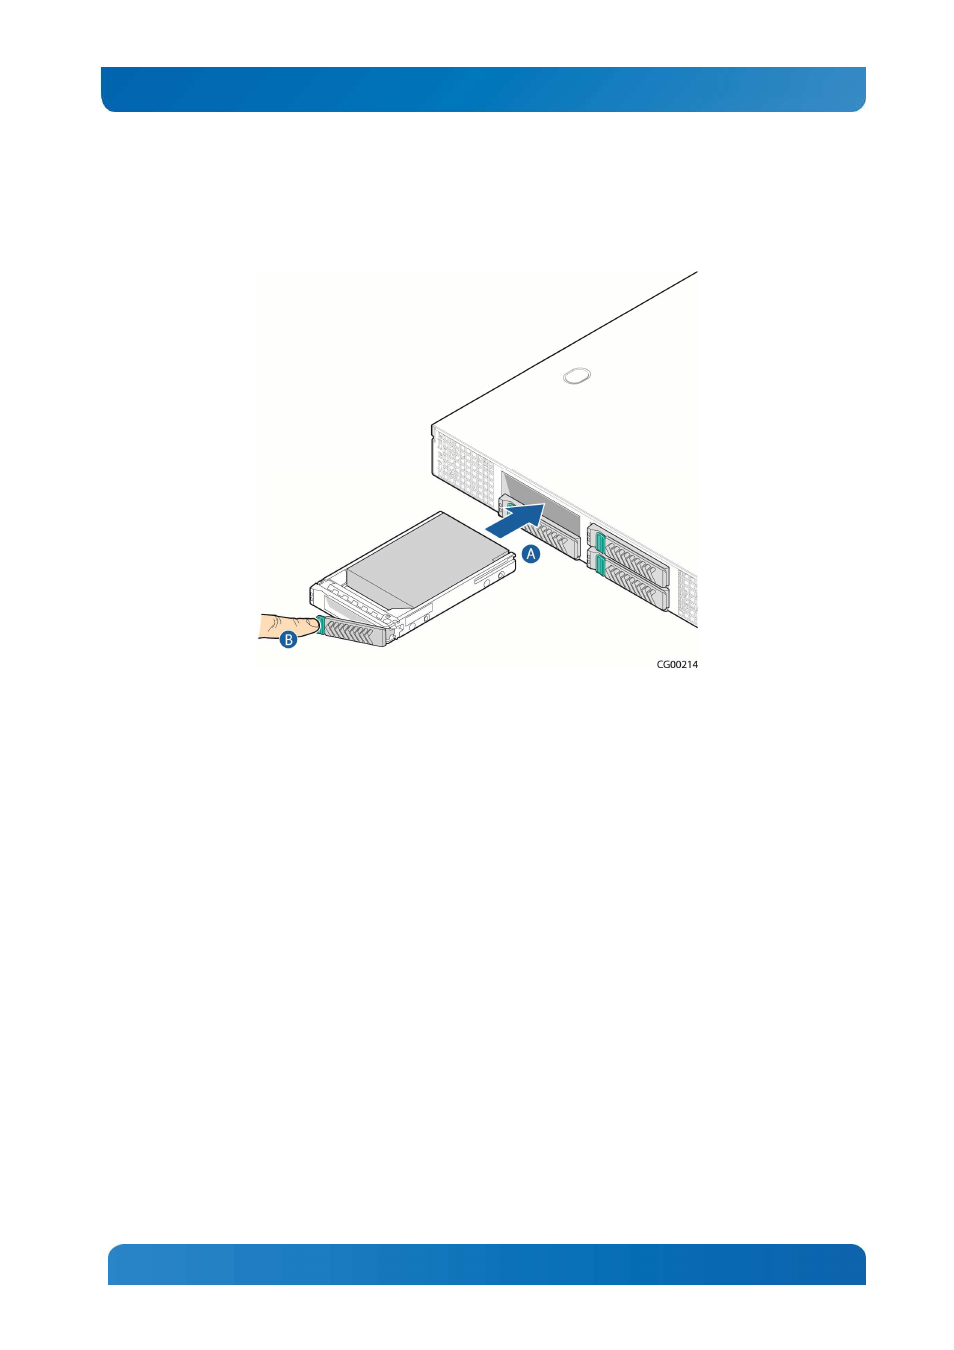
Figure 28: Inserting a New Hard Drive into the Chassis
4.3
Installing a Hardware RAID Controller
The CG1200 server supports the use of a RAID-on-chip (ROC) hardware RAID controller. This option is
separately orderable. The ROC module can be used with or without a SuperCap maintenance-free
backup module. If you are using the SuperCap module, the ROC module must be installed first, then the
SuperCap module.
Before you can install the ROC you must first remove the chassis cover, the front bezel, the PCIe fan
duct, and the riser card assembly.
4.3.1 Installing the ROC Module
1. Power down the server and remove all external devices and the power cord(s).
2. Remove the chassis cover. For instructions, see Section 3.2.1 “Removing the Chassis Cover”.
3. Remove the front bezel if you will be using the ESD ground attachment on the server for your anti-
static wrist strap grounding. For instructions, see section 3.2.3, “Removing the Front Bezel”.
4. Remove the riser card assembly. For instructions, see section 3.2.5, “Removing the Riser Card
Assembly”.
5. Remove the black plastic PCIe fan duct assembly:
NOTE: The fan does not need to be removed from the duct.
a. Disconnect the fan power/signal cable from the server board. (Figure 29, “A”)