Lift kit installation – Dynojet 424xLC2: Installation Guide User Manual
Page 170
A P P E N D I X C
Lift Kit Installation
Above Ground Model 424x/424xLC
2
Automotive Dynamometer Installation Guide
C-16
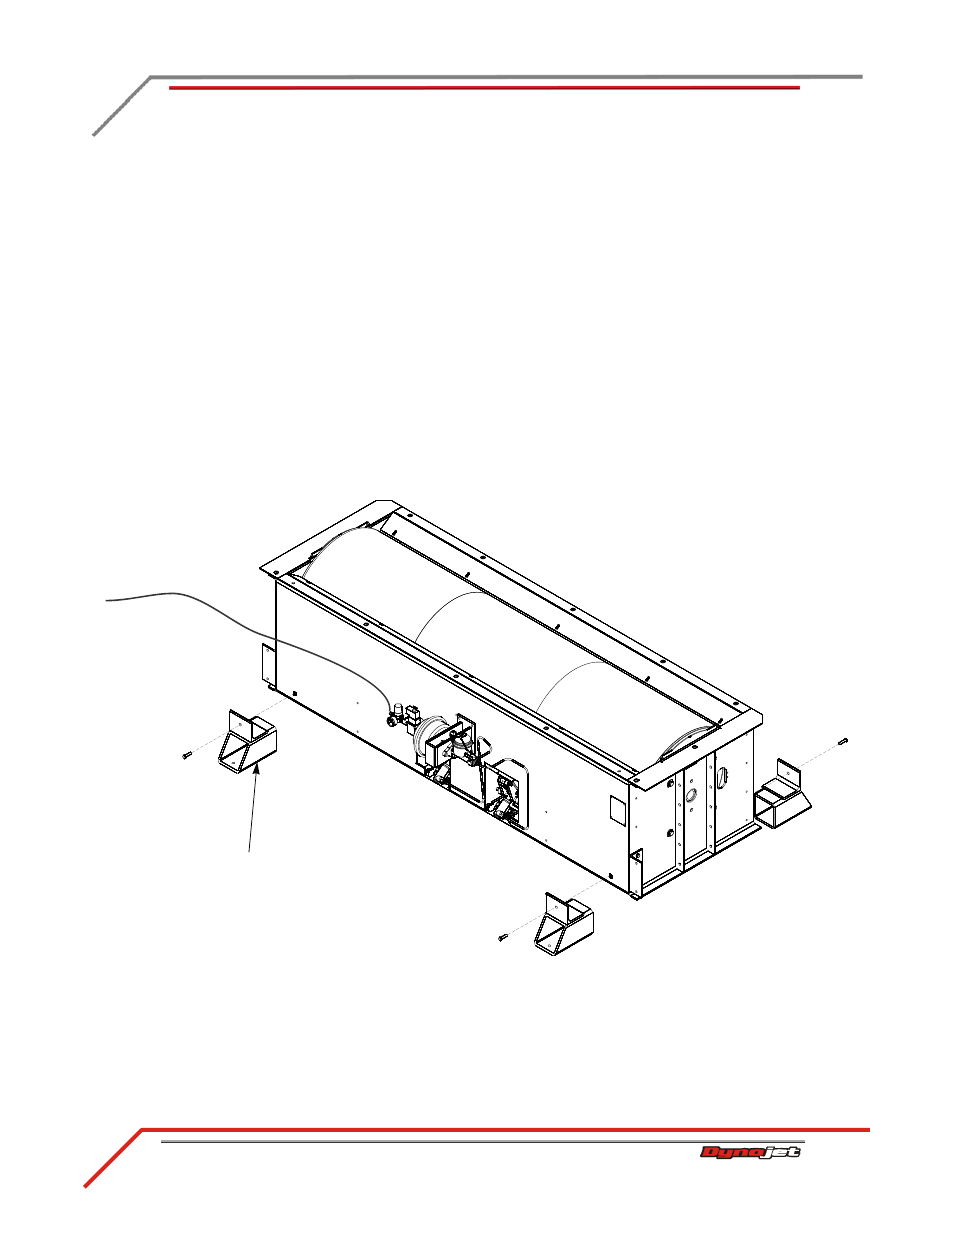
LIFT KIT INSTALLATION
Once the rear deck has been removed, the lift kit must be installed. The lift kit will
raise the stationary dyno to match the 4WD dyno.
You will need the following parts:
• 61319600
Riser Foot Assembly (4)
• 36582471
Bolt, 3/8-16 x 1.5", Flange-Hex (4)
1
Remove the four bolts securing the dyno to the floor and set aside.
2
Using single loop straps and a forklift, raise the dyno off the floor.
3
Remove the bolts and washers securing the existing feet and remove the feet.
4
Secure the four new lifting feet to the bottom of the dyno using one
3/8-16 x 1.5-inch flange bolt each.
5
Lower the dyno back in place.
6
Secure the dyno to the floor using the bolts you removed earlier.
7
Continue with upgrading your air fittings on page C-17.
Figure C-15: Install the Lifting Feet
A 559
D
lifting foot