Installation/setup transmig 250i – Tweco 250i Transmig Inverter User Manual
Page 29
INSTALLATION/SETUP
TRANSMIG 250i
Manual 0-5187
3-11 INSTALLATION/SETUP
LIFT TIG
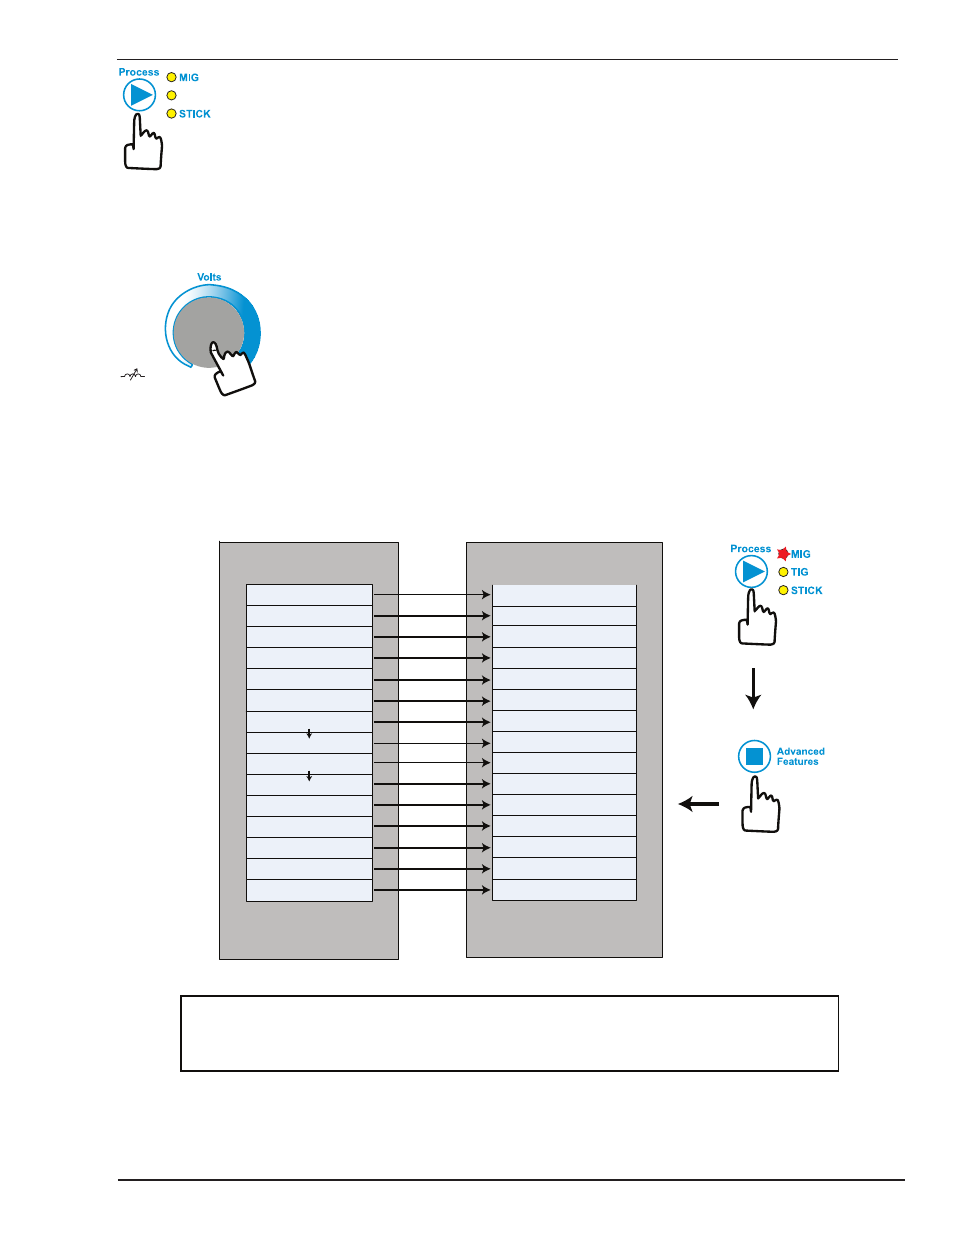
If the welder is in Advanced Features mode and the Weld Process Selection button (Control No 4) is pressed, the
welder will exit Advanced Features mode, saving any change made, and change to the next weld process function in
the sequence: MIG, TIG, stick. If you wish to view the Advanced Features for the next process you will need to enter
the Advanced Features function again.
Push For Inductance
Arc Control
Right Knob
If the welder is in Advanced Features mode and the right knob (Control No 8) is pressed for one (1) second (to enter
Arc Control Function) the welder will exit Advanced Features mode, saving any change made, and enter the Arc Control
Function for the currently selected weld process.
MIG (GMAW/FCAW)Mode Advanced Features Menu Map
RUN- / IN
POST / FLOW
BURN / BACK
WIRE / SHRP
Advanced Menu – MIG
Mode
Wire Feed Speed
ARC- / TYPE
MIG / CNTL
PRE- / FLOW
SPOT
STCH
DWEL / TIME
ON OFF
*STCH / TIME
AUTO CV
Advanced Menu - MIG
Options or Range
Press Advanced Button
to Exit to Welding Mode
LOCL REMT
0.1 - 5.0 S
MPM IPM
WFS- / UNIT
30 - 150%
0.0 - 30.0 S
0.00 - 1.00 S
0.1-20.0 S
FACT / DFLT
HR
*SPOT / TIME
0.2 - 4.0 S
0.1 - 1.0 S
0.0 - 9999.9
NO YES
Press Advanced Button
to Exit to Welding Mode
Left Display
Right Display
ON OFF
ON OFF
Left Knob Selection
* SPOT TIME and STCH TIME are only active when SPOT or STCH are “ON”.
Note “SPOT” and “STCH” are MUTUALLY EXCLUSIVE functions. If the user enables either function and the system
detects that the OTHER function is already ON, the system will automatically turn the OTHER conflicting function OFF.
Left Display: Where (2) items shown, e.g. RUN- / IN, the display will alternate (flash) between the (2) items
Right Knob Selection
Art # A-10321
Figure 3-5 MIG Advanced Menu