Tweco 500SP PowerMaster Automation User Manual
Page 32
POWERMASTER 400SP, 500SP AUTOMATION
3-8
March 16, 2007
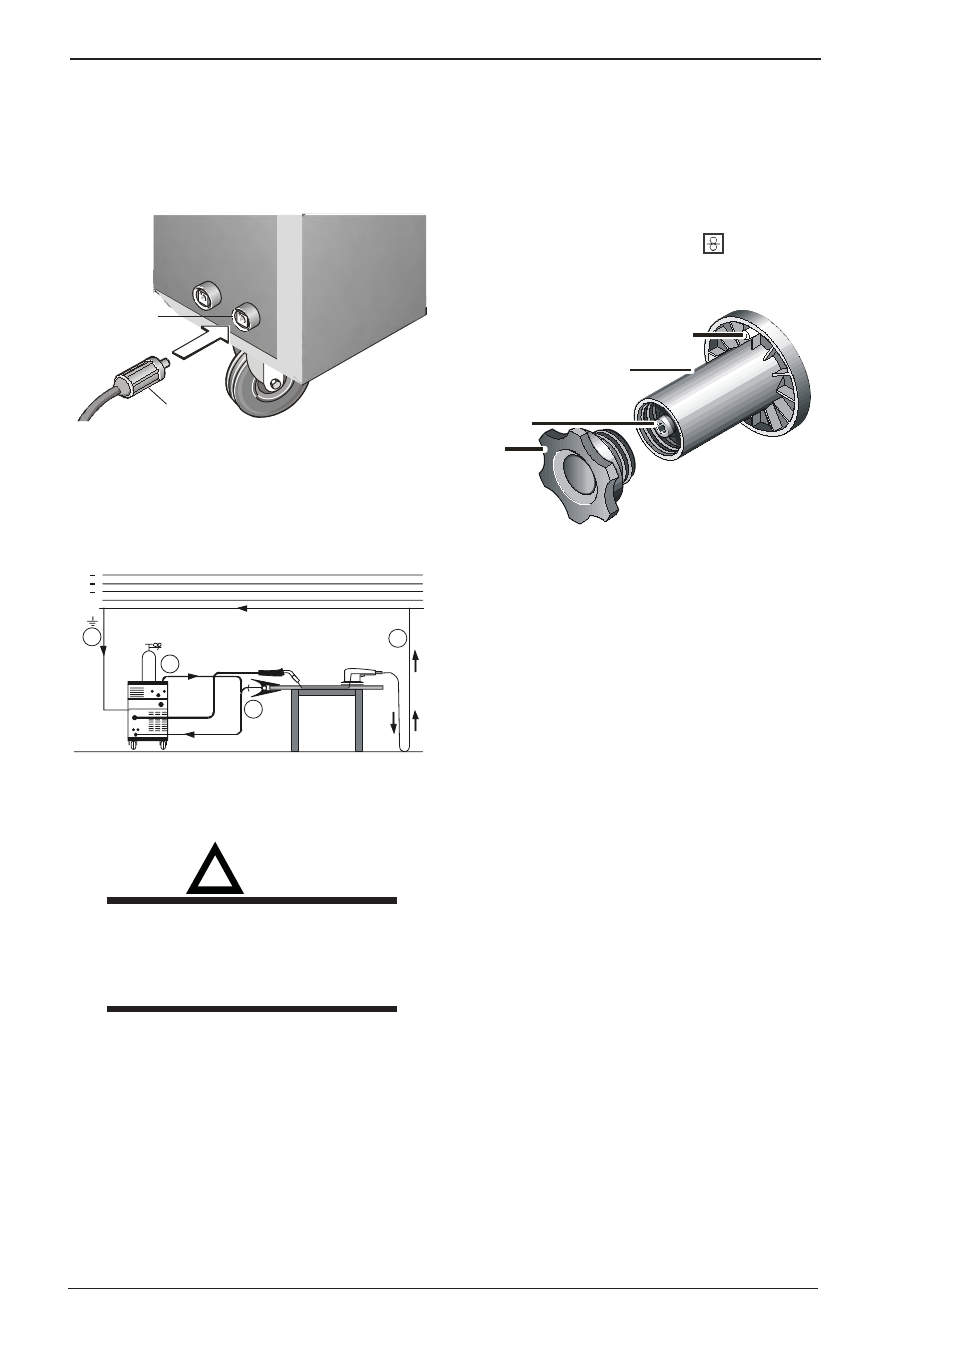
B. How To Connect The Work lead
Connect the work lead to the Negative connection and
fasten it by turning the connector to the right. Connect
the Work clamp to the workpiece or the welding table.
Art # A-06366
Negative
Connection
Work Lead
C. Where to connect the Work Clamp
Fasten the Work clamp (shown as #2 below), near the
welding location; this avoids stray current flow through
mains earthing system.
Art # A-06367
2
1
1
L
L
L
N
E
1
Connect the Work clamp tightly to the welding bench
or to the workpiece.
!
WARNING
Do not place the Work clamp on the welding
power supply or gas cylinder as welding
current may be conducted via the mains
earth and will burn it out.
D. How To Connect To The Mains
Refer to Connecting Input Power Section.
E. How To Install The Wire Spool
Open the wire feed compartment lid on the power
supply or wirefeed case and un-screw the nut from
the wire support coil hub.
Place wire spool on the hub and ensure that the drive
dog-pin engages the mating hole in the wire spool.
Press then release the inch switch
to adjust the
brake, the wire spool should not continue to run.
Art # A-06368
Drive pin
Hub
Brake
Nut