10 system operation – Tweco Weld Sequencer User Manual
Page 33
Manual 0-2023
27
OPERATION
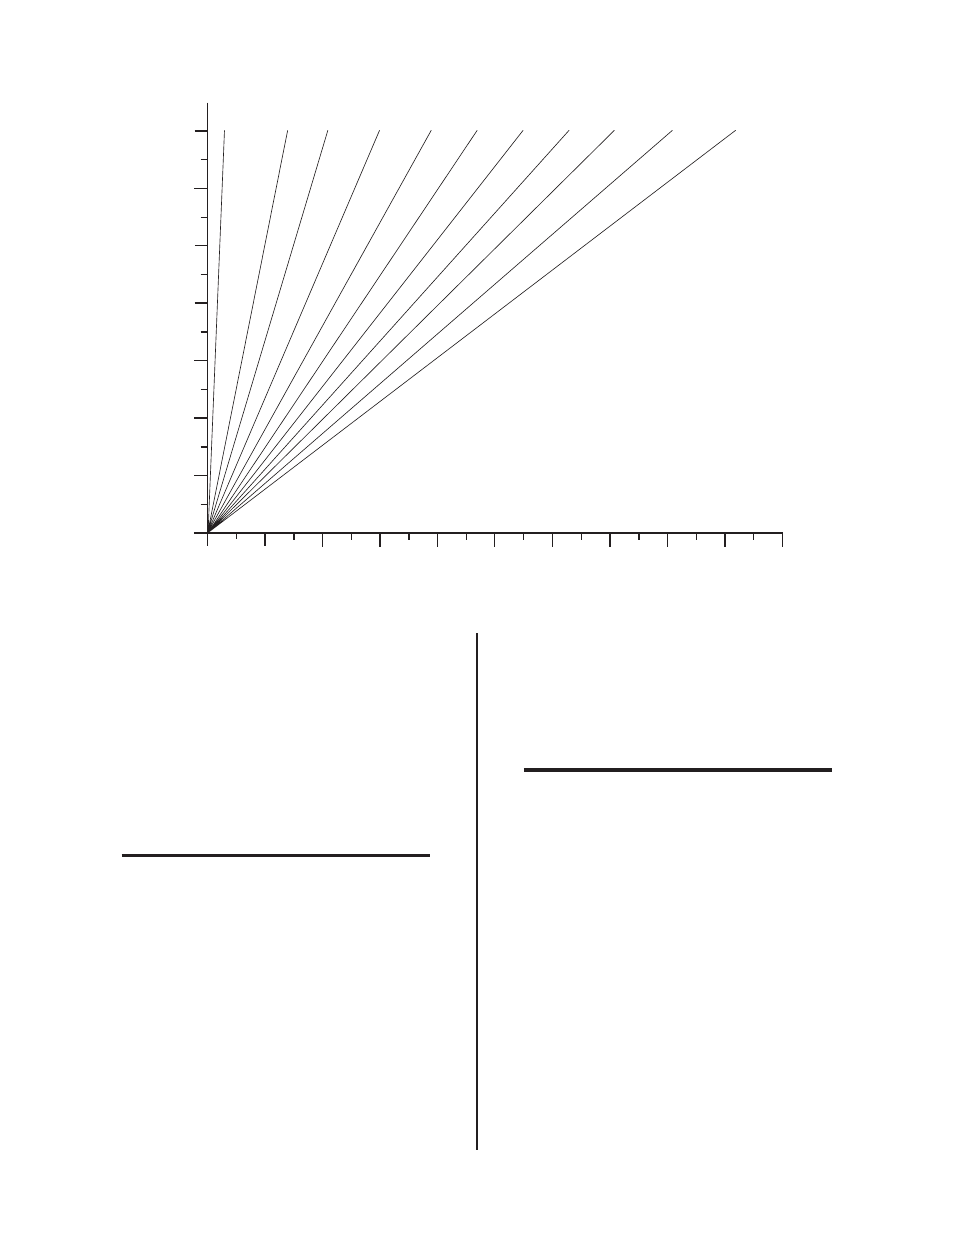
10. Adjust GS1 DOWNSLOPE RATE to correspond to
current downslope rate (if CS1 is used) or to achieve
the desired rate refer to Figure 4-10.
11. Adjust delay time for the start of downslope using
the GS1 DOWNSLOPE DELAY knob. The numbers
specify delay time in seconds (from 0 to 10 seconds).
4.10 System Operation
NOTES
Refer to Appendix VI for timing and detailed se-
quence of operation for all Weld Sequencer Mod-
els.
Refer to Appendix VII for timing and detailed se-
quence of operation for GS1 Gas Slope Only.
1. Position torch for start of weld.
2. Turn on gas supplies.
3. Activate welding console, coolant recirculator, power
supply, weld sequencer and any accessory control cir-
cuits.
4. Turn on all control modules in the weld sequencer that
are to be used.
5. Move the RP1 Control CONTACTOR ON/OFF switch
to ON position to close the main contactor.
6. Push the RP1 Control START SEQUENCE switch to
start the welding sequence (see NOTES).
NOTES
1. If spot welding, once the CONTACTOR switch
is moved to ON position only the SPOTWELD
switch must be pressed to continue.
2. If GS1 is not used the entire weld sequence will
start with contactor closure and pressing the
START SEQUENCE switch. If GS1 is set in to
MANUAL, CS1 (if used) will not operate.
3. If CS1 is not used and GS1 is set to MANUAL,
start gas upslope by pressing the RP1 Control
START SEQUENCE switch. Start gas
downslope by pressing the RP1 Control START
DOWNSLOPE switch.
0
0
1 0
2 0
3 0
4 0
5 0
6 0
7 0
8 0
9 0
1 0 0
1
2
3
4
5
6
7
A - 0 2 4 3 6
Rate = 10
Rate = 9
Rate = 8
Rate = 7
Rate = 6 Rate = 5 Rate = 4 Rate = 3Rate = 2 Rate = 1
Rate = 0
T i m e ( S e c o n d s )
Max - Min Gas Flo
w (scfh)
Figure 4-10 GS1 Upslope and Downslope Rate Selection