Mount the switch on a wall or panel – Rockwell Automation 1783-Mxxx Stratix 8000 and 8300 Ethernet Managed Switches User Manual User Manual
Page 26
26
Rockwell Automation Publication 1783-UM003I-EN-P - March 2014
Chapter 1 Install the Switch
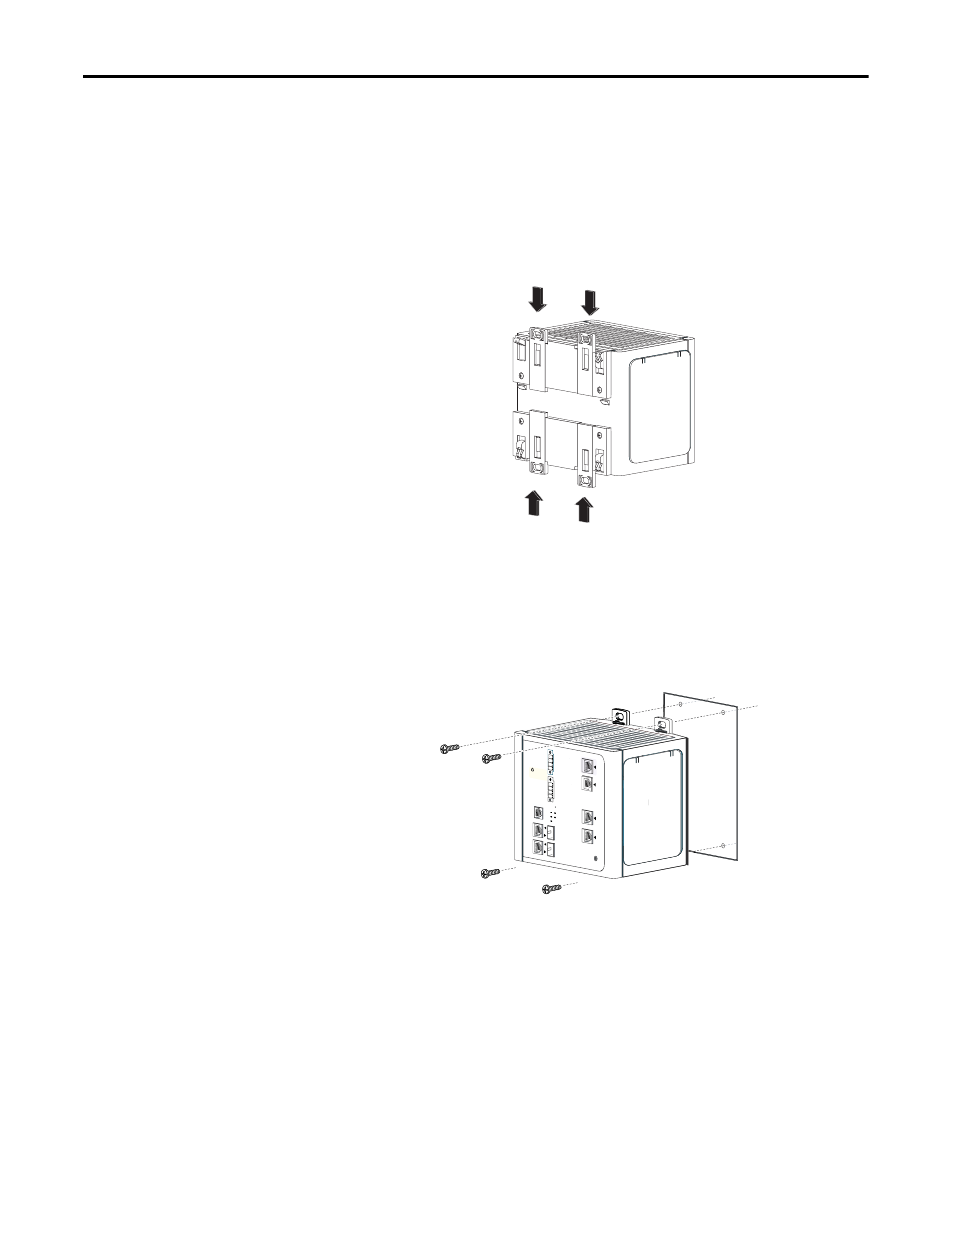
Mount the Switch
on a Wall or Panel
The switch can be mounted on a wall or a panel. You need M5 or #10-24 or
#10-32 bolts or screws with 1.27 cm (0.5 in.) O.D. flat washers. This hardware is
not provided with the switch.
Follow these steps to mount the switch to a wall or a panel.
1. If the DIN rail latches are pushed out, push them in so they are fully
locked in place.
2. Rotate all feet to their recessed positions so that the switch can mount flat
on the wall or pane.
If greater air circulation around the switch is required, rotate the feet to
their extended positions before mounting the switch on the wall.
3. Position the rear panel of the switch against the wall or a panel in the
desired location, as shown in this figure.
4. Place M5 or #10-24 or #10-32 bolts or screws with 1.27 cm (0.5 in.) O.D.
flat washers through each DIN rail latch, and screw them into the wall.
31777-M
1
3
4
1
2
t
s
yl
at
a
C
o
c
si
C
C
D
V
4
2(
A
r
w
P
)
C
D
V
8
4
ro
nt
R A
4
2(
B
r
w
P
ro
C
D
V
8
4 D
V )C
nt
R B
p
x
E
p
ut
e
S
ss
er
ts
y
S
m
e
m
ra
lA
te
S pu
A
r
w
P
B
r
w
P
oj
a
M
lA
r
m
ra
M on
i
lA
r
m
ra
ti
n
u
s
i
h
T
i
m
t
h
g
a
h
e
v
e
r
o
m
th n
a
e
n
o
w
o
p
r
e
r
o
c
.
d
o
T
re
t
e
c
u
d
e
h ris o
k f
c
e
l
e
tri s
c
c
o
h
d
k
c
s
i
e
n
n
o
t
c
o
w
t
e
h
t
w
o
p
r
e
r
o
c
s
d
f
e
b
e
r
o
i
v
r
e
s
.t
i
n
u
g
n
i
c
G
N
I
N
R
A
W
!