Architectural, Peak detail – Metal Sales Soffit Panel User Manual
Page 47
© Metal Sales Manufacturing Corporation / Subject to change without notice, effective 02/09.
46
ARCHITECTURAL
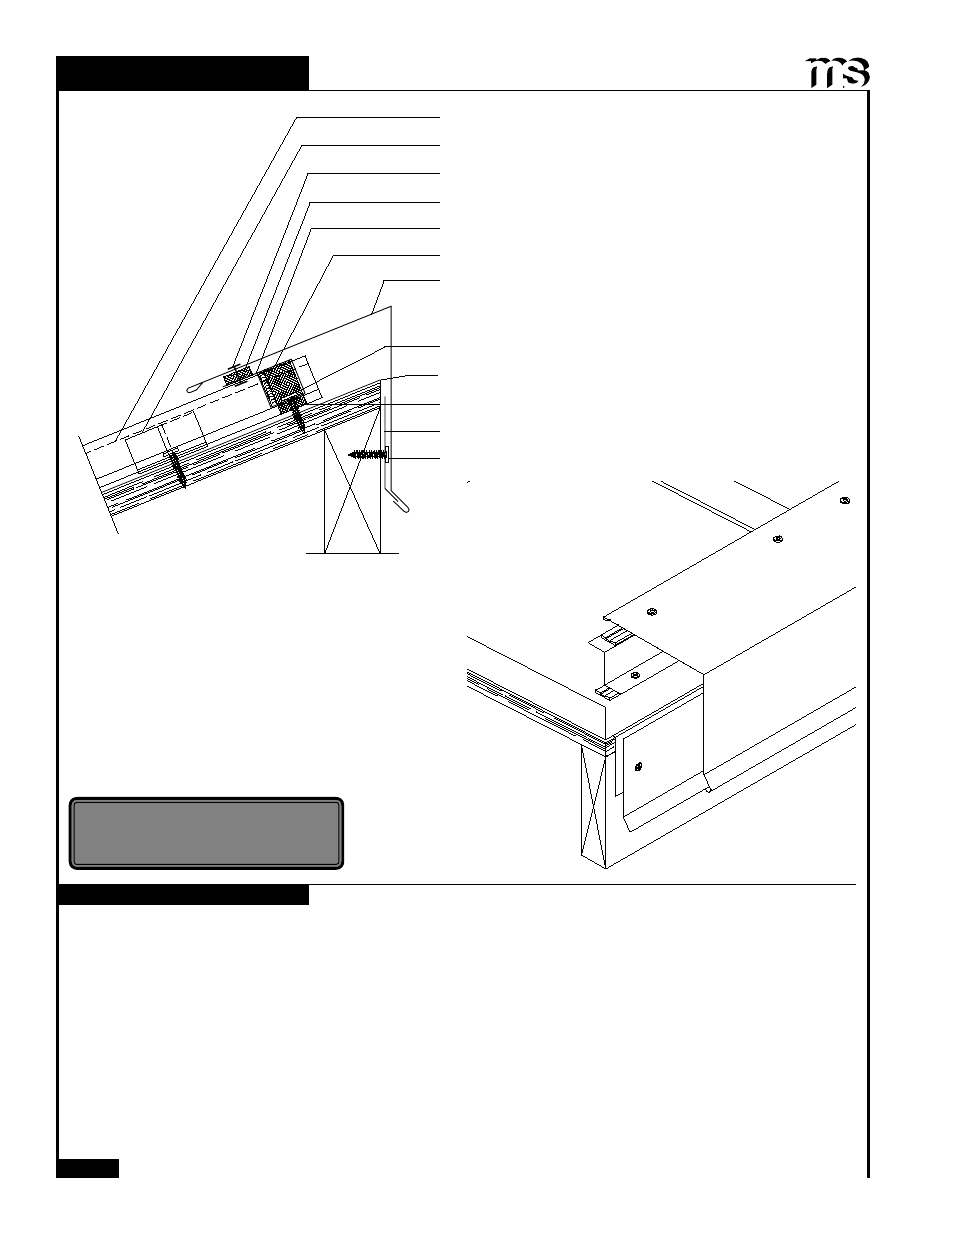
PEAK DETAIL
INSTALLATION NOTES
Z-Closure (see page 61)
Double Bead Tape Sealant
Cleat
Roof Panel
Moisture Barrier (by others)
Peak
Pop-Rivet (see note below)
Pancake Head Woodscrew (1'-0" o.c.)
Clip
Double Bead Tape Sealant
Pancake Head Woodscrew (4 per panel)
1. Once panels have been installed, field cut the Z-Closure (See page 61) to fit between the panel ribs.
2. Place a row of Double Bead Tape Sealant across panel and over each panel rib approximately 2" from panel end. Before
proceeding make sure Z-Closure placement will accomodate Peak cover.
3. Install field cut Z-Closure as shown on page 61.
4. Fasten Z-Closure through panel with #10-12 x 1" Pancake Head Woodscrews (4 per panel).
5. Apply a row of Double Bead Tape Sealant across top leg of Z-Closure filling any gaps or openings around panel ribs.
6. Position and install Cleat to the wall with the appropriate fastener, 12" o.c. Make sure cleat allows for proper Peak
attachment.
7. Install Peak flashing by sliding the open hem onto the Cleat and then attaching to the Z-Closure with
1
/
8
" x
2
/
16
" Pop Rivets,
at the spacing shown above.
8. If two or more flashings are required, lap the flashing over the previously installed flashing by a minimum of 2" placing a
bead of Tube Sealant between the flashings and securing with pop rivets 2.5"o.c.
Tube Sealant
3:12 Slope
Minimum
NOTE
For Mini/Maxi Batten Panels, Pop Rivet must
attach Peak to each Batten Cap