Step 1, Step 2, Architectural – Metal Sales Soffit Panel User Manual
Page 27: Pro-loc (cdf) installation
© Metal Sales Manufacturing Corporation / Subject to change without notice, effective 02/09.
26
ARCHITECTURAL
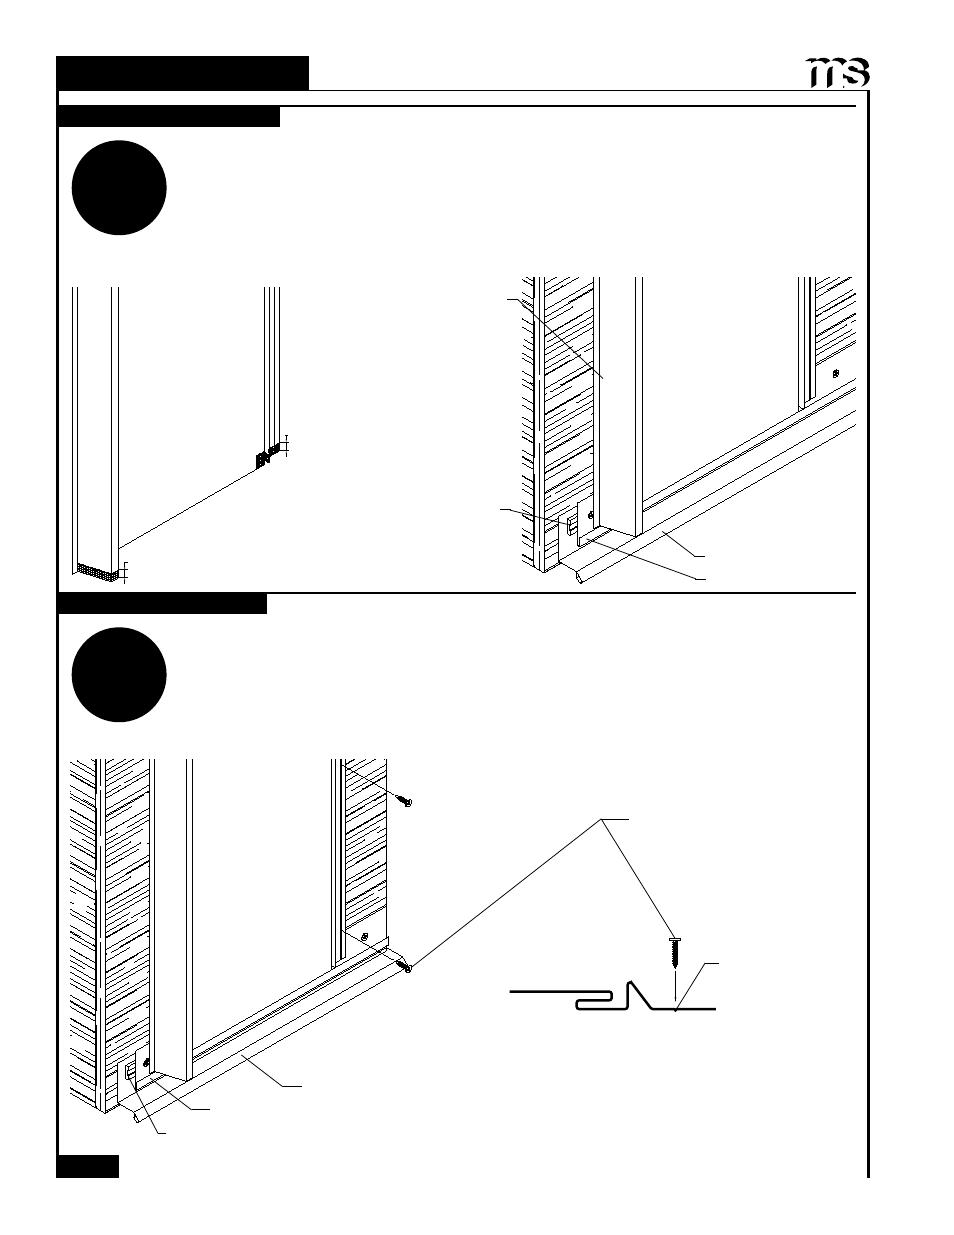
PRO-LOC (CDF) INSTALLATION
STEP
1
1RWH %DVH DQG ZDOO RSHQLQJ ÀDVKLQJV PXVW ¿UVW EH LQVWDOOHG EHIRUH SDQHO LQVWDOODWLRQ FDQ EHJLQ
(see pages 51-58).
Pro-Loc panels are installed from left to right or right to left.
1. Field notch Pro-Loc (CDF) panel rib
1
/
2
" for Starter installation.
2. Fill starter groove with continuous bead of tube sealant.
(QJDJH ÀDW SDUW RI SDQHO LQWR 6WDUWHU PDNLQJ VXUH WKDW SDQHO LV VTXDUH WR HDYH DQG FRUQHU
Note: Fasten panel in fastening groove as shown below for proper installation.
1. Fasten panel as required to meet local building codes with appropriate fastener (see page 23) in center
of the fastening groove and make sure not to overtighten screws. If a fastener strips out, you must
remove and reposition it so the fastener can drill a new hole at least
3
/
8
" from the stripped hole
or install an oversized fastener in the stripped hole. Failure to do so will result in weakening the
wind
resistance.
STEP
2
INSTALLING FIRST PANEL
DIRECT FASTENING
Properly position
panel for eave
condition
Square panel to wall end.
#10-12 x 1" Pancake
Head Woodscrew
Concealed Direct Fasten (CDF)
Fastening Groove
Field Cut Rib
1
/
2
" to
fit starter flashing.
Field Cut Rib
1
/
2
"
Starter Flashing
Starter Flashing
Double Bead Tape Sealant
Base Flashing
Base Flashing
Double Bead Tape Sealant