Architectural, Eave with offset cleat detail – Metal Sales Soffit Panel User Manual
Page 38
© Metal Sales Manufacturing Corporation / Subject to change without notice, effective 02/09.
37
ARCHITECTURAL
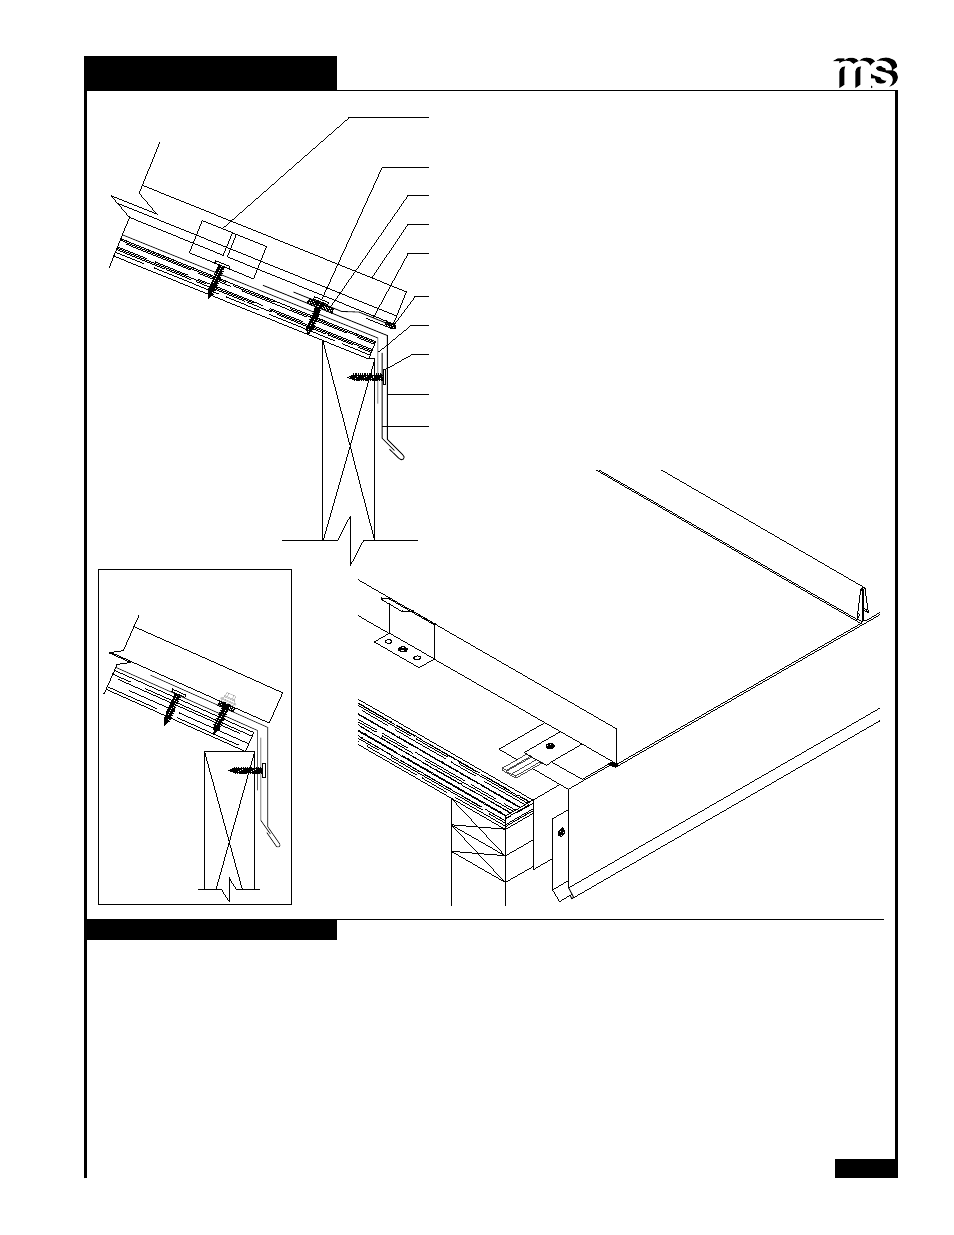
EAVE WITH OFFSET CLEAT DETAIL
INSTALLATION NOTES
3:12 Slope
Minimum
Pancake Head Woodscrew (1'-0" o.c.)
Tube Sealant
Double Bead Tape Sealant
Offset Cleat
Cleat
Roof Panel
Moisture Barrier (by others)
Eave
Pancake Head Woodscrew (1'-0" o.c.)
Clip
(Direct Fasten)
(Optional for Image II)
All Eave flashings must be installed prior to panel installation.
1. Position and install Cleat to wall with appropriate fastener, 12" o.c. Make sure Cleat allows for proper Eave attachment.
2. Install Eave flashing by sliding open hem onto Cleat and resting the Eave flashing against the substrate and fasten with
#10-12 x 1" Pancake Head Woodscrew (4'-0" o.c.) to hold the Eave Flashing in place during installation.
3. Apply a row of Double Bead Tape Sealant on the bottom leg of the Offset Cleat and fasten to substrate with #10-12 x 1"
Pancake Head Woodscrew through top of Eave flashing and into substrate, 12" o.c. Make sure Offset Cleat is lined up to
properly accomodate hemmed panel.
4. Install panel by engaging field hemmed end of panel (see pages 59 and 60) to Offset Cleat (See pages 24-34 for panel
installation).
5. If two or more flashings are required, lap the flashing over the previously installed flashing by a minimum of 2" placing a
bead of Tube Sealant between the flashings and securing with pop rivets 2.5" o.c.
Panel rib must be field
notched and flat part of
panel must be field bent
to accept offset cleat
(see pages 59 and 60).