Architectural, Ridge / hip detail – Metal Sales Soffit Panel User Manual
Page 45
© Metal Sales Manufacturing Corporation / Subject to change without notice, effective 02/09.
44
ARCHITECTURAL
INSTALLATION NOTES
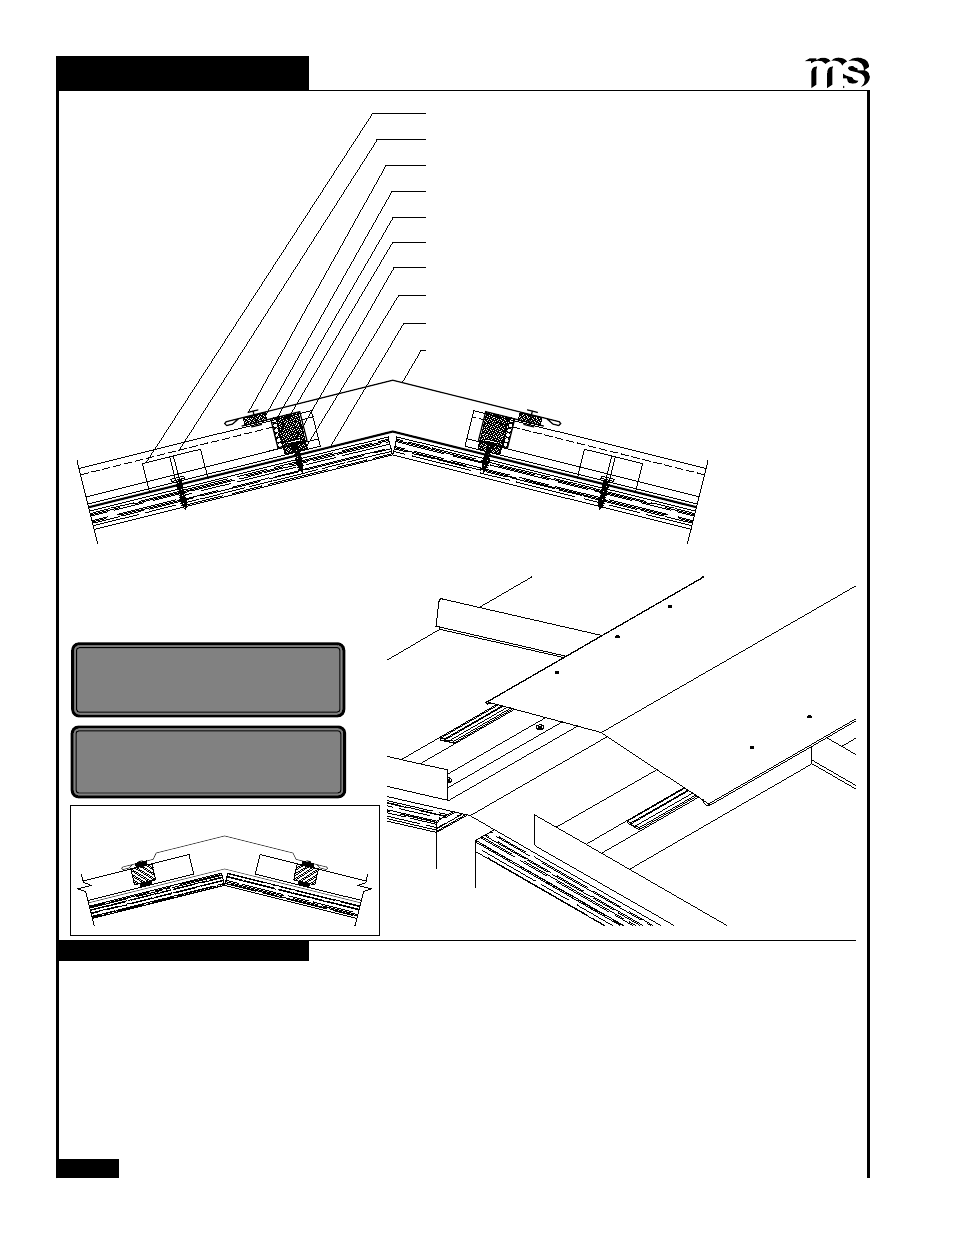
Z-Closure (see page 61)
Double Bead Tape Sealant
Roof Panel
Moisture Barrier (by others)
Pop-Rivet (3 per panel) (see note below)
Pancake Head Woodscrew (4 per panel)
Double Bead Tape Sealant
Clip
Ridge / Hip Cover
RIDGE / HIP DETAIL
1. Once panels have been installed, field cut the Z-Closure (See page 61) to fit between the panel ribs.
2. Place a row of Double Bead Tape Sealant across panel and over each panel rib approximately 2" from panel end. Before
proceeding make sure Z-Closure placement will accomodate 11" Ridge/Hip cover.
3. Install field cut Z-Closure as shown on page 61.
4. Fasten Z-Closure through panel with #10-12 x 1" Pancake Head Woodscrews (4 per panel).
5. Apply a row of Double Bead Tape Sealant across top leg of Z-Closure filling any gaps or openings around panel ribs.
6. Position and install 11" Ridge/Hip Cover flashing to Z-Closure with
1
/
8
" x
3
/
16
" Pop Rivets (as shown).
7. If two or more flashings are required, lap the flashing over the previously installed flashing by a minimum of 2" placing a
bead of Tube Sealant between the flashings and securing with pop rivets 2.5" o.c.
(Optional)
Tube Sealant
3:12 Slope
Minimum
NOTE
For Mini/Maxi Batten Panels, Pop Rivet must
attach Ridge/Hip Cover to each Batten Cap
CAUTION
Additional screws may be required for high
snow loading and steep slopes.