Step 1, Step 2, Architectural – Metal Sales Soffit Panel User Manual
Page 36
© Metal Sales Manufacturing Corporation / Subject to change without notice, effective 02/09.
35
ARCHITECTURAL
SOFFIT PANEL INSTALLATION
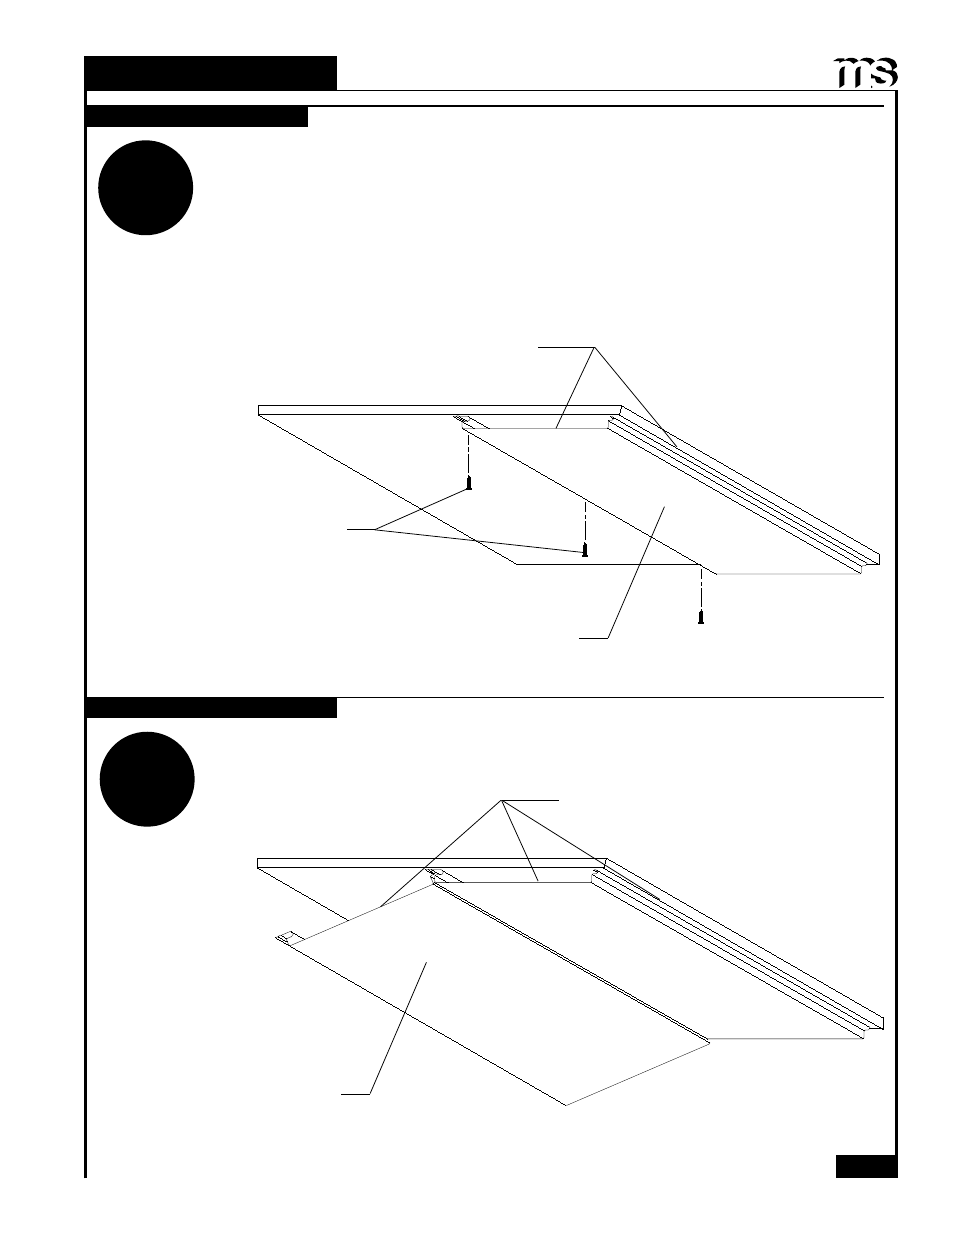
STEP
1
1RWH 0RLVWXUH %DUULHUV DQG -DPE ÀDVKLQJV PXVW ¿UVW EH LQVWDOOHG EHIRUH SDQHO LQVWDOODWLRQ FDQ
begin (see pages 54-58).
6RI¿W SDQHOV DUH LQVWDOOHG IURP OHIW WR ULJKW RU ULJKW WR OHIW VHH SDJH
,QVWDOO ¿UVW SDQHO PDNLQJ VXUH WKDW SDQHO LV VTXDUH WR WKH VRI¿W IDVFLD RU ZDOO It is critical that the
¿UVW SDQHO EH VWUDLJKW DQG VTXDUH ZLWK WKH EXLOGLQJ DV LW FRQWUROV DOLJQPHQW RI WKH IROORZLQJ
panels. Fasten panel typically with pancake head woodscrews (12" o.c. typical) in center of the
fastening groove and make sure not to overtighten screws. For areas with high wind considerations,
closer fastener spacing may be required.
STEP
2
INSTALLING FIRST PANEL
INSTALLING SECOND PANEL
Square panel to
soffit, fascia, or wall
Fasten in center of
groove with pancake
head fasteners (see
installed panel cross
section on page 36)
Soffit panel
Square panel to
soffit, fascia, or wall
Second Soffit panel
positioned into place
3RVLWLRQ WRQJXH RI VHFRQG SDQHO LQWR WKH JURRYH RI WKH ¿UVW PDNLQJ VXUH SDQHO HQGV DUH DOLJQHG
and continue with previous steps until installation is complete. Make sure all panels are properly
installed, and clean any debris from panel before continuing to next area.