Step 1, Step 2, Architectural – Metal Sales Soffit Panel User Manual
Page 25
© Metal Sales Manufacturing Corporation / Subject to change without notice, effective 02/09.
24
ARCHITECTURAL
PRO-LOC (CCS) INSTALLATION
STEP
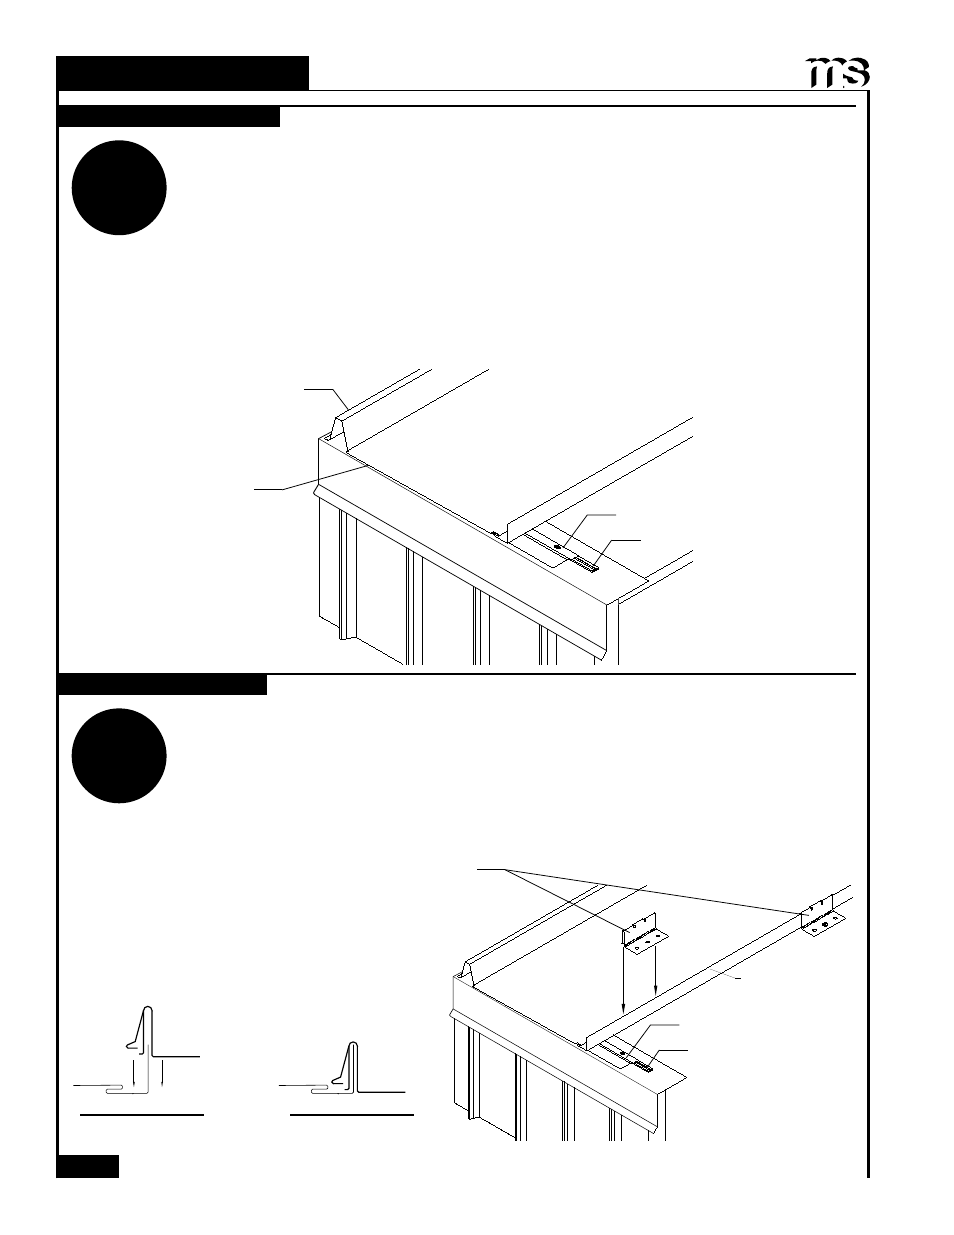
1
1RWH 0RLVWXUH %DUULHUV (DYH *XWWHU 9DOOH\ DQG 2IIVHW &OHDW ÀDVKLQJV PXVW ¿UVW EH LQVWDOOHG
before panel installation can begin (see pages 37-40).
Pro-Loc panels are installed from left to right or right to left.
The Pro-Loc (CCS) Panel System must be used on applications with slope to fascia transitions.
1. Field notch and hem the Pro-Loc (CCS) panel as shown on page 59. Apply a single bead of tube
sealant inside the open hem of the Pro-Loc panel.
,QVWDOO ¿UVW SDQHO PDNLQJ VXUH WKDW SDQHO LV VTXDUH WR HDYH DQG UDNH 6OLGH WKH SDQHO WRZDUG
the peak of the roof engaging the panel and the Offset Cleat. Offset Cleat must be fully
engaged into the panel. Additional overhang must be considered if using wall panels. It is
FULWLFDO WKDW WKH ¿UVW SDQHO EH VWUDLJKW DQG VTXDUH ZLWK WKH EXLOGLQJ DV LW FRQWUROV DOLJQPHQW
of the following roof panels.
Note: Engage clip to panel in a vertical motion (as shown below left) to allow for proper seating.
2QFH WKH ¿UVW SDQHO KDV EHHQ LQVWDOOHG HQJDJH WKH ¿UVW FOLS LQWR ORFNHG SRVLWLRQ RYHU WKH PDOH OHJ RI
the panel (see below).
2. Fasten the Pro-Loc clip to the deck with the proper type and number of fasteners. Fastener spacing
must be designed to meet local building codes (see page 23). If a fastener strips out, you must
remove the clip and reposition it so the fastener can drill a new hole at least
3
/
8
" from the stripped
hole or install an oversized fastener in the stripped hole. Failure to do so will result in weakening
the wind uplift resistance.
STEP
2
INSTALLING FIRST PANEL
INSTALLING PANEL CLIP
Square panel to rake condition
Properly position panel
for eave condition
Pro-Loc Clip
Offset Cleat
Positioned to Lock
Locked in Position
Male Leg
Double Bead Tape Sealant
Offset Cleat
Double Bead
Tape Sealant