Step 3, Step 4, Architectural – Metal Sales Soffit Panel User Manual
Page 30
© Metal Sales Manufacturing Corporation / Subject to change without notice, effective 02/09.
29
ARCHITECTURAL
Field bend after
all panels are
installed and
prior to snapping
batten caps in
place.
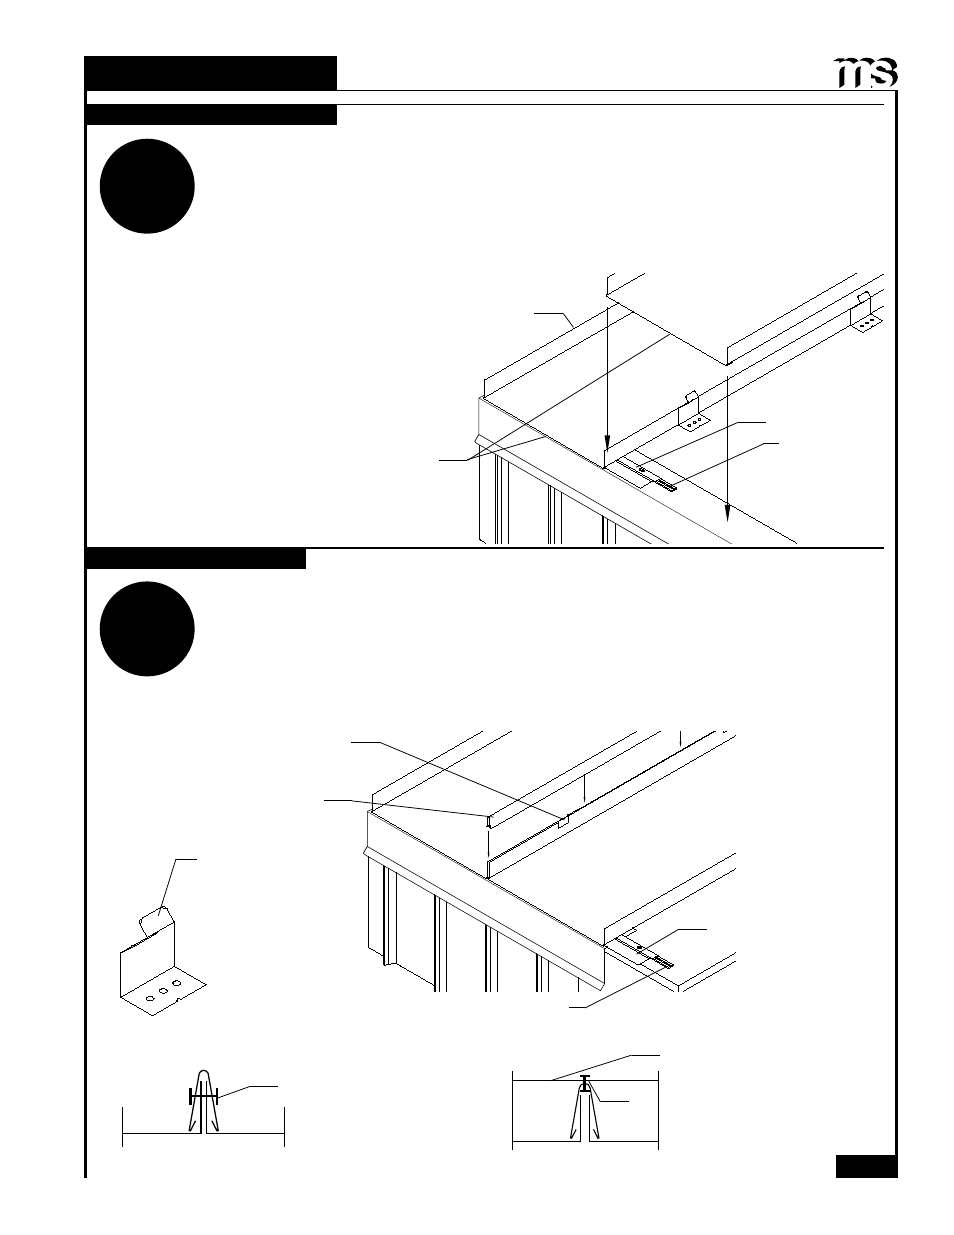
MINI-BATTEN INSTALLATION (
CONT
.)
STEP
3
INSTALLING SECOND PANEL
7DEV RQ 0LQL%DWWHQ &OLS PXVW EH ¿HOG EHQW GRZQ WR DFFHSW 0LQL%DWWHQ &DS %HQG WDEV RYHU YHUWLFDO
leg of the panel.
2. Install Mini-Batten Cap over the panel rib and Mini-Batten Clip. Snap the Mini-Batten Cap into place
working from one end to the other.
2QFH LQVWDOODWLRQ LV FRPSOHWH ¿OO HDFK HQG RI EDWWHQ ZLWK SURSHU VHDODQW VHH SDJH DQG FOHDQ DQ\
debris and excess sealant from the panels.
$WWDFK HYHU\ %DWWHQ &DS WR WKH SDQHO RU ÀDVKLQJ QHDU WKH KLJK HQG RI WKH %DWWHQ &DS ZLWK D 3RS 5LYHW
as shown below.
STEP
4
INSTALLING BATTEN CAP
Square panel to rake condition
Properly position panel
for eave condition
keeping ends flush.
1. Field notch and hem the Mini-Batten panel as shown on page 60. Apply a single bead of tube sealant
inside the open hem of the Mini-Batten panel.
2.
Install second panel so that eave has proper overhang making sure that panel is square to eave and rake.
Slide the panel toward the peak of the roof engaging the panel and the Offset Cleat. Offset Cleat
must be fully engaged into the panel. Additional overhang must be considered if using wall panels.
Make sure all panels are properly snapped in place.
3. Continue with previous steps until panel installation is complete.
Offset Cleat
Double Bead
Tape Sealant
Mini-Batten Cap
Mini-Batten
Clip (1" or 1
1
/
2
")
Offset Cleat
Double Bead Tape Sealant
Pop Rivet (fasten Cap
to the panel at the
Vented Ridge)
Pop Rivet (fasten Cap to the
flashing)
Flashing