Step 1 step 2, Architectural – Metal Sales Soffit Panel User Manual
Page 35
© Metal Sales Manufacturing Corporation / Subject to change without notice, effective 02/09.
34
ARCHITECTURAL
1. Field notch and hem the Image II panel as shown on page 59. Apply a single bead of tube sealant
inside the open hem of the Image II panel.
2.
Install second panel so that eave has proper overhang making sure that panel is square to eave and rake.
Slide the panel toward the peak of the roof engaging the panel and the Offset Cleat. Offset Cleat
must be fully engaged into the panel. Additional overhang must be considered if using wall panels.
Make sure all panels are properly snapped in place.
3. Place the second panel on top of previously installed panel so that the second hemmed panel can be
engaged with the Offset Cleat.
4. Begin snapping the panels together working from eave to peak. It is critical that panels only be
snapped in one direction.
5. Repeat steps 3 and 4 for remaining panels.
2QFH LQVWDOODWLRQ LV FRPSOHWH ¿OO HDFK ORZHU HQG RI SDQHO ULE ZLWK VHDODQW $OVR FOHDQ DQ\ GHEULV
DQG H[FHVV VHDODQW EHIRUH FRQWLQXLQJ QH[W DUHD 3DQHOV PD\ DOVR EH ¿HOG QRWFKHG DQG EHQW WR FORVH RII
panel end (see page 59).
IMAGE II INSTALLATION
(CONCEALED FASTENED END)
STEP
1
STEP
2
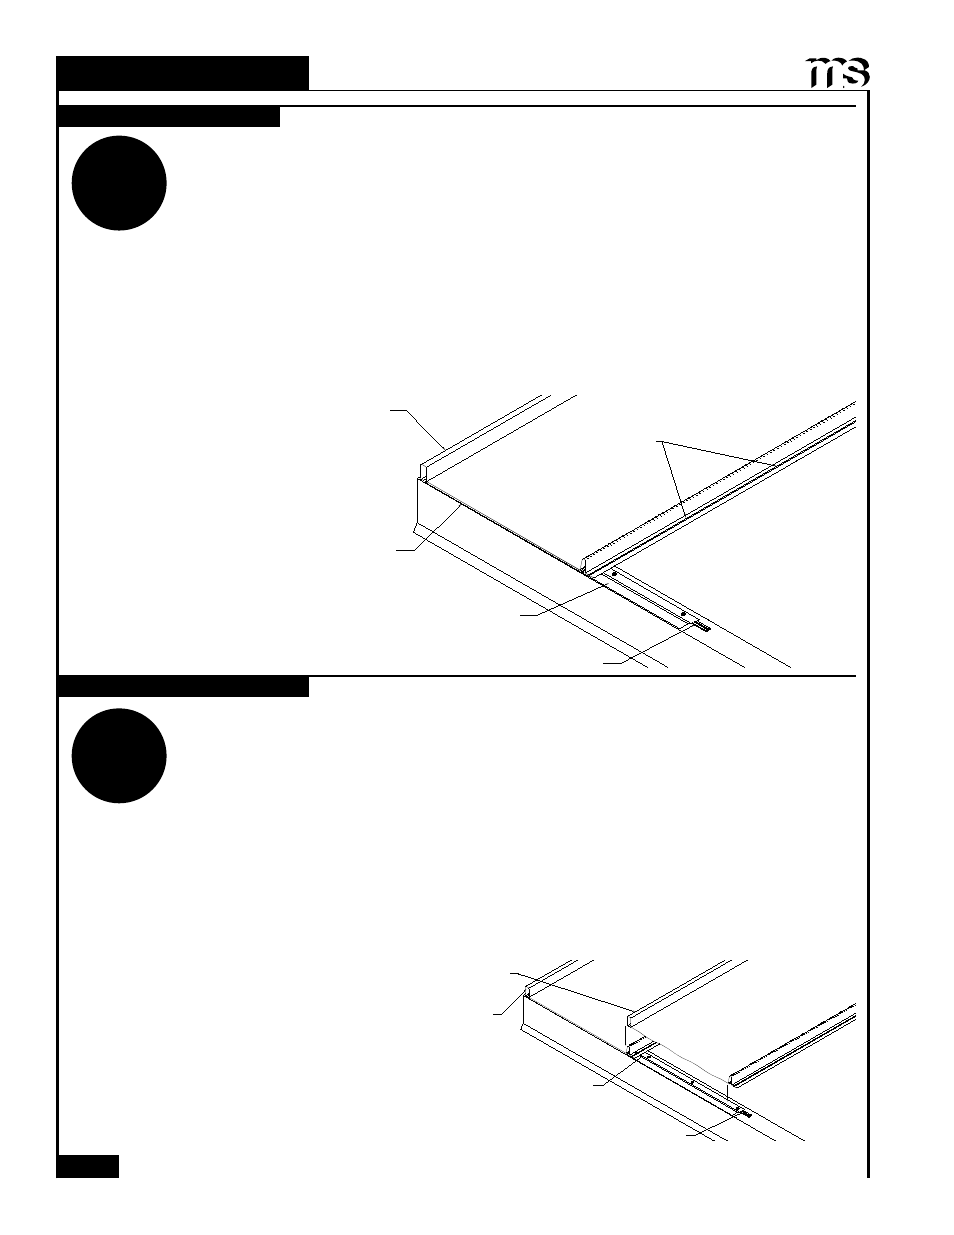
INSTALLING FIRST PANEL
INSTALLING SECOND PANEL
1RWH 0RLVWXUH %DUULHUV (DYH *XWWHU 9DOOH\ DQG 2IIVHW &OHDW ÀDVKLQJV PXVW ¿UVW EH LQVWDOOHG
before panel installation can begin.
Image II panels are installed from left to right or right to left.
1. Field notch and hem the Image II panel as shown on page 59. Apply a single bead of tube sealant
inside the open hem of the Image II panel.
,QVWDOO ¿UVW SDQHO VR WKDW HDYH KDV SURSHU RYHUKDQJ PDNLQJ VXUH WKDW SDQHO LV VTXDUH WR HDYH DQG UDNH
Slide the panel toward the peak of the roof engaging the panel and the Offset Cleat. Offset Cleat
must be fully engaged into the panel. Additional overhang must be considered if using wall panels.
,W LV FULWLFDO WKDW WKH ¿UVW SDQHO EH VWUDLJKW DQG VTXDUH ZLWK WKH EXLOGLQJ DV LW FRQWUROV DOLJQPHQW
of the following roof panels.
)DVWHQ SDQHO WR VXEVWUDWH ZLWK [ 7UXVV +HDG :RRGVFUHZ LQ center of the fastening groove
located along the male leg of the panel. Fastener spacing must be designed to meet local building
codes (see page 23). It is important that the fastener be placed in the center of the fastening
groove and make sure not to over tighten screws.
Square panel to rake condition
Offset Cleat
Properly position panel for eave condition
Fasten in center
of panel slot
with Truss Head
Woodscrew
Apply sealant at all panel rib ends along eave
Square panel to rake condition
Offset Cleat
Double Bead Tape Sealant
Double Bead Tape Sealant