Assembly of the carrier, Assembly of the carrier -10 – JLG 460SJ ANSI Service Manual User Manual
Page 64
SECTION 3 - CHASSIS & TURNTABLE
3-10
– JLG Lift –
3120788
NOTE: If you don’t drive the roll pin all the way into the
planet shaft t, you could damage the carrier when
you remove the planet shaft from the carrier.
2. Using a punch and hammer, drive planet shaft (3E)
out of the planet shaft t hole in carrier housing (3A).
3. When you remove planet shaft (3E) from the carrier
housing, one thrust washer (38), one cluster gear
(3F), and one more thrust washer (3B) will come off
of the planet shaft and come to rest inside the car-
rier. Remove these parts from inside the carrier.
4. Remove 16 needle rollers (3C) from inside one end
of cluster gear (3F). Discard the needle rollers.
5. Remove one spacer (3D) from inside cluster gear
(3F).
6. Remove the remaining 16 needle rollers (3C) from
the other side of cluster gear (3F). Discard the nee-
dle rollers.
7. Repeat steps 1-6 to remove and disassemble the
two remaining cluster gears.
8. At this point the carrier disassembly is complete.
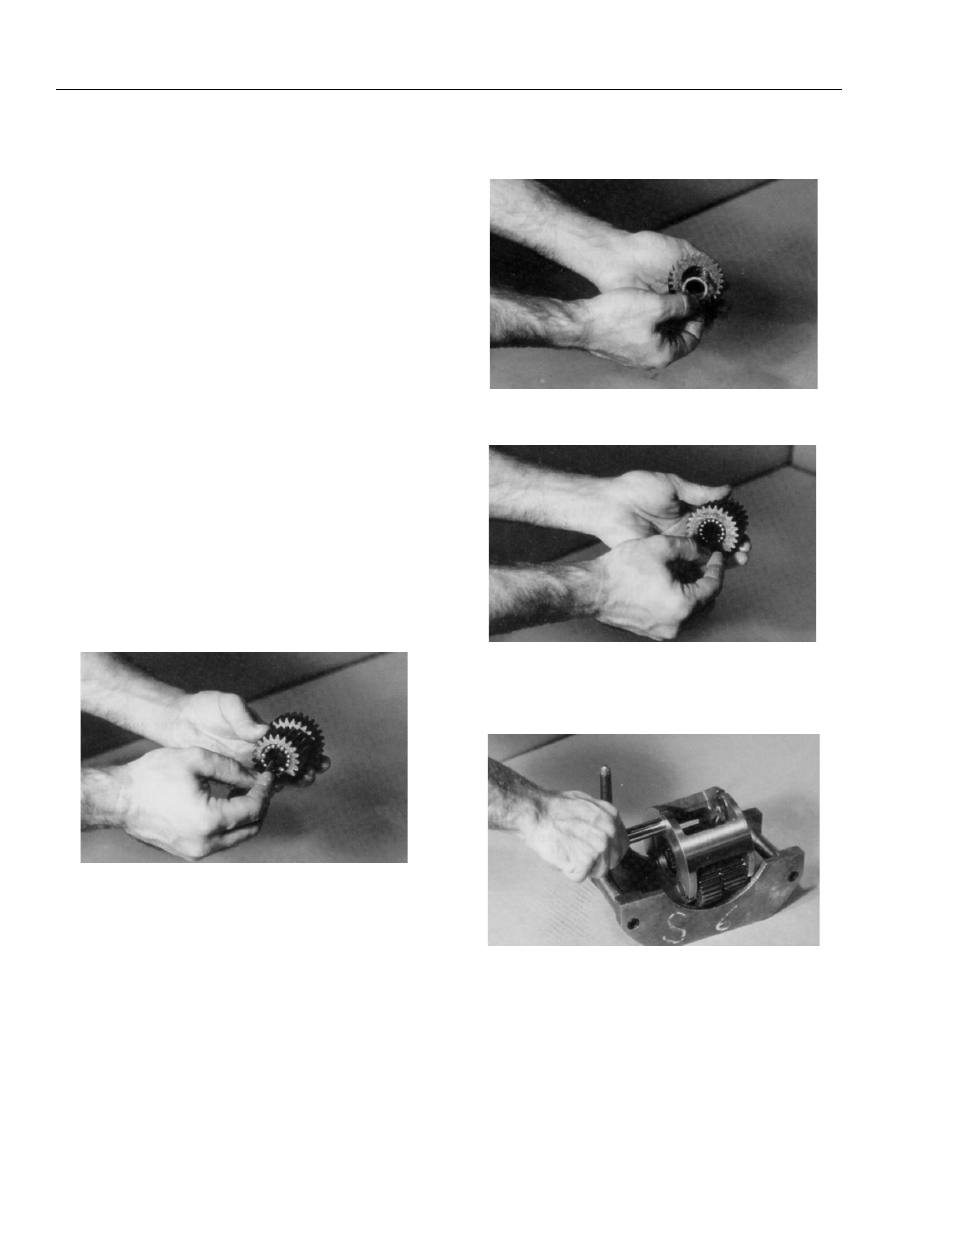
Assembly of the Carrier
1. Apply grease to the inside of one cluster gear (3F)
and line one half of cluster gear with 16 needle roll-
ers (3C).
2. Place one spacer (3D) inside cluster gear (3F) so
that it rests on top of the needle rollers.
3. Line the remaining half of cluster gear (3F) with 16
needle rollers.
4. Set carrier housing (3A) on table, sideways. Insert a
planet shaft (3E), roll pin hole last, into one of the
planet shaft holes from roll-pin-holed side of carrier
housing (3A).