Direct-network installation – Lenovo ThinkVantage ImageUltra Builder Version 5.0 User Manual
Page 51
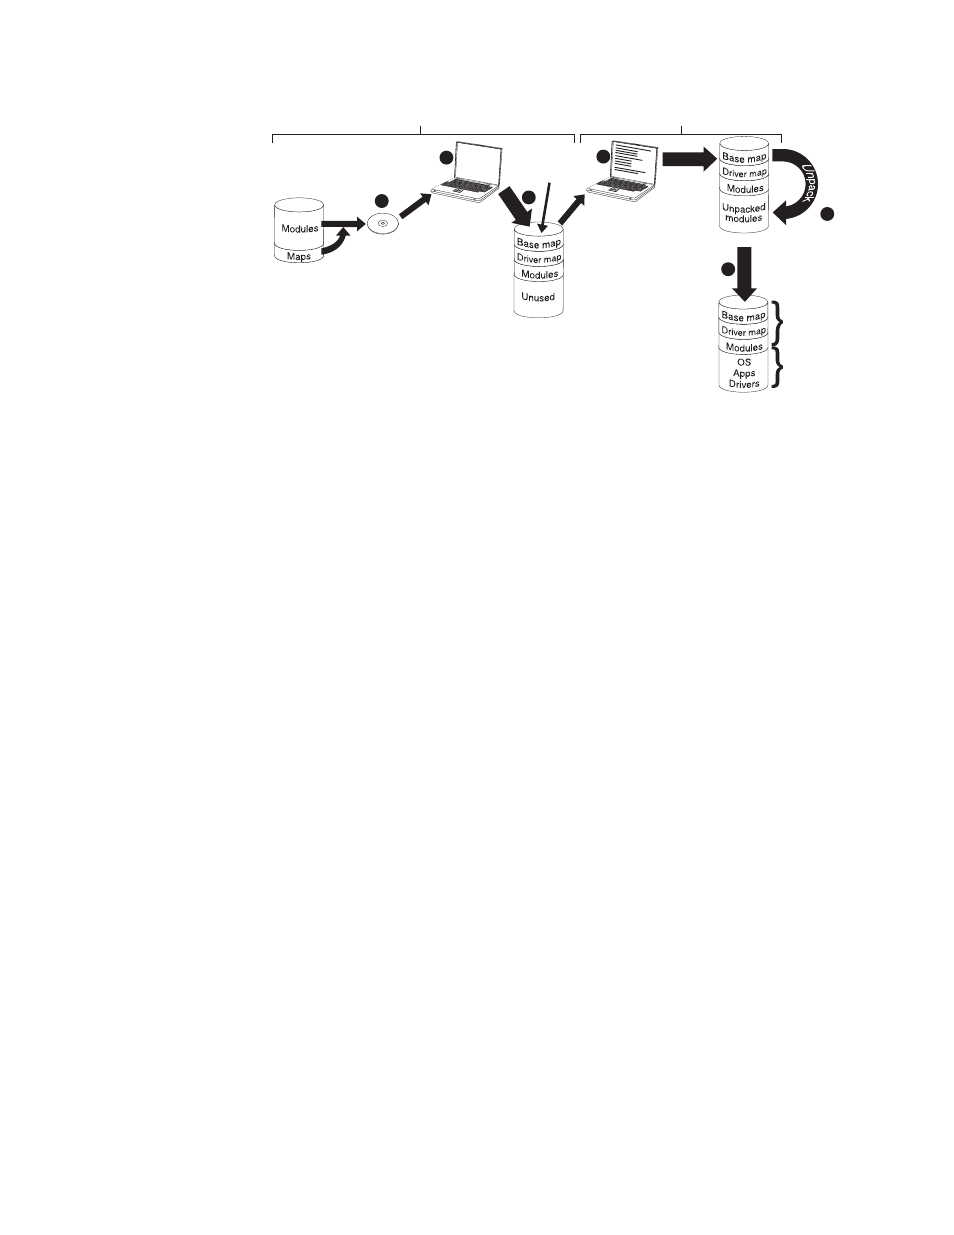
Smart Image
on service
partition
Final image
on C partition
Create
distribution
CD
Start target
computer with
distribution CD
Smart image
on Staging area
(service partition)
C partition
Repository
Deployment
Installation
S
e
t
u
p
Cop
y
5
6
4
3
2
1
Make menu
selections to
define the
image to be
installed
1.
The first step in deployment is the creation of ImageUltra Builder Distribution
Media. (See the ImageUltra Builder help system for details).
2.
The person controlling the media deployment starts the process by booting the
target computer with ImageUltra Builder Distribution Media.
3.
The maps and modules contained on the media are copied to the service
partition, which acts as the staging area for the complete Smart Image.
Note:
At this point, a message is displayed stating that the deployment phase
is complete. The person controlling the deployment can either shut down
the computer at this point and ship it to another location, or continue
with the installation phase.
4.
The person controlling the installation process, starts the installation phase by
making selections from the installation menus to define the image to be
installed.
5.
The modules required for the defined image are unpacked from the service
partition onto the C partition.
6.
The setup process begins. When the installation phase is over, the C partition
contains the new image and the service partition contains the Smart Image,
which can be used for client-side recovery.
Note:
An optional cleanup step can be defined in the base map Map Settings
window to minimize the size of the service partition and keep only those
files required for the installed image, or eliminate the service partition.
Direct-network installation
The following illustration shows a direct-network installation, which uses a
network-staging folder as a staging area.
Chapter 3. Staging-area behavior and logic
37