Organizing locations into, Organizing locations into zones, Creating zones – Vaisala viewLinc-4.1-M211518 User Manual
Page 40
Chapter 2: Management
28
©
2012 Vaisala Canada Inc
Give it a name which describes the zone. Once a zone is
created, you can then add a location to it by right clicking and
selecting
Add Location
.
If no devices are displayed in the
device browser, your device may not be connected properly.
• If you use Vaisala Veriteq devices, try discovering devices
- see “Discovering Devices” on page 40.
Organizing Locations into Zones
To organize your viewLinc screen and keep a closer eye on
the locations that matter to you, you can organize your
locations into relevant zones using the Locations Manager.
By default, there is one zone created: System. If you wish to
see recently deactivated locations, click the left Options
dropdown and select the Show Deactivated checkbox.
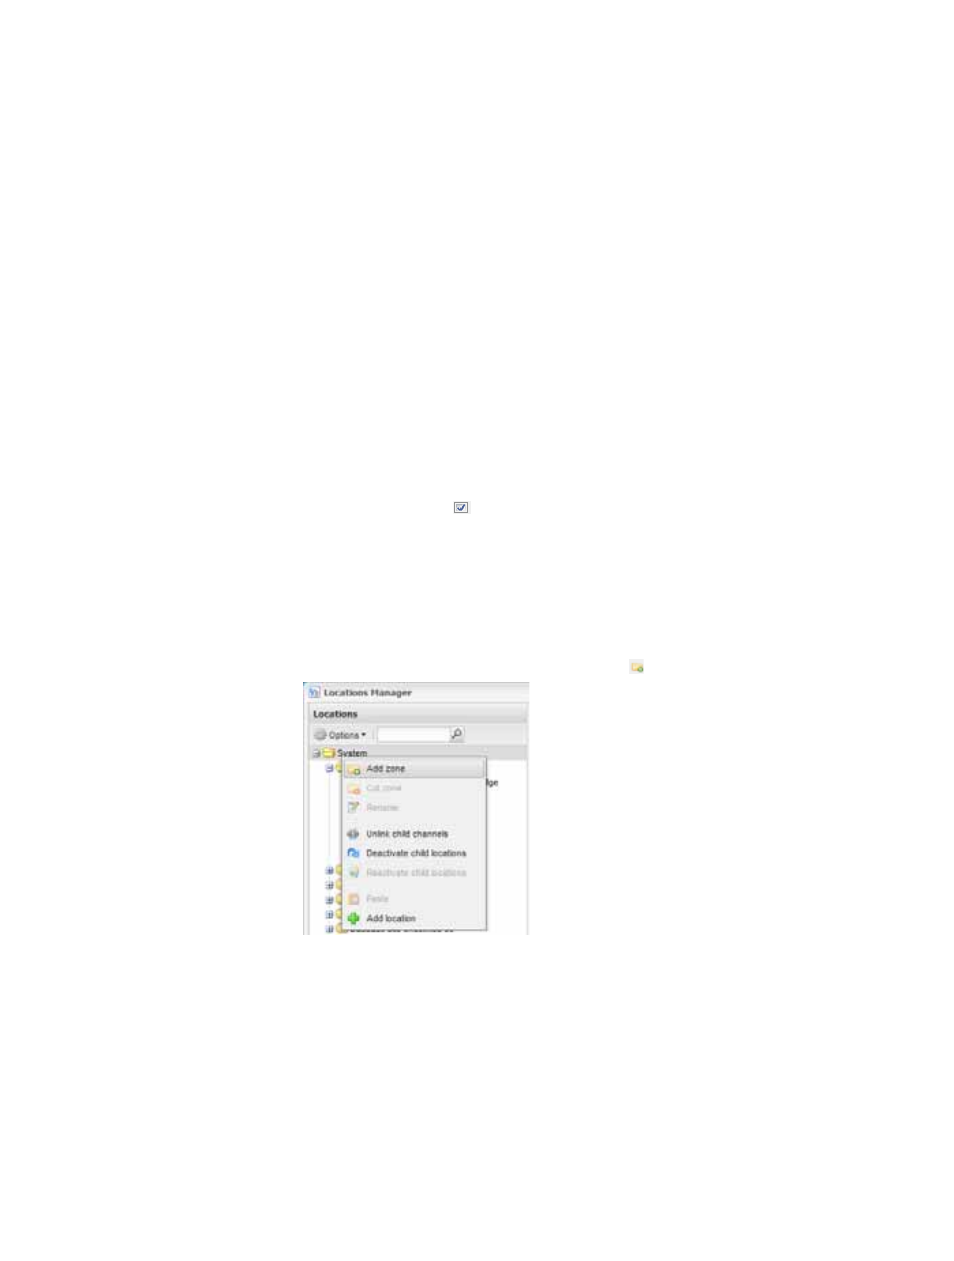
Creating Zones
To create a new zone:
1
Select
Options | System Configuration | Locations
Manager
. Navigate the locations tree on the left or simply
right click on the System folder and select
Add Zone
.
2
A ‘New Zone’ folder will appear. Enter a name for the
zone and press
[Enter]
.
To Add a location to a zone:
1
To add a location to a new or existing zone, browse the
locations tree to find the location you’re looking for and