Appendix: remote modem installation – DAVIS WeatherLink Getting Started Guide: Vantage Stations User Manual
Page 29
27
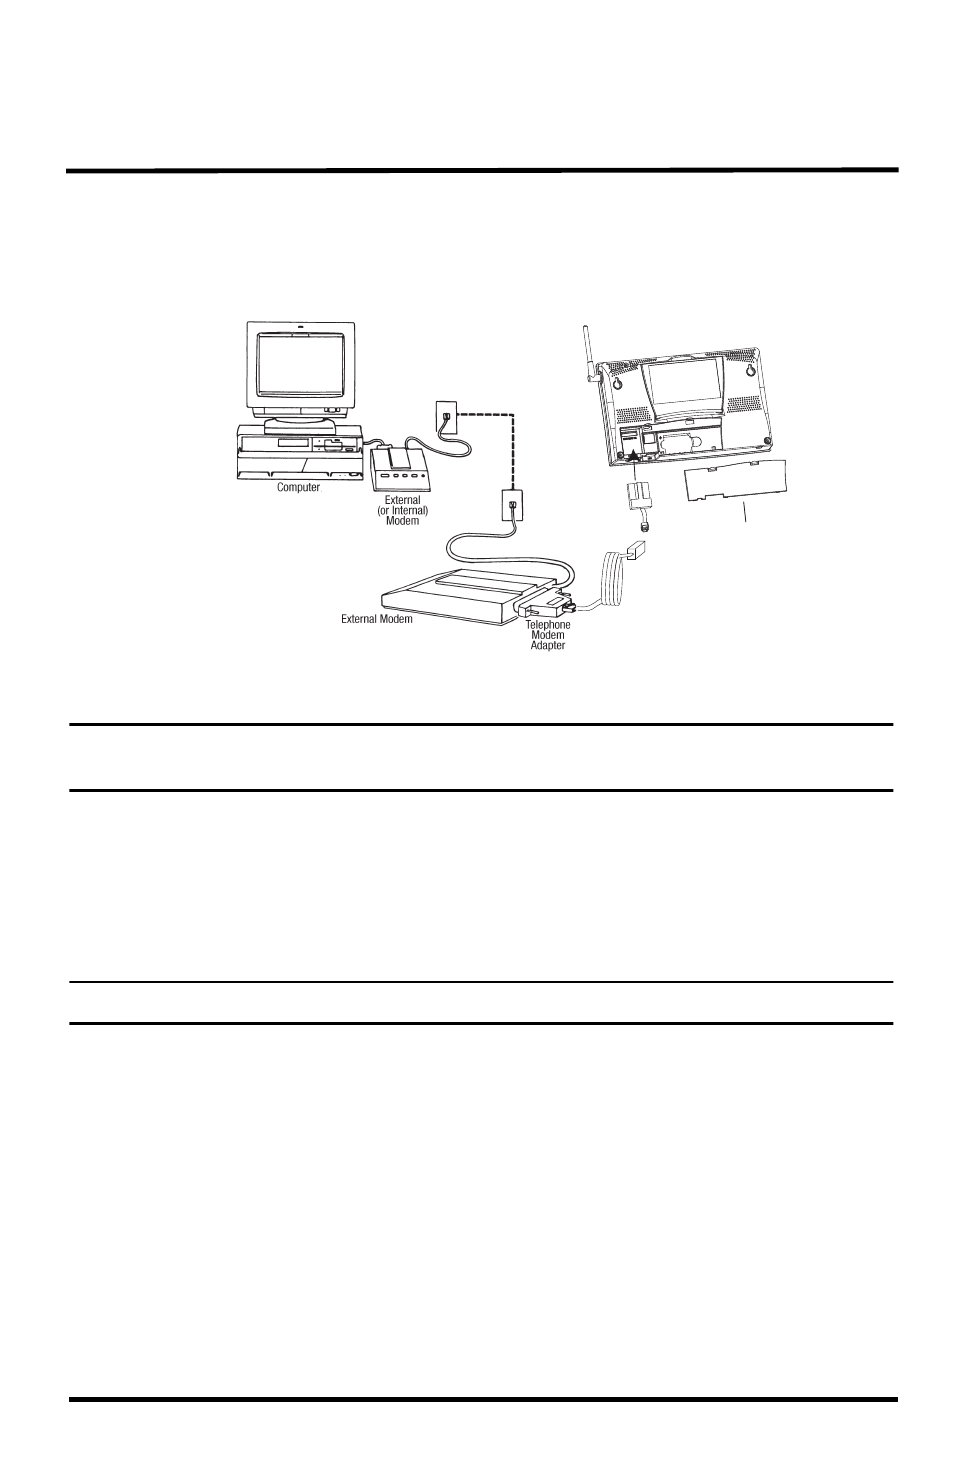
Appendix: Remote Modem Installation
A remote modem installation is a connection from the data logger on the console
or Weather Envoy to a modem that can be dialed and accessed from a computer.
Use a remote modem installation to connect your computer to a remote console
or Weather Envoy.
Using Modems to Connect Your Computer and Weather Station
Note: Before installing the console and modem at a remote location, test the data logger and con-
nection first using a direct connection like that shown in the section above.
1. Install and set up an internal or external modem (according to the
manufacturer’s instructions ) for use with your computer. Make a note of the
COM port used by the modem. This information is used when using the
Communications Port dialog box to connect to a console or Envoy.
2. At the station console site, put the external modem in a location where it can
connect to both the logger and a phone jack and plug it into the jack.
Note: Do not turn the modem on at this time.
The cable connecting the data logger to the modem is 8' (2.4 m) long. If neces-
sary, use a 40' (12 m) standard 4-conductor extension cable to extend the con-
nection between the console and modem. Do not attempt to use more than 40'
of extension cable, or the data logger may have difficulty communicating
with the computer.
3. Plug the external modem into the phone jack.
4. For consoles only: Enter the console’s Setup Mode by pressing and holding
DONE, then pressing the down arrow (-). Entering Setup Mode ensures that
the station is not writing any data and saves the current daily weather infor-
mation to memory.
5. Remove the battery cover from the console back and remove all power by
removing the batteries and AC power adapter, if present.
Vantage Vue, Vantage Pro or Pro2
console or Envoy
battery cover
8' (2.5 m)
data logger
cable
data logger