Installing the legacy i/o board – HP Integrity rx4610 Server User Manual
Page 82
Chapter 8: Server Management
75
Server Management
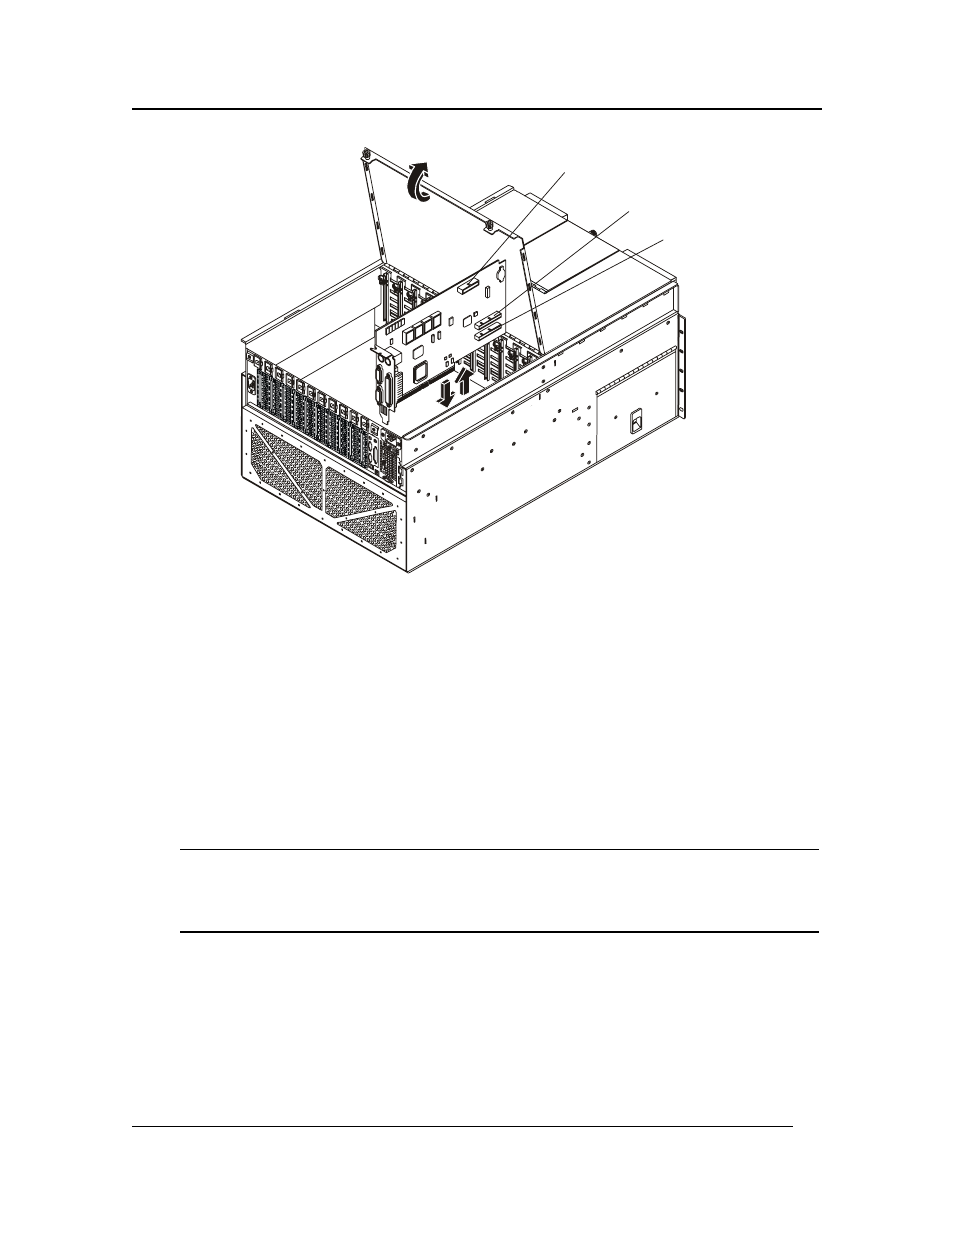
Cable
DVD Cable
Floppy Disk
Drive Cable
Figure 8-6. Removing Legacy I/O Board
14. Remove both IDE cables (DVD and Floppy Disk Drive) from the Legacy I/O board by
grasping the ends of the cable connectors and rocking them out of their respective connectors.
15. Carefully lay the board component side up on an antistatic work surface or inside proper
packaging.
Installing the Legacy I/O Board
To install the Legacy I/O Board, complete the following procedure:
1. Observe the safety and ESD precautions at the beginning of this chapter.
2. Be sure that the plastic retaining mechanism (I/O Card Guide) that secures the end of the board
nearest the front of the chassis is open so that it will allow a board to be inserted.
NOTE
Being careful not to touch the components or gold edge connectors on the I/O
Legacy board, remove it from its protective wrapper, and place it component-side
up on a nonconductive, antistatic surface within reach of the primary and
secondary IDE cables in the server.
3. Record the serial number of the board in your equipment log.
4. Connect the primary and secondary IDE cables to their respective connectors on the I/O
Legacy board.
5. Connect the server management cable to the Legacy I/O board.
6. Press the board down firmly until it seats in its slot.
7. Attach the rear screw that secures the board to the chassis.