Installing the floppy disk drive, Installing the dvd drive – HP Integrity rx4610 Server User Manual
Page 37
Chapter 4: Installing Mass Storage Devices
30
3. Disconnect the drive’s data and power cables from cable adapter PCB at the rear of the drive.
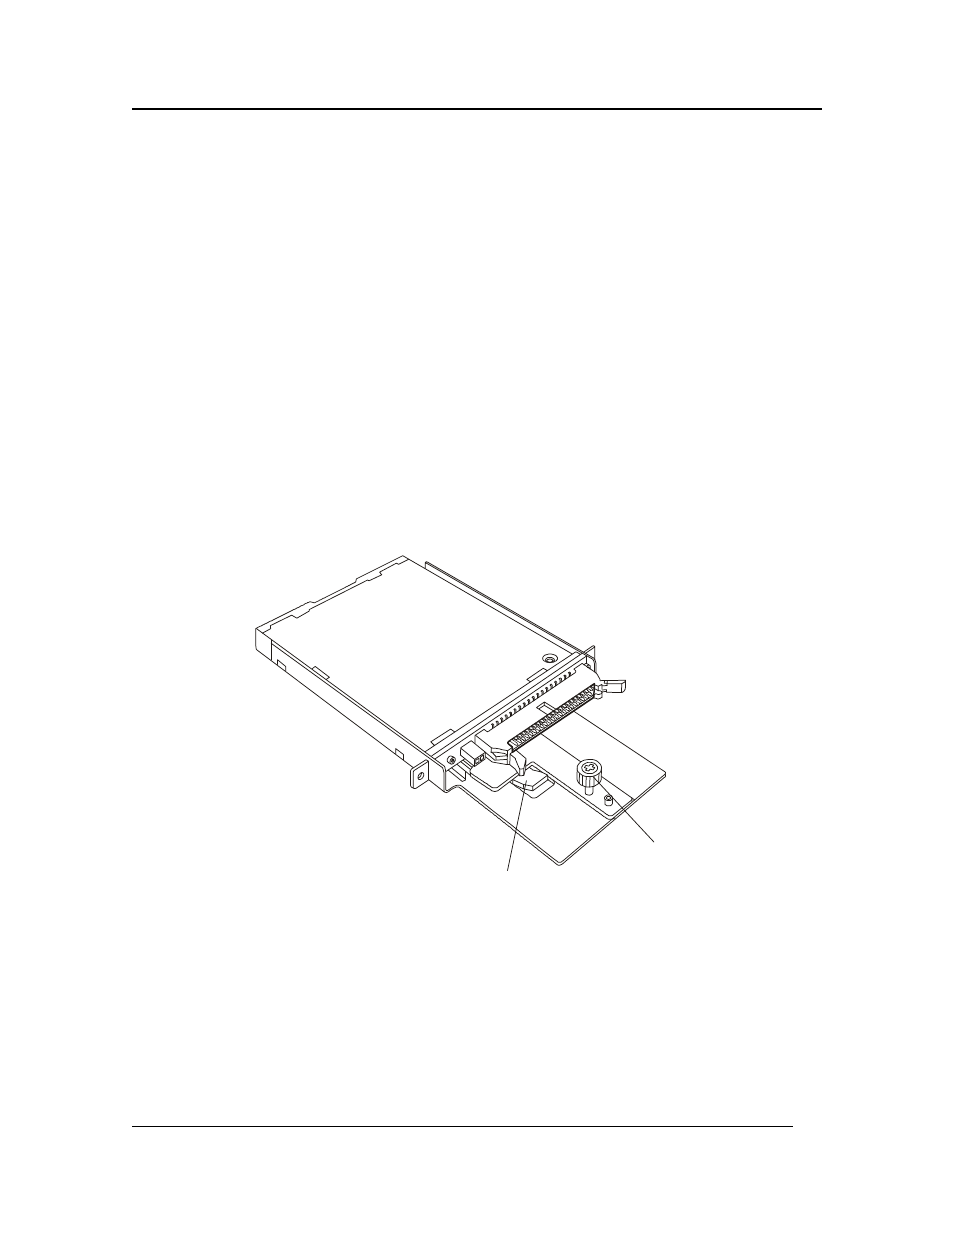
4. Loosen the thumbscrew found at the rear of the drive carrier assembly.
5. Slide the drive and the drive carrier assembly toward the rear of the chassis so that the front
part of the drive clears the opening in the chassis.
6. Remove the drive carrier assembly with the drive in it from the chassis.
7. Place the drive in an antistatic protective wrapper if you are not reinstalling the same drive.
Installing the Floppy Disk Drive
To install the new floppy diskette drive, complete the following steps:
1. Remove the new drive assembly from its protective wrapper, and place it component-side up
on an antistatic surface.
2. Record the drive model and serial numbers in your equipment log.
3. Pick up the entire drive carrier assembly, being careful that you keep the pieces together, and
place it on the chassis surface just inside the drive slot.
4. Grasp the sides of the drive and drive carrier assembly and slide it forward such that the front
part of the drive comes through the opening in the chassis. Make sure that the thumbscrew at
the rear of the drive carrier assembly aligns with the hole in the surface of the chassis.
Tab
Thumbscrew
Figure 4-3. Diskette Drive
5. Tighten the thumbscrew at the rear of the drive carrier assembly.
6. Install the drive’s data and power cables into the cable adapter PCB.
7. Install the top cover.
Installing the DVD Drive
The DVD Drive is housed in two-piece drive carrier assembly that rests on the chassis surface. The
drive carrier assembly is accessible when the top cover is removed. The following sections describe
how to remove and install the drive.