8100 u, Notice – Triton 8100 User/Installation Manual User Manual
Page 98
M
ODEL
8100 U
SER
/ I
NSTALLATION
M
ANUAL
80
8.
Loosen the end of the new paper roll. Use scissors to cut off about 18" from
the end of the roll. Note: Make sure the glue tab is completely removed
from the end of the paper roll.
Notice
The APS printer assembly installed in Model 8100 ATMs
requires 58 mm-wide thermal paper. Using 60 mm-wide
paper (available in other 8-bit units) may cause printer
jams or skewed tracking!
9.
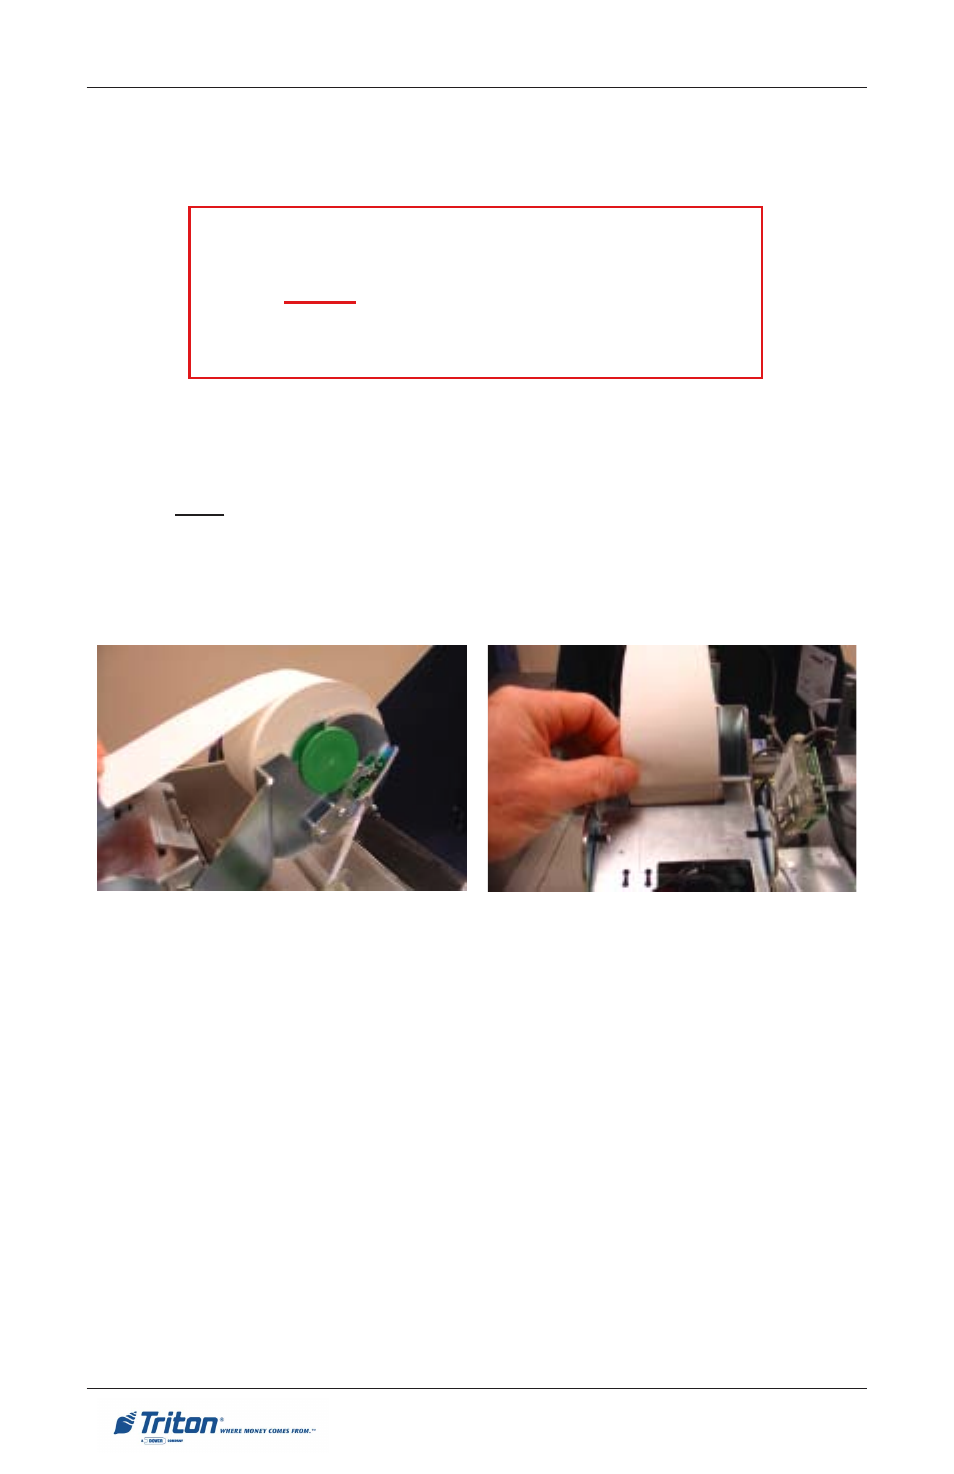
Insert the spool into the new paper roll. Place the paper roll and spool on the
paper bracket by sliding the small slotted end of the spool into the U-
shaped slot of the paper bracket. When installed, the paper will feed from
the TOP of the roll (Figure 6-4).
11. If the printer does not feed automatically, open the printer assembly (step 5)
and check the green knob to ensure it is in the correct position
(counterclockwise position). Close the printer assembly and perform steps
9 and 10 again.
12. Close and lock the control panel. Go to M
ANAGEMENT
F
UNCTIONS
>
D
IAGNOSTICS
and perform a T
EST
R
ECEIPT
P
RINTER
. If the test receipt is
printed successfully, place the ATM back in service.
10. Feed the end of the paper into the printer take-up slot (Figure 6-5). The
printer will activate and automatically feed the paper through the printer
and slightly out the front of the control panel.
Figure 6-4. Paper/spool in bracket. Figure 6-5. Feed paper in take-up slot.